The central exams officer is To coordinate both internal and external examination processes, in collaboration with staff, students, parents, and examination boards, to ensure that all students are properly entered and scheduled for exams. To administer all internal and public examinations according to the established standards and procedures, ensuring that all regulations are followed by the examination staff and that all students are supplied with the required resources and arrangements to maximize their exam achievement.
Select Central Exams from the main menu on the LMS to open its page.

Working on the Central Exams screen::
- Click on the Create New Exam button at the top left corner of the screen to start creating a new exam.
- Use the drop-down filters:
- Title: Filter exams by their title.
- Status: Filter exams by their status (e.g., all, published, draft).
- Click the Search button to apply the filters and display relevant exams.
- The table at the bottom will display the list of exams based on the applied filters.
- Columns include:
- Title: The name of the exam.
- Questions Count: The number of questions in each exam.
- Publishing Date: The date the exam was published.
- Due Date: The exam’s due date.
- Action: Options to manage or edit the exam.
Creating New Exam: #
- Click on the Create New Exam button at the top left corner of the screen.
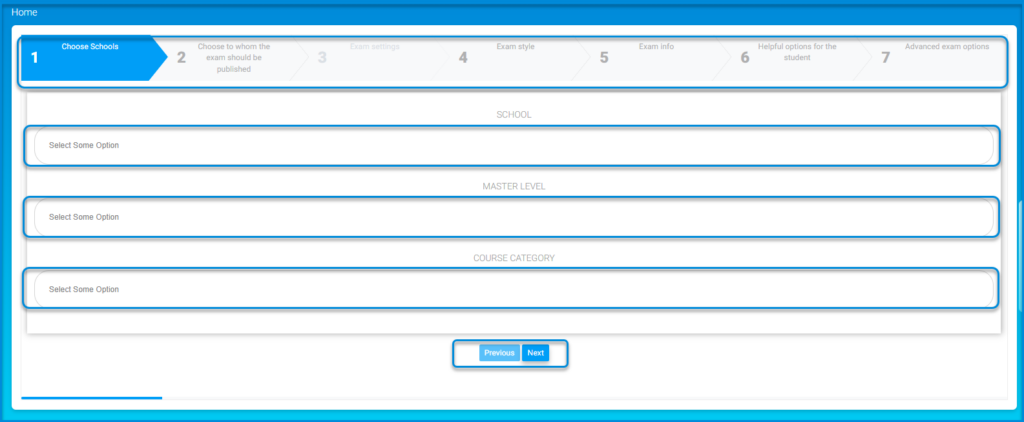
- Start by adding the school in the Choose School first tab in the workflow. Select School, Level then Course Category. Click Next.
- In Tab 2; select to whom the exam will be published. Click Next.
- Move to Tab 3 to add the exam settings. Click Next.
- Select the suitable exam style from Tab 4. Click Next.
- Add the exam information in Tab 5. Click Next.
- Add some helpful options for the students to help them during answering the exam in Tab 6. Click Next.
- Tab 7 is for advanced options of the exam.
- Click Submit, the exam is added to your exams’ list and published according to the publishing options you set in Tab 2.


