Table des Matières
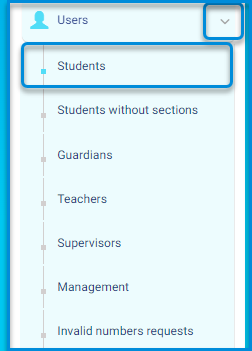
Il y a six catégories principales d’utilisateurs avec des rôles et des autorisations différents. L’administrateur de l’école a la gestion et l’autorisation complète sur eux : Il peut les ajouter et les supprimer, il peut se connecter en tant qu’un de ces utilisateurs. Dans le menu principal, cliquez sur le bouton déroulant Utilisateurs, puis sélectionnez la catégorie requise.
Users Categories: #
- Élèves
- Élèves sans sections
- Parents
- Enseignants
- Superviseur
- Administration
- invalid numbers requests
Contenu de la Page Élèves: #
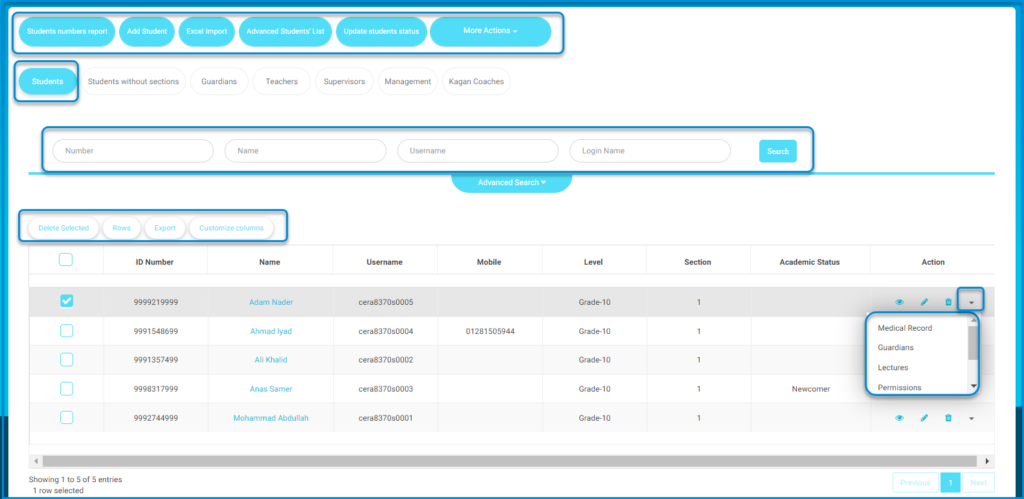
- Le bouton Rapport sur le nombre d'élèves pour afficher les numéros des élèves à chaque étape, niveau et section.
- Le bouton Ajouter un élève pour ajouter des élèves individuellement.
- Le bouton Importation Excel pour ajouter des élèves à partir d’un fichier Excel.
- Le bouton Liste avancée des élèves pour afficher les informations détaillées des élèves où vous pouvez vérifier les informations qui manquent.
- Le bouton Mettre à jour le statut des élèves pour importer les données des élèves et mettre à jour leur état.
- The More Actions drop-down button which includes more actions to take upon students, such as: (Show Students and Guardians Relation – Add and Update Guardians Accounts – Reset Passwords -…)
- The screen contains a search engine with various methods to search for a student within the educational platform, done by entering the student Number, Name, Username, or the student’s Login Name.
- The main students’ page contains a table with all the registered students on the platform and their data.
- The Action column in the table enables you to view, edit and delete the students details alongside with a drop-down button where you can view the medical records of the students, manage the students’ guardians, view the students’ lectures and manage them.
To Generate a Students Numbers Report: #
- Click the Students Numbers Report button.
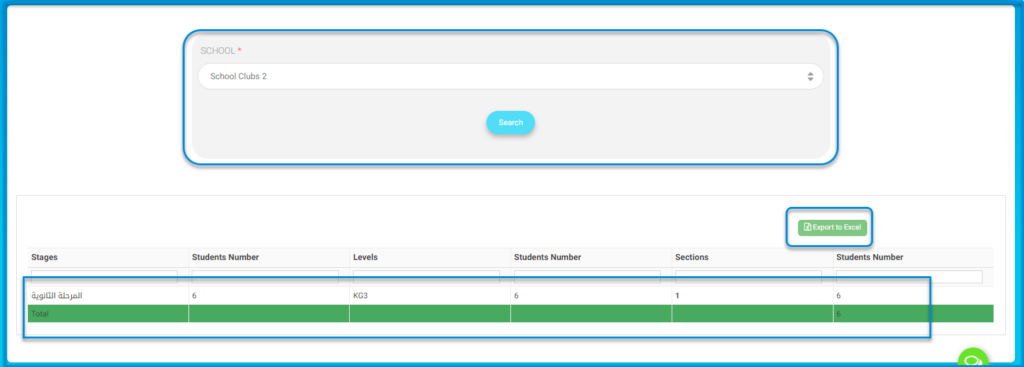
- Choose the school for which you want to extract the students’ report from the drop-down list.
- Click the Search button.
- A comprehensive report appears containing the school’s students’ data, including the educational stages, the number of students per stage, the levels within the stage, as well as the number of students in each class.
- Click the Export to Excel button to export this report to an Excel file.
To Browse Advanced Students’ List Page: #
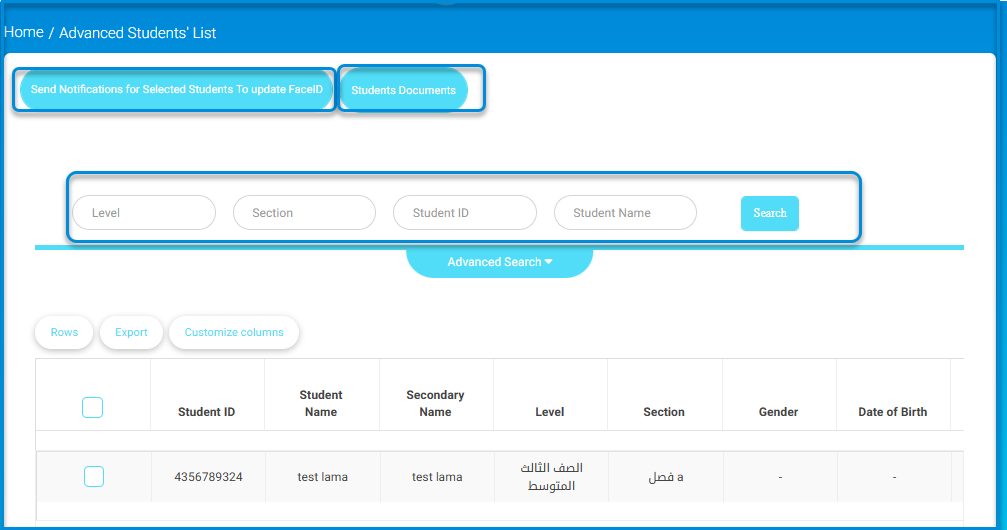
- Click the Advanced Students’ List button.
- A table of students’ data appears.
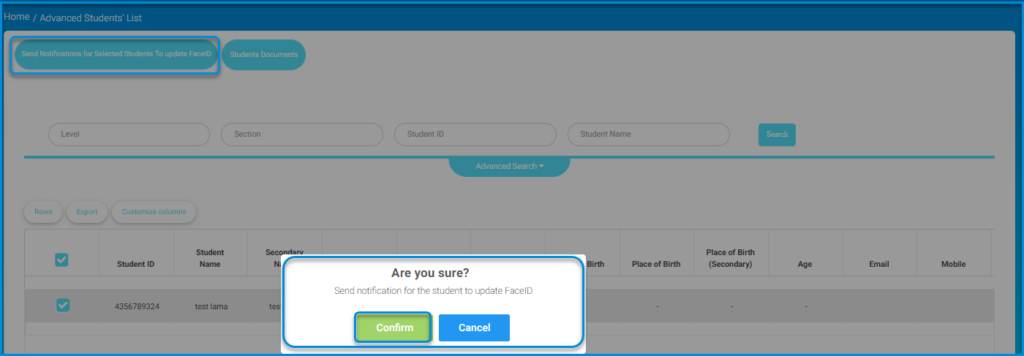
- Select the students required to update their face ID, and click the send notifications button for selected students to update the face ID recognition feature if they have not already done so, then click the confirm button to complete the process.
- Click the students’ documents button to start uploading their documents.
