1) Timetable Management: Changing Schedule Printing View #
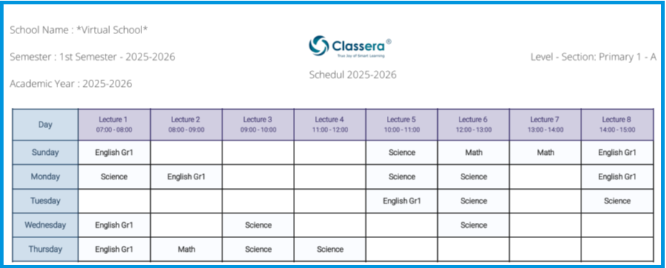
This feature provides users with a simplified, printer-friendly version of their timetable. Designed to fit perfectly onto a single page, the exported schedule is ideal for physical display. Users can download the document as a PDF in their currently selected language, featuring a clean, rotated layout that highlights essential information for easy reading.
This feature is available to Students, Guardians, Teachers, and Other relevant users.
Exporting the Simplified Schedule #
To download and print your schedule in the simplified format, follow these steps:
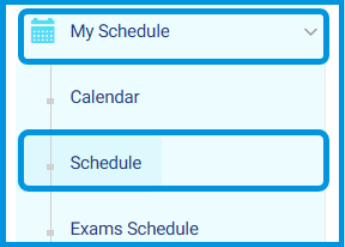
- Navigate to the Schedule page based on your user role:
a. Students: Side menu > My Schedule > Schedule.
b. Guardians: Home page > View Profile (select the specific student) > Side menu > My Schedule > Schedule.
c. Teachers: Side menu > My Schedule > Schedule.
- Click the new button located directly above the timetable: Export in Simplified View.
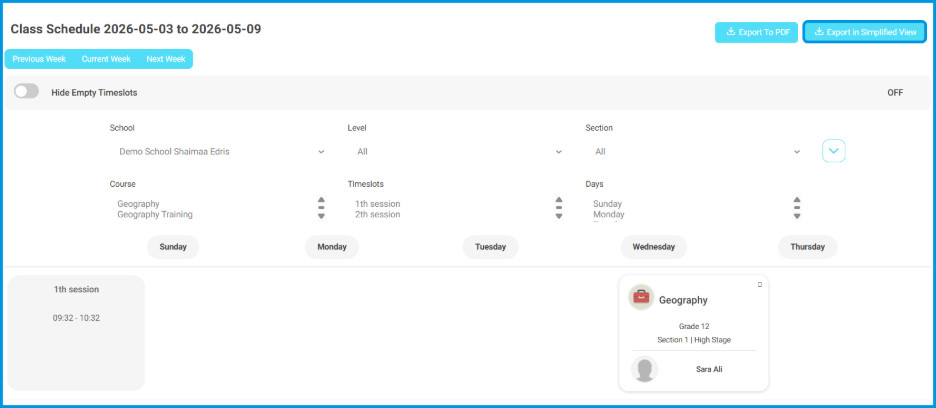
- The schedule will automatically generate and download as a PDF matching your current system language.
- Review the structured layout within the PDF:
a. For Students and Guardians: The header displays the School Logo, School Name, Semester Title, Level & Section Titles, and the Academic Year.
b. For Teachers and Other Users: The header displays the School Logo, School Name, Semester Title, and the Academic Year.
c. Formatting: Days are listed vertically on the left, while Time slots run horizontally across the top.
d. Details: Each individual lecture cell displays only the Course Title to maximize readability.
- Save, print, or pin the PDF on a wall as needed.
2) Daily Gradebook: Mapping Teacher Categories #
This feature allows teachers to link their classroom grade categories directly to admin-defined categories. By establishing this alignment, grades are automatically synced with the school’s official grading system, while maintaining administrative rules such as maximum grade limits. The system prevents mapping errors by restricting choices to supported column types and validates all selections instantly.
This feature is available to Teachers.
Mapping and Syncing Grade Categories #
To connect your grading categories with administrative reports, follow these steps:
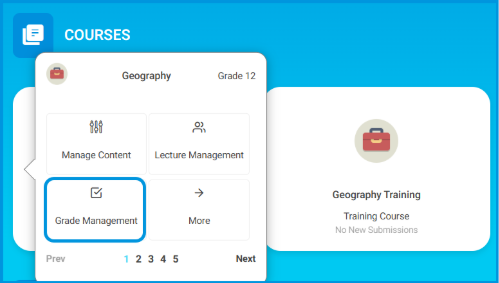
- Navigate to the Daily Gradebook using one of the following methods:
- Method 1 (Side Menu): Go to the side menu, select Grade Management, then click Daily Gradebook.
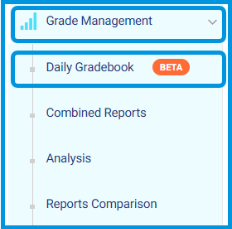
- Method 2 (Course Dashboard): On the main dashboard, go to the specific Course box (e.g., English Gr1), click Grade Management, and select Daily Gradebooks.
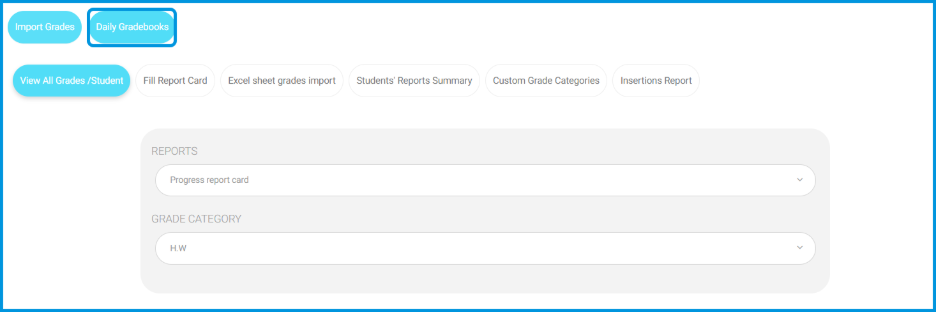
- Locate the desired report card, click the Actions dropdown arrow, and select Category Mapping.
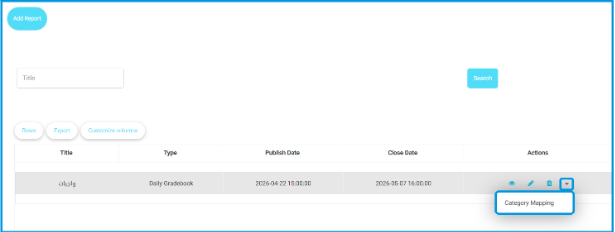
- In the window, select your target report card from the dropdown.
- Select the appropriate Admin Grade Category to match each Teacher Grade Category (e.g., matching HW to Homework, CW to Classwork).
- Ensure that the Column Type is supported (Number, Calculated, Bonus, or Comment).
- Click the Sync Category Mapping button.
- Verify that the grades reflect accurately in the administrative report cards.

Note: If an unsupported column type is selected, the mapping status will display a red error message: “Invalid mapping type” (نوع المطابقة غير صالح). You must change the selection to a valid type to complete the synchronization.
3) Assessments Management: Linking Assignments & Exams to the Daily Gradebook #
This feature allows teachers to link online assignments and exams directly to specific columns in the Daily Gradebook during the creation process. By selecting the appropriate grade category immediately, grades are automatically synchronized from completed assessments directly to the gradebook, eliminating the need for manual data entry.
This feature is available to Teachers.
Mapping Assignments and Exams During Creation

To link your assessment grades directly to the Daily Gradebook, follow these steps:
- Go to your dashboard and locate the specific Course box (e.g., English Gr1).
- To create a new assessment, click Create next to either:
- Online Assignments
- Exams/Quizzes
- In the creation page, fill in the required fields (Title, Publish Date, etc.).
- Scroll down to locate the Grade Category field.
- Open the dropdown menu to view the available categories mapped from your report cards (e.g., Homework).
- Select the exact Gradebook column you wish to link the assignment or exam to.
- Save and publish your assessment.
- Once students complete the submissions and they are graded, the marks will be automatically reflected in the selected Gradebook column without any manual entry.

4) Public Library: Filtering by Master Level #
This feature enhances content visibility within the public and custom libraries by introducing a dedicated Master Level filtering option. This allows teachers to quickly narrow down educational resources and content based on primary academic levels, streamlining information retrieval and resource planning.
This feature is available to Teachers.
How to Use the Master Level Filter
To filter library content effectively using the newly added parameters, follow these steps:
- Go to the side menu and select Public Library.
- To use the new filter, navigate to either of the following pages:
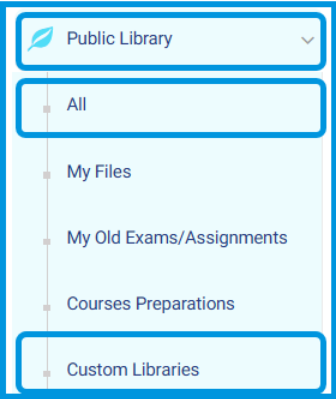
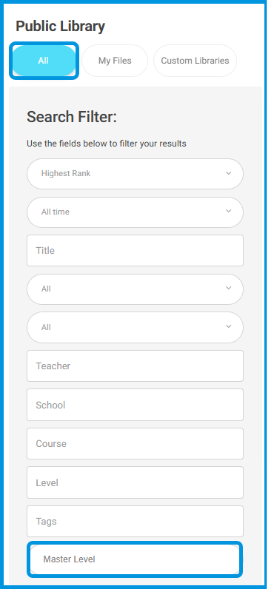
a. All
b. Custom Libraries -> Advanced Search
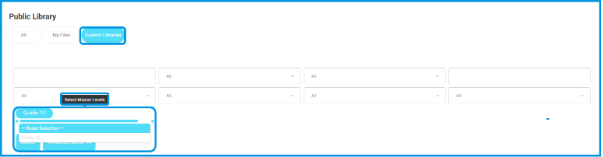
- Go to the newly added Master Level field / Select Master Levels.
- Click to open the dropdown menu and select the desired academic level (e.g., Grade 1 / الصف الأول الابتدائي).
- Click to apply the filter.
- The table will immediately update to display content mapped specifically to that master level.


