1) Approval Flows “How to add a Multi-Campus Setup” #
This feature enables parent school administrators to centrally manage approval flows by creating and assigning a single workflow to multiple campuses in one step. It enhances governance and prevents redundancy by allowing only one active flow per module for each school, while ensuring consistency by giving parent-level settings priority, appearing as read-only in child schools to prevent unauthorized changes.
This feature is only available to parent school administrators. Child school administrators do not have.
Adding a New Approval Flow #
To create a new approval flow, follow these steps:
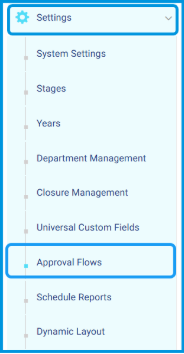
- Go to the side menu and select Settings.
- Click Approval Flows.
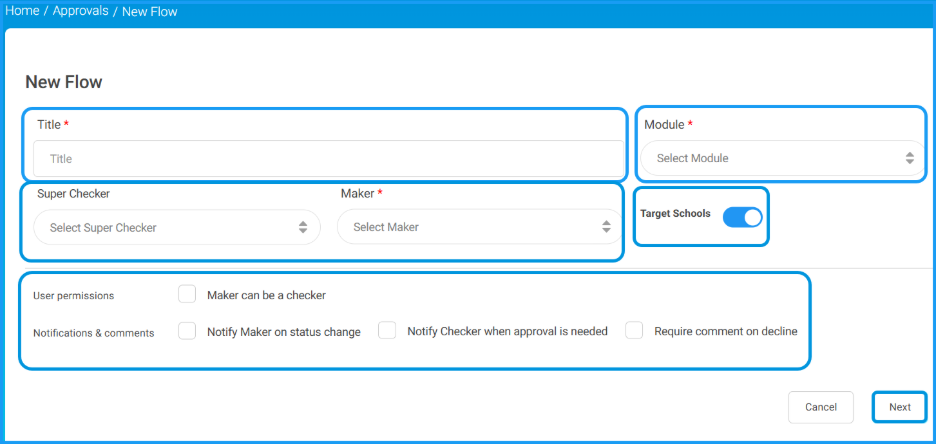
- Click + Add New Flow to create and save a new approval workflow.

- Enter the flow title and select the module.
- Select the Maker and the Super Checker.
- Enable the Target Schools toggle to assign this flow to multiple schools. If you leave the toggle off, the flow will apply to one school only and the school selection step will be skipped.
Note: The Target Schools toggle only appears in the parent school admin account. If the parent admin has no assigned roles or access on any child schools, the toggle will be disabled and the multi-campus flow cannot be created.
- Set the user permissions and notification preferences as needed.
- Click Next.
- The school selection page appears. Use the school tree to select your target schools. You can use Search to find a specific school, Select All to choose all available schools, or Clear to reset your selection. A counter at the bottom shows the total number of schools selected.
Note: The Target Schools toggle only appears in the parent school admin account. If the parent admin has no assigned roles or access on any child schools, the toggle will be disabled and the multi-campus flow cannot be created.
- Click Next.

- Define the approval levels and assign checkers for each level, and targeted action.
- Click Save Approval Flow.

Note: You can add multiple approval flows for the same module if different roles or scenarios require distinct workflows.
Note for Child School Admins: The Target Schools toggle and the school selection page are not available in the child school admin account. When you create a new flow, the system automatically assigns your own school as the target. You do not need to select a school. If you attempt to access the school selection page directly through a URL, the system will block access and show an error.
Also note that any approval flow created by a parent school admin that applies to your school will appear in your Approval Flows list as read-only. You will not be able to edit or delete it.
Important Notes:
These rules apply whenever a parent school admin creates or manages a flow that covers child schools.
- Only one active workflow is allowed per module per school at any time.
- When a parent school admin creates a flow assigned to a child school, the system automatically overrides and removes any existing workflow that was previously set at the child school level for the same module.
- Deleting a parent-level workflow does not restore the previous child school workflow. Any workflow that was removed when the parent flow was created will not be recovered.
- Workflows created at the parent school level appear in child school accounts as read-only. They cannot be edited or deleted from the child school account.
2) Managing Guardian Relationships #
This feature ensures seamless data synchronization between the Learning Management System (LMS) and C-smarx by resolving any data conflicts. It aims to tighten administrative control by restricting each student to only one “Father” and one “Mother” to prevent duplicate or inaccurate parent profiles, while directing SMS messages only to the correctly designated parent to ensure precise communication and prevent duplicate notifications. Additionally, it provides administrative tools to review and correct legacy data, ensuring that important messages—such as absences summaries—reach the intended parents accurately.
This feature is available to System Administrators and relevant administrative roles (Manager, Adviser, Supervisor, Student Affairs Officer, School Leader, and School Owner).
Managing Guardian Relationships #
To manage and validate guardian data, follow these steps:
1. Adding or Editing Students Manually #
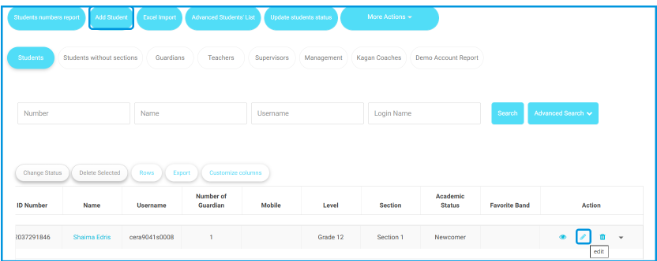
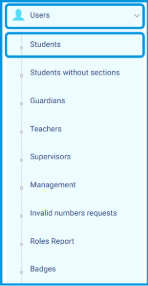
- Go to the side menu and select Users.
- Click Students.
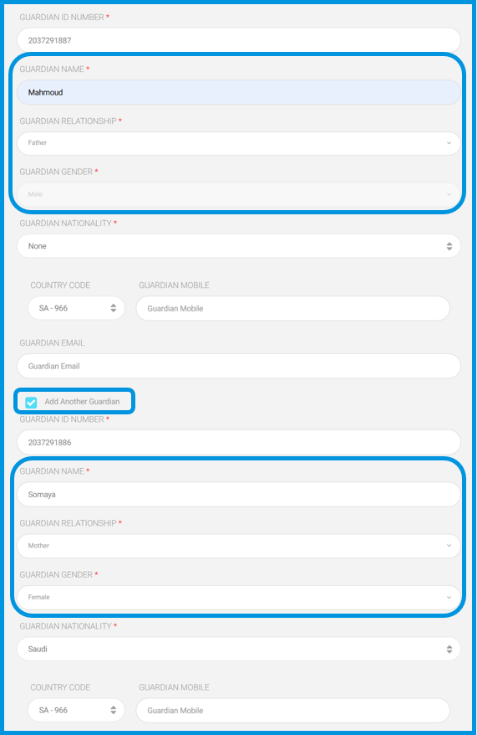
- Click Add/Edit Student.

- Assign a guardian as Father or Mother.
(Note: You will not be able to select another guardian for the same parent type).
- Observe that the system automatically hides the selected parent type from further options to prevent duplicates.
2. Importing Data via Excel #

- Go to the side menu and select Users.
- Click Students.
- Click Excel Import.
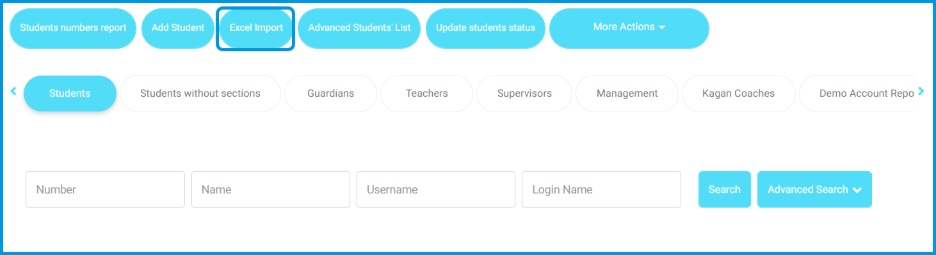
- Upload your file containing student and guardian data.
- If you attempt to assign more than one father/mother or use an invalid relationship value, the import will be blocked.
- Review the log for the validation message: “Invalid guardian relationship / علاقة ولي الأمر بالطالب غير موجودة.”

3. Resolving Legacy Data #
- Go to the side menu and select Users, then Students.
- Click More Actions and select Show students and guardians relation.
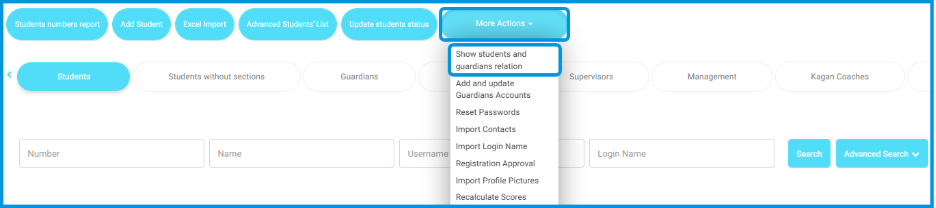
- Alternatively, go to the side menu, select Users, then Guardians, and click Guardians Students Link.
- A new tab “Customize Guardians Relationships” will appear.
- Review students with multiple fathers/mothers; the system retains the earliest added record and reassigns others to “Undefined”.
- Use the dropdown menu to edit and correct these relationships (e.g., Father, Mother, Uncle, etc.).
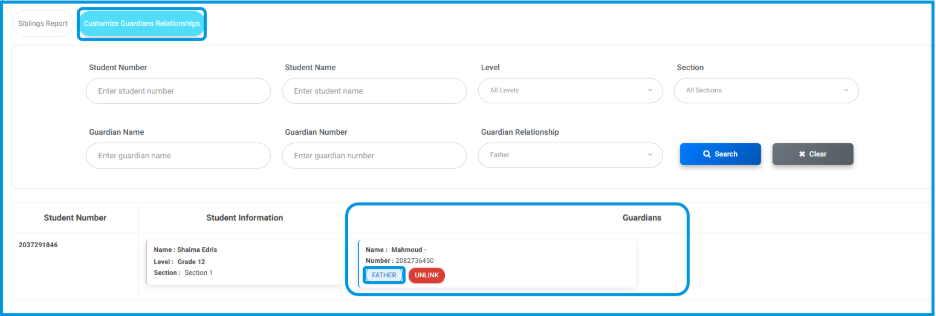
Note: That the system prevents assigning more than one father or mother for the same student, even within this interface.
3) Report Card Acknowledgment: Adding the “Watcher” Column #
This feature allows administrators and teachers to monitor parent engagement by tracking viewing activity for student report cards. It provides real-time statistics, including the initial view time and total view count per student. By offering a detailed inspection of individual viewing habits through an interactive popup, the system ensures that schools can verify consistent communication and oversight.
This feature is available to System Administrators and Teachers.
Accessing the Watcher Report Card #
To view the acknowledgment statistics, follow these steps:
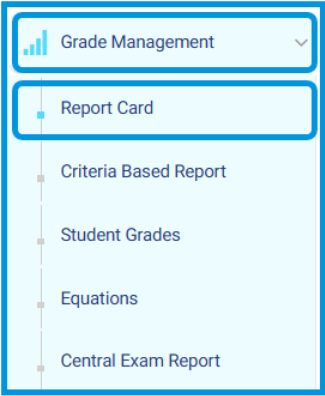
- Go to the side menu and select Grade Management.
- Click on Report Cards.
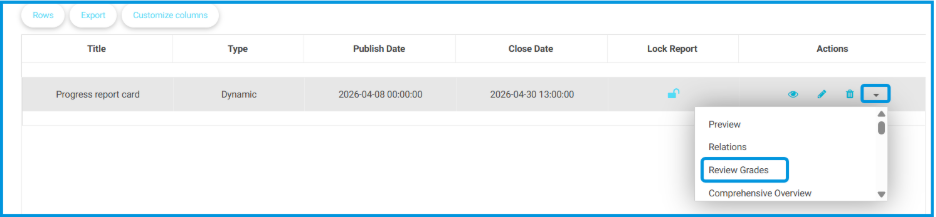
- Locate the specific report card, click More Options (the dropdown arrow), and select Review Grades.
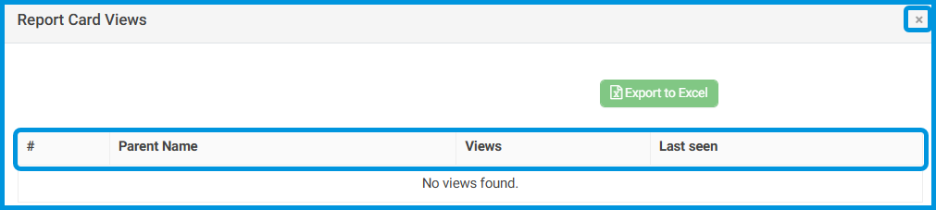
- On the Review Grades page, locate the Watcher Report Card column.
- Review the summary data in the cell:
- First Seen: | Views: <total_count>
- If the report has not been opened, the cell will display Not Viewed Yet.
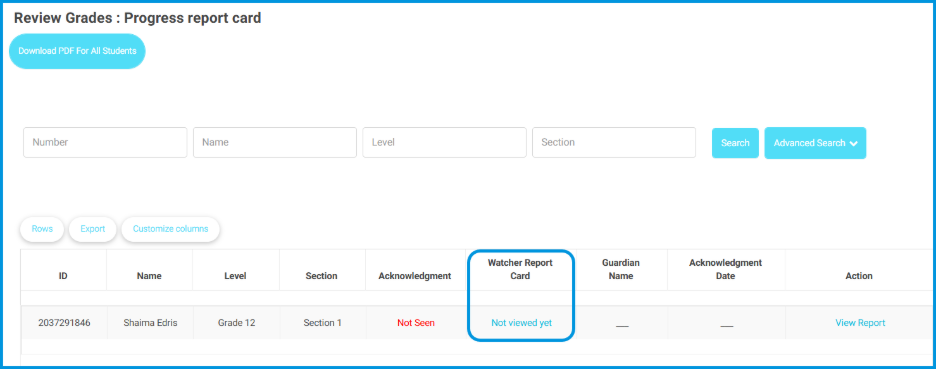
- Click on any active cell in this column to open a detailed popup.
- Within the popup, you can view:
- Each parent’s name.
- The number of times that specific parent opened the report.
- The Last seen timestamp for each parent.
- To exit the detailed view, click the X icon or click anywhere outside the modal.
4) Management Reports: Adding Date & Time Filters #
This update enhances the precision of all management reports by allowing users to filter data using specific time ranges in addition to dates. By providing granular control over the report generation process, this feature improves the accuracy and consistency of administrative data analysis. For security and auditing, all applied filter parameters are logged by the system.
This feature is available to all Management roles, including System Administrators.
Using the Date & Time Filter #
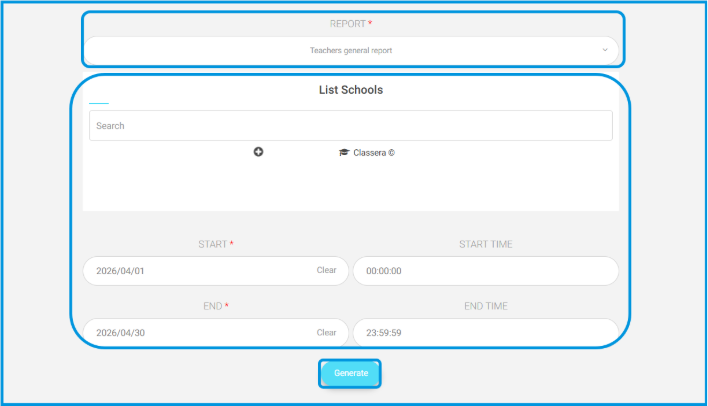
To generate a report with specific time parameters, follow these steps:

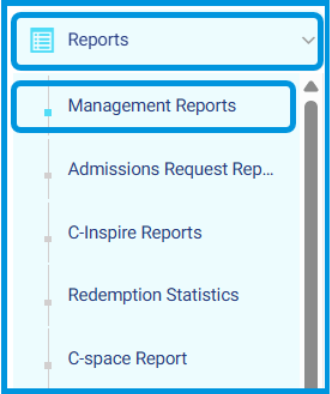
- Navigate to Reports via the side menu.
- Select Management Reports.
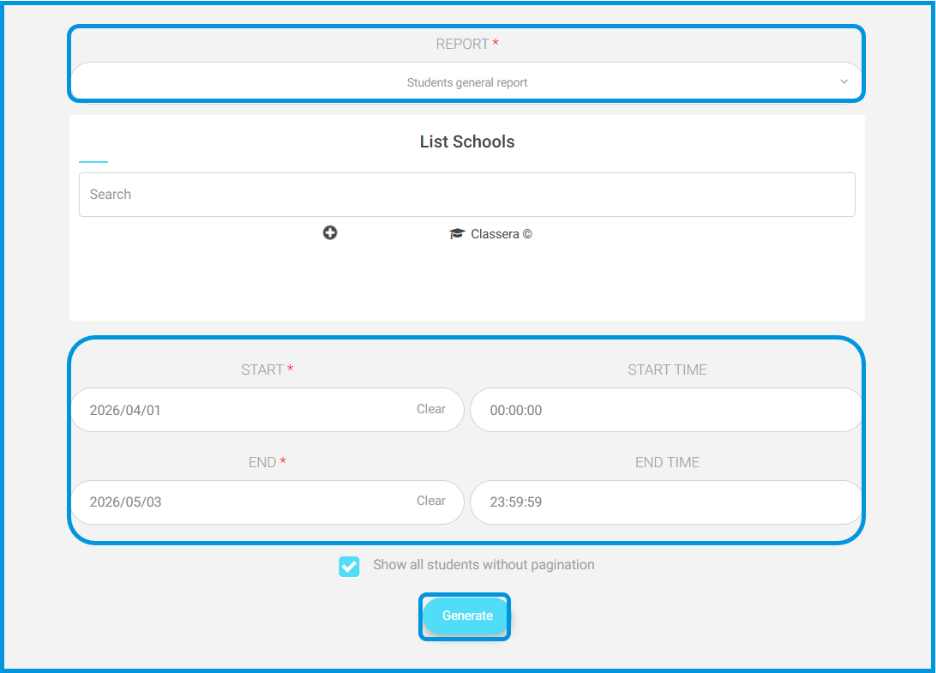
- Select the desired report (e.g., Schools General Report), and select the school.
- Locate the Date & Time filter fields at the top of the report configuration page.
- By default, the system covers the full 24-hour period (00:00:00 – 23:59:59).
- Adjust the Start Date/Time and End Date/Time fields to define your custom range.
- Click the Generate button to apply the filter.
- The report will update to display data only for the selected period.
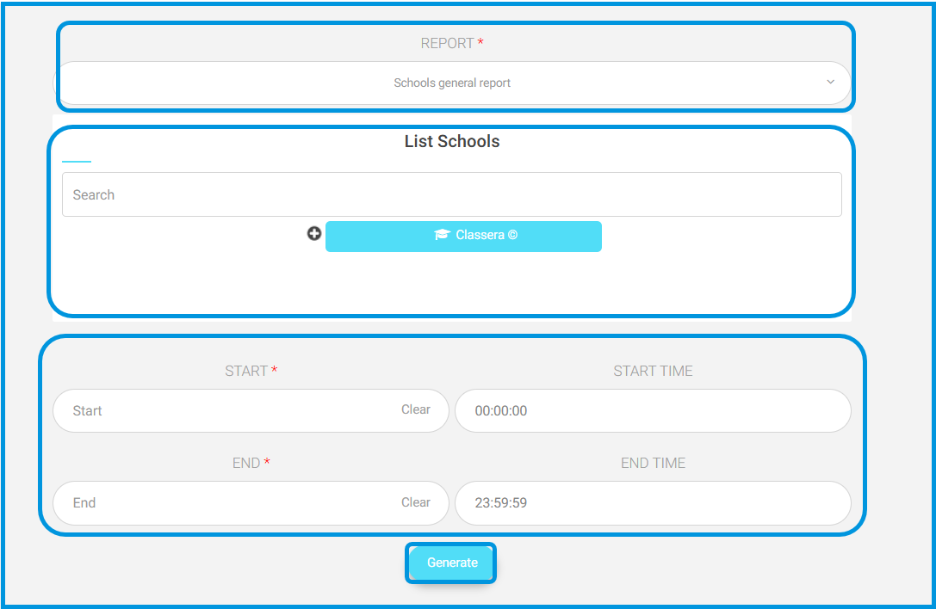
Note: If an invalid range is entered (e.g., the end time is set earlier than the start time), the system will display an error message and block the report generation until the values are corrected.
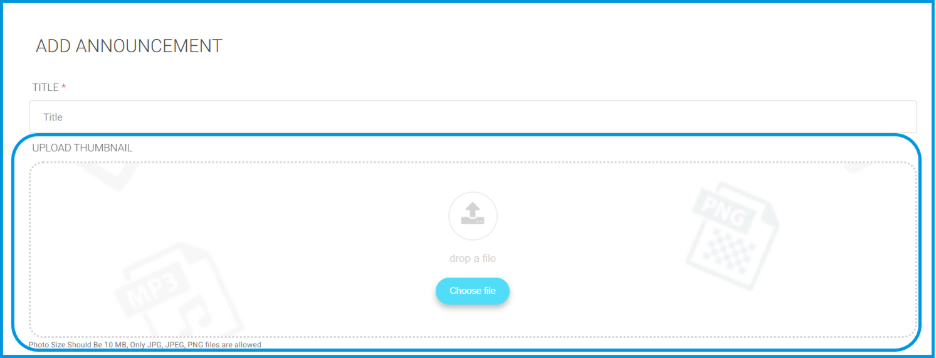
5) Announcement Thumbnails #
This feature allows authorized users to add and display thumbnails for announcements, significantly enhancing visual appeal and clarity. By providing a dedicated image space, announcements become more engaging on both the platform’s home page and within individual announcement detail pages.
This feature is available to Admins, Managers, Advisers, Floor Supervisors, Activity Officers, School Leaders, and Student Affairs Officers.
Adding and Displaying Thumbnails #
To include a thumbnail in your announcement, follow these steps:
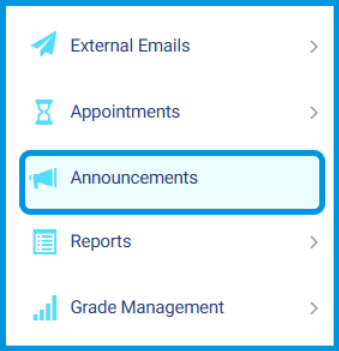
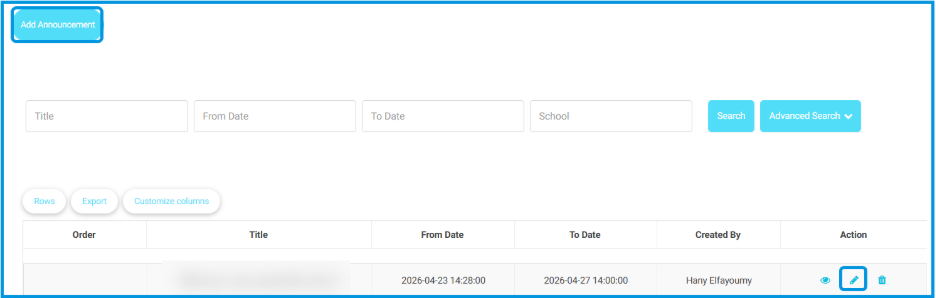
- Navigate to the side menu and select Announcements.
- Click to Add Announcment or Edit an existing one.
- Locate the Upload Thumbnail section, which appears immediately after the title field.
- Upload a single image file in JPG, JPEG, or PNG format.
- Note: Ensure you follow the recommended banner size displayed in the upload area for the best visual result.
- Save your changes.
Note: The thumbnail is optional. If you do not upload one, the system may automatically display an image from the announcement’s description on the home page instead.
How Thumbnails Appear
Once uploaded, the thumbnail will be displayed in two key areas:
- New Home Page: The thumbnail appears directly next to the announcement text for a quick visual preview.
Details Page: The thumbnail is showcased as a prominent banner located above the announcement title.
6) Teachers General Report: Adding Participating Students Count #
This feature enhances report accuracy by displaying the actual number of students who engaged with an exam or activity. By basing percentages on real participation—tracking those who opened or attempted to submit—it provides administrators and supervisors with more credible data for any decision-making.
This feature is available to School Admins and Teacher Supervisors.
Viewing Participation Data #

To monitor actual student engagement within the report, follow these steps:
- Navigate to the side menu and select Reports, then click Management Reports.
- Select Teachers General Report as the report.
- Choose the desired school and set your date/time parameters, then click Generate.
- Locate the new columns: Exam Participating Students Count and Homework Participating Students Count.
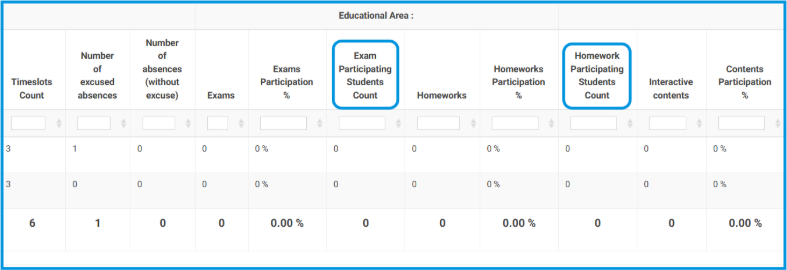
- Review the figures, which specifically count students who either opened the item or attempted to solve it.
- Observe that all participation percentages in the report are now automatically updated based on these actual participation numbers.
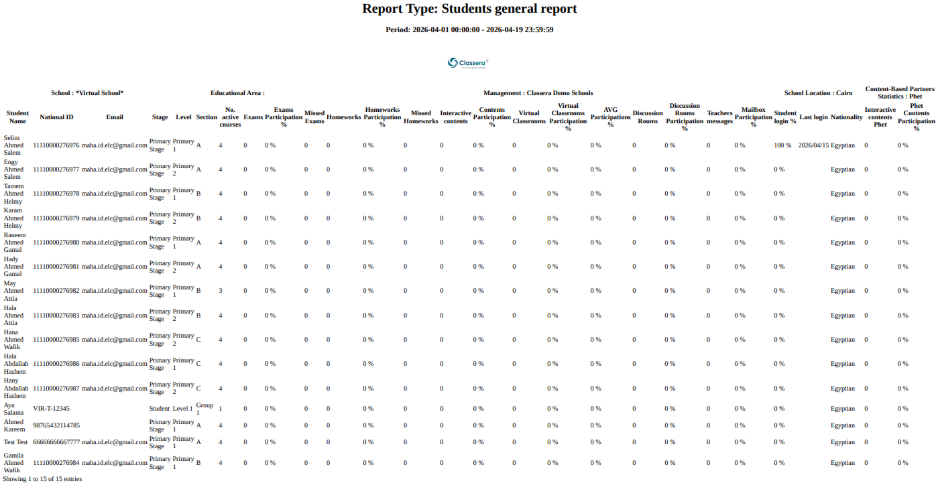
7) Students General Report: Enhanced PDF Export Formatting #
This update improves the layout and readability of the Students General Report when exported to PDF. It ensures professional presentation through proper column alignment, consistent spacing, and full text visibility without truncation. Additionally, exported reports now feature clear headers and footers that include the school’s name and the generation date.
This feature is available to System Administrators.
Exporting the Enhanced Report #
To generate the Students General Report with improved formatting, follow these steps:
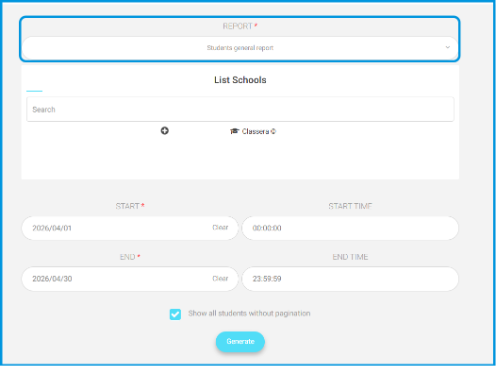
- Navigate to the Reports section in the side menu.
- Select Management Reports.

- Click on Student General Report.
- Choose the desired school and define your date/time range, then click Generate.
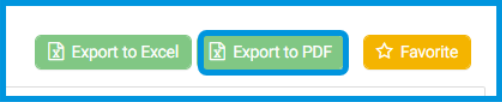
- Click the Export to PDF button to download the report with the enhanced formatting.
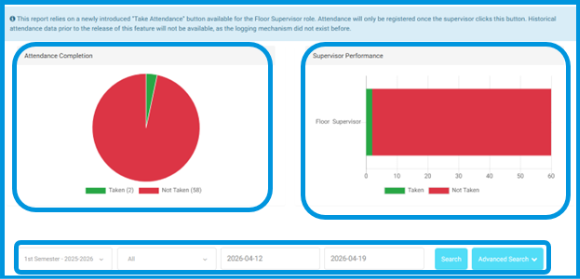
8) Daily Attendance Report #
This update significantly improves the Daily Attendance Report by adding new columns, clear status indicators, advanced filters, and visual charts. These changes enhance the school’s oversight by allowing administrators to immediately identify if attendance has been registered by floor supervisors.
This feature is available to System Administrators.
Reviewing Daily Attendance Data #
To monitor and filter attendance statuses, follow these steps:
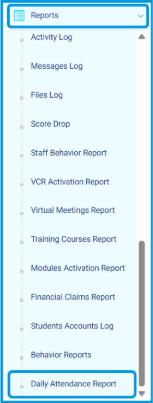
- Go to the side menu and select Reports.
- Click on Daily Attendance Report.
- Use the filters at the top to refine your view:
a. Term (e.g., 1st Semester).
b. Level (All or specific levels).
c. Date Range (Start and End dates).
- Review the visual charts at the top of the page for quick monitoring:
a. Attendance Completion: Displays the overall percentage of classes where attendance was taken vs. not taken.
b. Supervisor Performance: Shows a direct comparison of floor supervisor actions.
- In the data table below the charts, review the newly added columns:
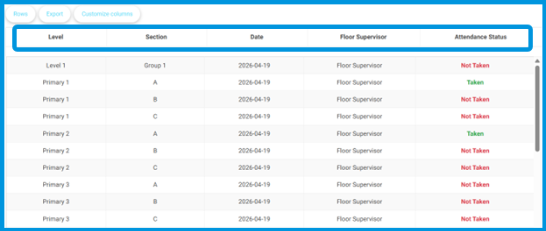
a. Level
b. Section
c. Date
d. Floor Supervisor
e. Attendance Status – marked clearly as Taken or Not Taken.
Note: This report relies on a newly introduced “Take Attendance” button available to the Floor Supervisor role. Attendance will only be registered once the supervisor clicks this button. Historical attendance data prior to the release of this feature will not be available.
9) Forms and Assessments: Predefined Comments Groups #
This feature streamlines the student evaluation process by allowing administrators to link predefined Comments Groups directly to assessments. Instead of typing feedback manually, teachers and supervisors can select from a standardized list of comments. This ensures consistency in grading, saves time, and allows schools to reuse comment workflows already established in the report cards module.
This feature is available to System Administrators, Teachers, and Supervisors.
Creating and Linking Comments Groups #
To set up and use predefined comments groups, follow these steps:
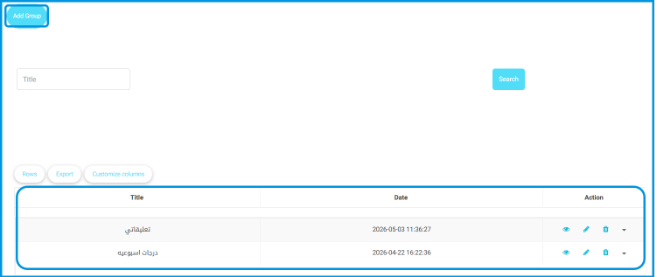
1. Creating a Comments Group (Admin) #
- Go to the side menu and select Grade Management.
- Click on Report Cards.

- Click the Manage Comments Groups button at the top of the page.
- Click on Add Group to create a new group or manage an existing one.
2. Linking the Group to an Assessment (Admin) #
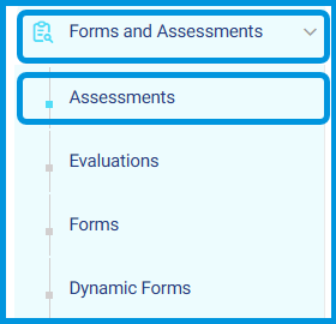
- Go to the side menu and select Forms and Assessments.
- Click Assessments.
- Click on New assessment or Edit an existing one.
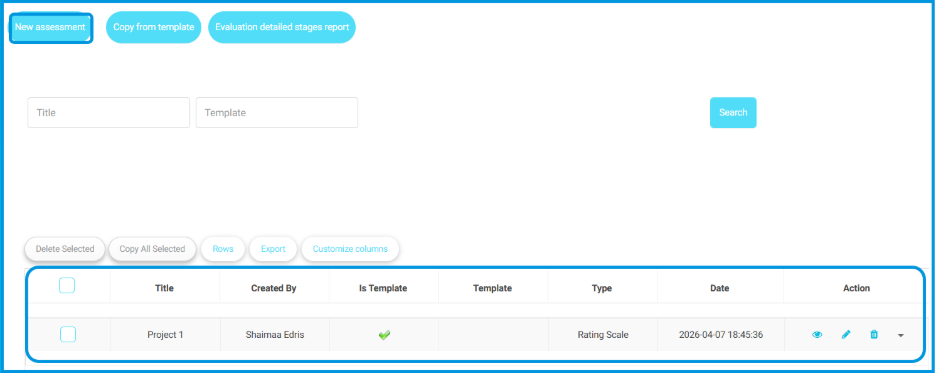
- In the assessment configuration page, locate the Comments Group and Comments Group Type fields.
- Select the desired comments group from the dropdown menu to link it.

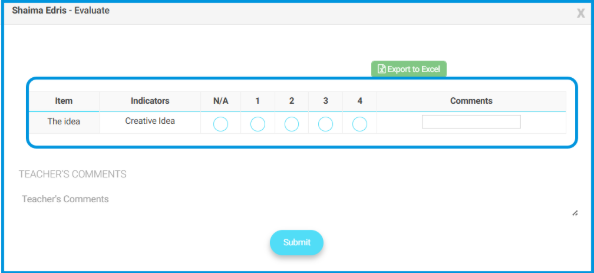
3. Evaluating Students Using Predefined Comments (Teacher/Supervisor)
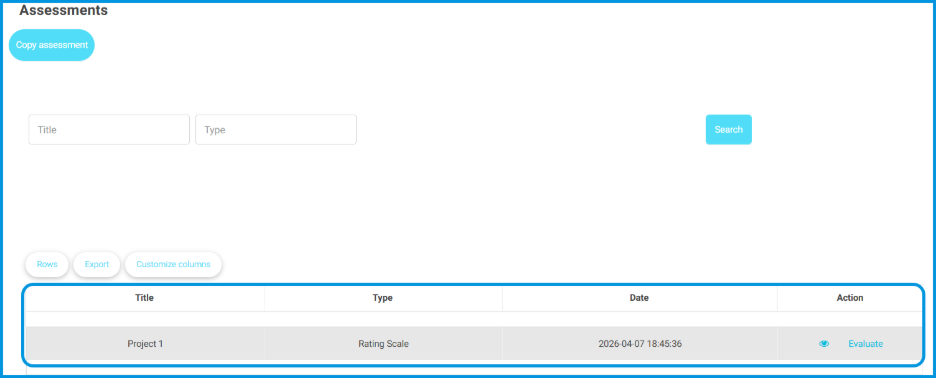
- Navigate to your teacher dashboard and select the relevant Course box.
- Click on Assessments and select the specific assessment to evaluate.

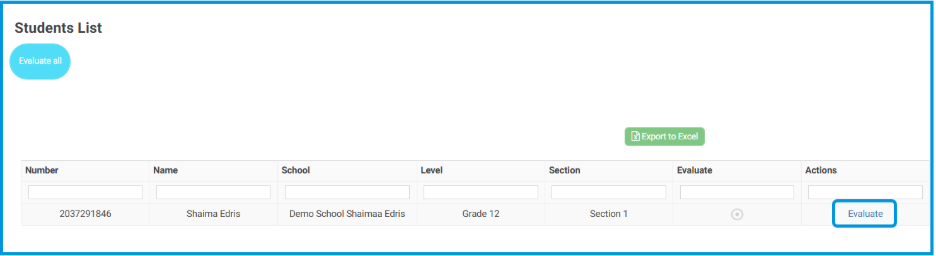
- Click Evaluate next to the student’s name.
- Use the dropdown menu in the evaluation interface to select a predefined comment from the linked group instead of typing manually.
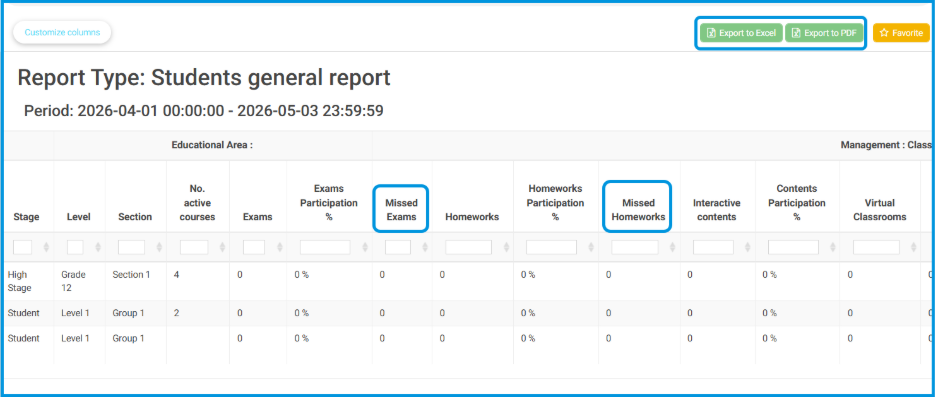
10) Students General Report: Tracking Missed Tasks #
This update enhances the Students General Report by providing clear visibility into missed homework’s or exams. By introducing dedicated tracking columns, school administrators and supervisors can instantly identify disengaged students, streamline follow-ups, and generate accurate reports for parents and leadership.
This feature is available to School Administrators and Supervisors.
Reviewing Missed Assignments and Exams #
To monitor student completion rates and identify missed tasks, follow these steps:
- Navigate to the side menu and select Reports.
- Click on Management Reports.
- Select Students General Report.
- Choose the target school and configure the date and time filters.
- Click Generate to generate the data table.
- In the generated report table, review the newly added columns:
- Missed Exams
- Missed Homeworks
- Use the values in these columns to pinpoint students who have incomplete assessments or coursework.
- Click Export to Excel or Export to PDF if you need to download and share these insights with parents or administration.