The More Action drop-down button on the Students page grants you various options to choose from if you want to perform some advanced actions on the students. Users>> Students>> More Actions. Here are some of these actions.


- Show Students and Guardians Relation
- It views students with their linked guardians’ accounts from which you can unlink the guardian from the student account by selecting the required account and then deleting it.

Reset Passwords #
- This action affects all students’ accounts.
Import Contacts #

- This option is used to update the students’ data, such as (Passport, Admission date, Date of Birth, ……). This file doesn’t create new accounts, just updates existing students’ accounts.
Registration Approval #

- The school administrator and the Admission officer can view and edit registration requests. Registration status and settings are enabled from the system settings.
import Login Name #

- This option is used to update login names and passwords for specific users. Download the sample file, add your updates, then re-uploaded it.

import Profile Pictures #

- It is used to upload profile pictures for users. Each uploaded file should be a ZIP file containing the profile pictures you want to upload.
- The profile picture file’s name should be named by the Government ID of the user you want to upload his profile picture. Example: 1234567890.jpg
- The Government ID should be the same as the system to upload the profile successfully.
Search in Existing Users #

- This is a helpful option, by which you can search for an account to see if this account exists or not for all LMS users. The search engine requires the user’s government ID.
Recalculate Scores. #
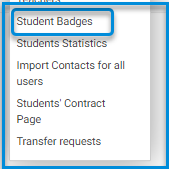
Student Badges #

- Click on the Student Badges button.
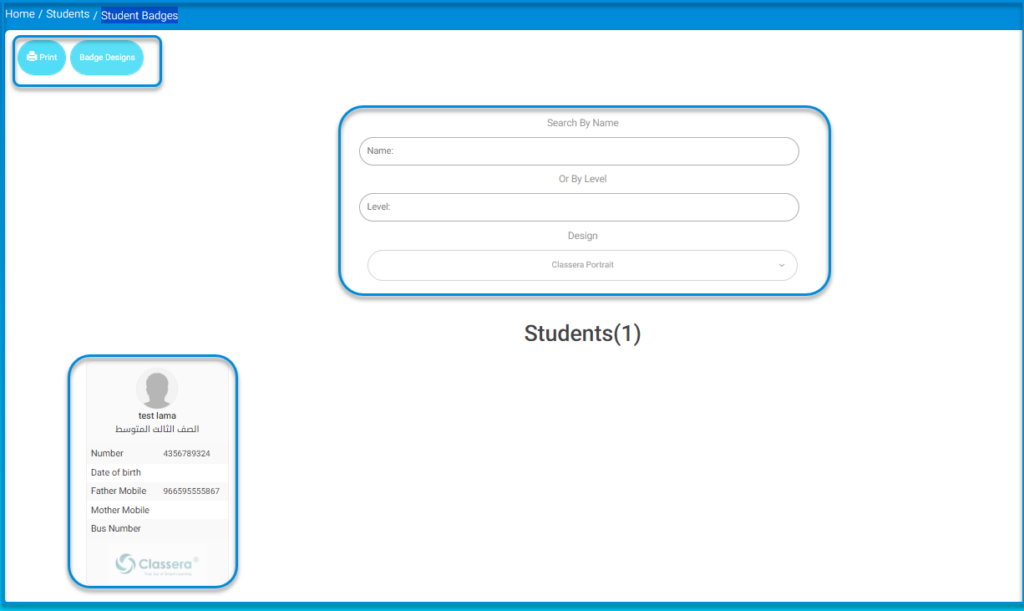
- Through the Student Badges screen, you can print the existing badges for the student or design a new badge.

- Enter the student’s data in the search engines then click the print button.
- Click the Badges design button.

- Click the add button.
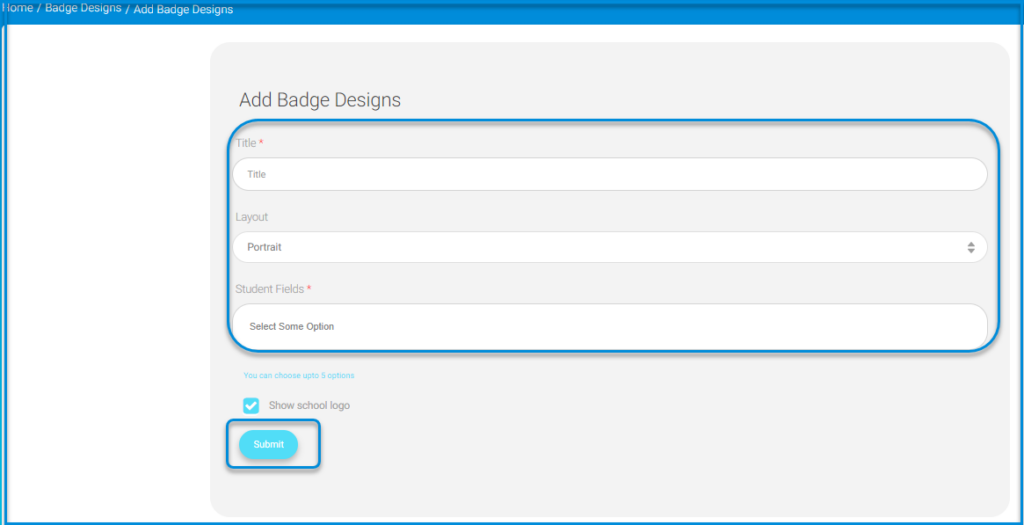
- Add the Badge design.
- Enter the appropriate title for the new badge.
- From the drop-down menu, choose the design: vertical or horizontal.
- Select after the options to display them in the badge fields.
- Click the show school logo button.
- After completion, click the submit button to complete the design process for the students’ exam badges.
Contract Page #
Every student in a school should have their own contract that keeps all of their information and the details of their enrollment in the school. So Classera provides the administrators with the option of adding these contracts on the platform.

To Add Bulk Contracts: #
- Click the Users tab from the main menu.
- Click the Students button.
- From the More Action drop-down button, click the Students’ Contract Page button.
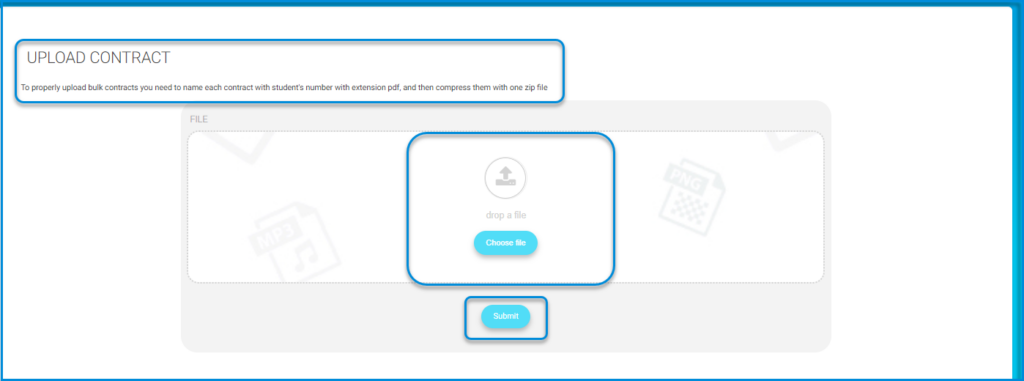
- Click the Upload Contract button to add the contracts.
- Click the Choose File button.
- Choose the file on your device.
- Click Submit.
- A message indicating that the contracts have been added successfully appears.

Note: To properly upload bulk contracts, you need to name each contract with the student’s number with the extension PDF, and then compress them with one zip file.

Adding Contracts Individually: #
- Click the Users tab from the main menu.
- Click the Students button
- From the More Action drop-down button, click the Students’ Contract Page button.
- ِA table with all the students of the schools appears.
- From the Action column next to the student required, click the arrow.
- Click the Upload button.
- Click the Choose File button.
- Choose the file on your device.
- Click Submit.
- A message indicating that the contract has been added successfully appears.
- You can view or delete the contract in the Action column.
- You can access any under review contract to view its details by clicking the Log button from the Action column next to the student whose status says that its contract is Under Review.


