Adding a Weekly Plan
The system allows you to add a weekly plan on the main platform through the system administrator’s account by following the following steps
- Click on the Weekly Plan button from the side menu.
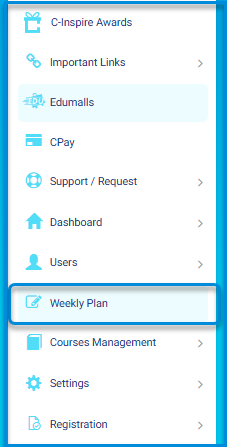
The Weekly Plan page allows you to search for study plans set by teachers during a specific period.
- After clicking, the system moves to the Weekly Plan screen, which contains a button to add a new weekly plan.
- The Weekly Plan screen contains a table showing all available weekly plans on the platform.
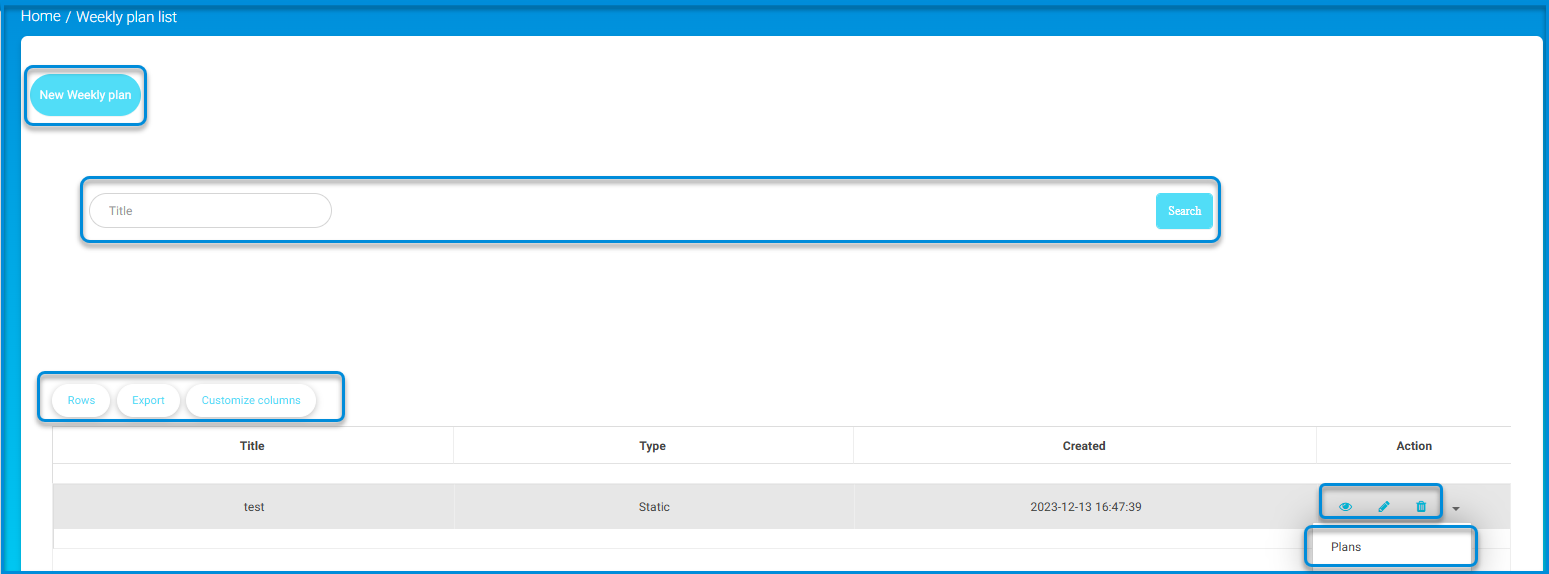
- Click on the button to add a new weekly plan to display the screen for selecting available types of weekly plans.
- Choose the appropriate type of weekly plan (Dynamic or Static ).
Dynamic weekly #
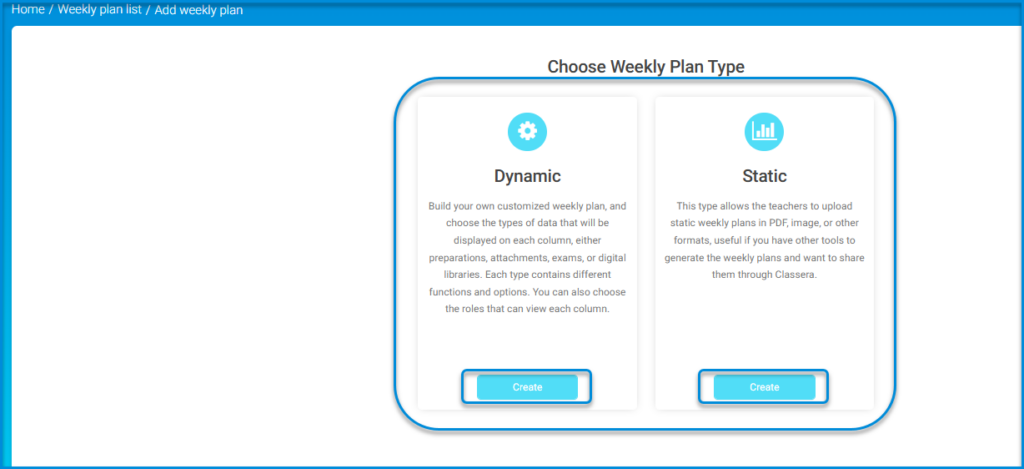
- When choosing a dynamic weekly plan, click the Add button to display the dynamic weekly plan screen.
- A screen appears containing two tabs: Settings tab and Columns tab.
- First, dynamic weekly plan settings:
- Add the main title of the plan in the appropriate title field.
- Add the secondary title of the plan in the appropriate secondary title field.
- Select the appropriate level choice from the level field.
Note: You must click on the Show Material Icon button and the Show Time Slot Column button.
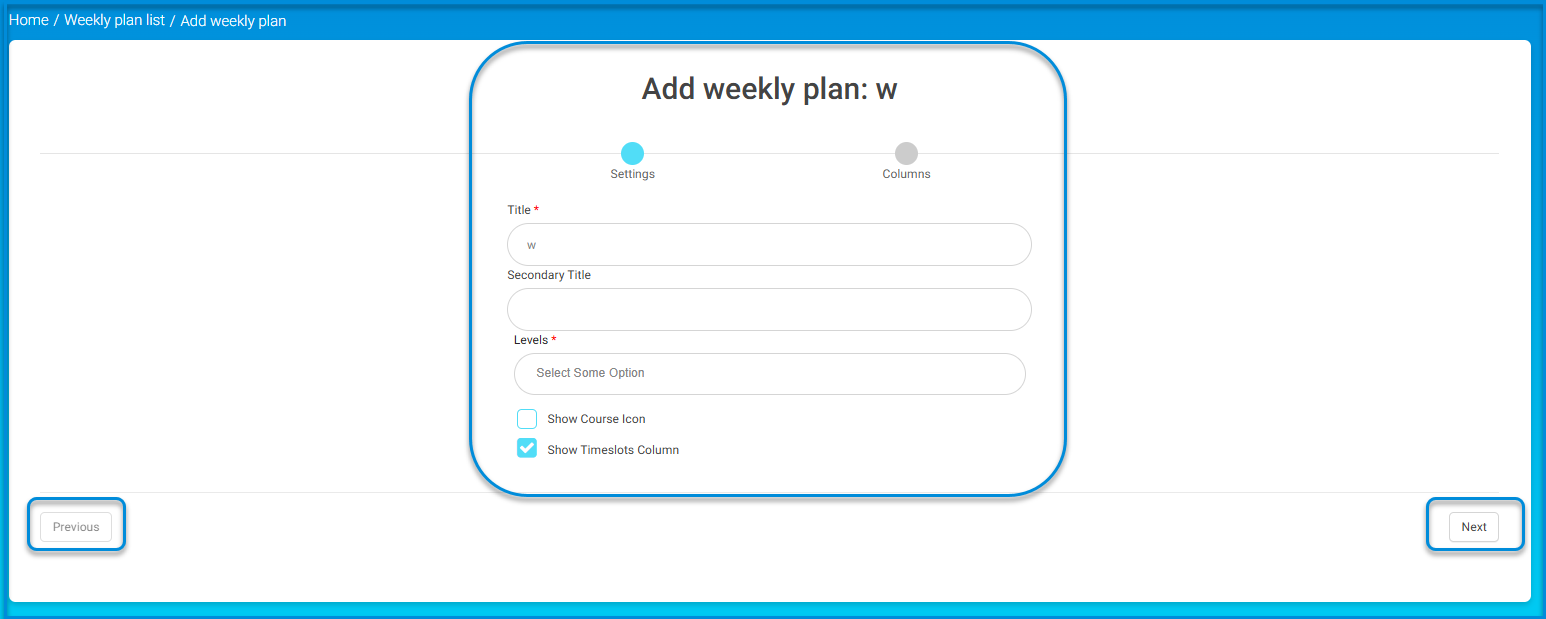
- Click on the Next button at the bottom left of the screen to move to adding columns.
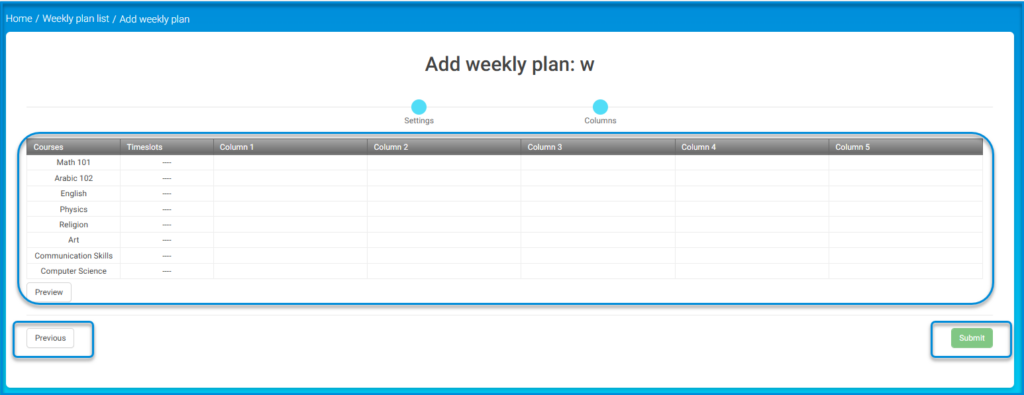
- Secondly, column settings:
• A table appears containing courses, time slots, and columns assigned to each course, and you can add or delete any of the columns by clicking on the column.
• When clicking on the column, a side menu appears on the left side of the screen containing the column’s settings.
• There are tabs to add a new column by clicking on them and a tab to delete a column by clicking on it.
• Click on each column for modification and selection of title, subject, and groups associated with it.
• You may need to select the classes you want to add to the plan and specify basic information such as weekdays and study hours.
• You can specify the type and content for each column, whether lectures, assignments, or tests, and fill in the necessary details for each type.
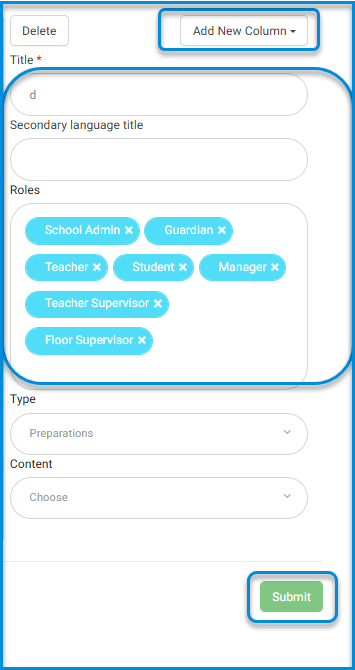
7-After completing all settings and details, click the Submit button to save the new weekly plan and make it ready for use.
Access the Weekly Plan: #
iew Weekly Plans:
- The system displays all weekly plans in a table with the following columns:
- Plan Title
- Type
- Date
- Action
- Settings dropdown menu, which includes:
- Header and footer settings
- PDF settings
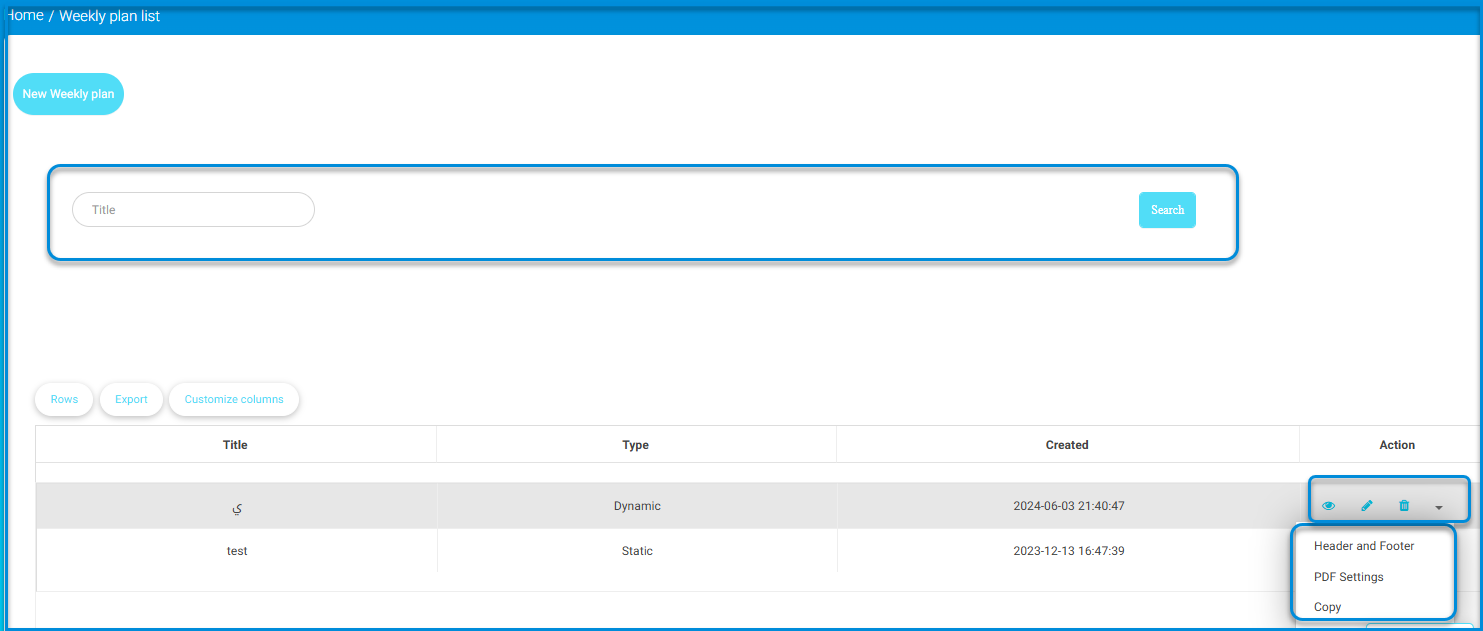
View Specific Weekly Plan:
- Click on the “View” button (eye icon) for the weekly plan you wish to see.
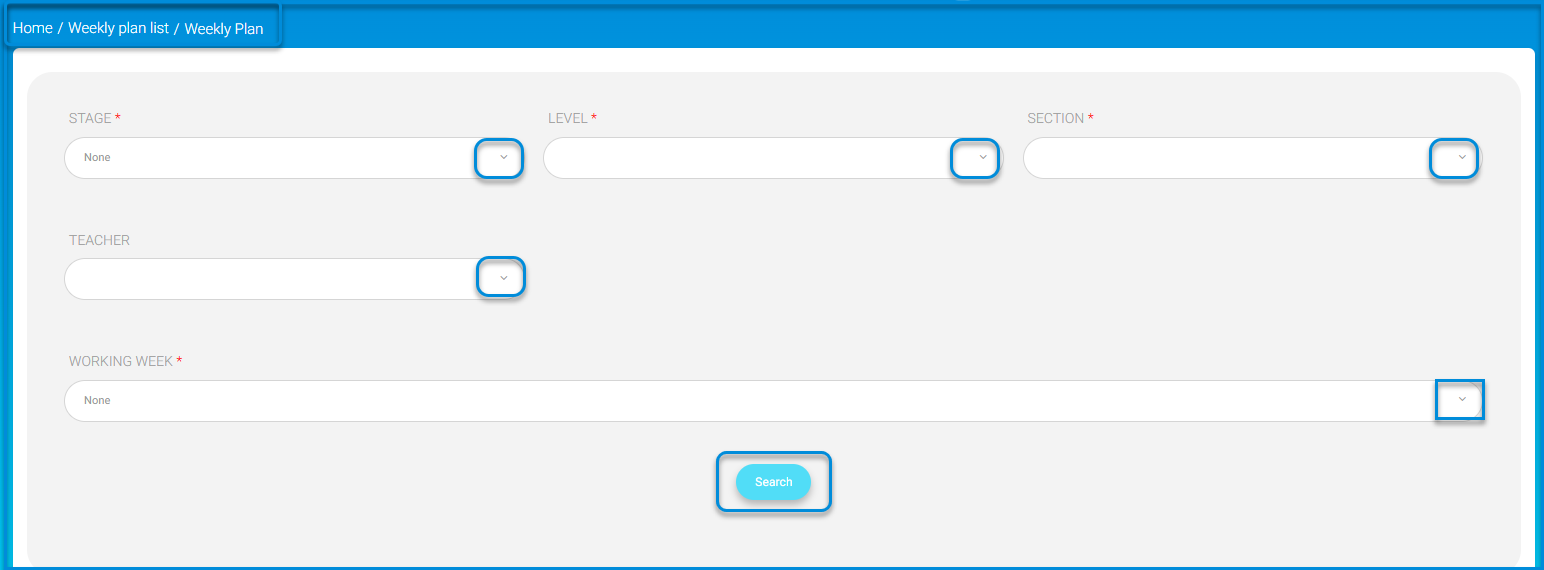
- The system transitions to the viewing settings screen, where you:
- Select the stage from the “Stage” dropdown menu.
- Choose the class level from the “Level” dropdown menu.
- Pick the section from the “Section” dropdown menu.
- Select the teacher from the “Teacher” dropdown menu.
- Choose the specific working week of the plan.
- Click on the “Search” button to display the plan.
Interacting with the Displayed Plan:
- The selected weekly plan appears below the search bar.
- Click on the arrow indicator to expand and view detailed plan information.
- To export the plan details to an Excel file, click on the “Export to Excel” button.
Note: To view all weekly plans, click on the “Show All” button.

To search for a weekly plan, fill in the search engines below: After you finish searching, you can
Weekly Plan Enhancement:
The Weekly Plan is an effective tool for organizing and presenting academic content in a structured and professional manner. It offers multiple features that enhance the teaching and learning experience for both teachers and students.
Service Features:
- Set page size
- Add automatic page numbering
- Display the plan by days of the week
- Format content within a unified table layout
- Adjust all four page margins
- Customize text within the plan
- Customize the table design used
- Choose the font type
- Choose font style (bold, italic)
- Align text

Key Features
- Ability to display content by day of the week, which helps evenly distribute lessons.
- Content is organized in a unified table format that is easy to read and understand.
- Allows customization of text and table design, including:
1. Font type and style (e.g., bold, italic)
2. Text alignment and margin adjustments for a clean layout
- Options to:

1. Set page size
2. Auto-number pages
3. Choose color schemes for titles and text for better visual appeal and easier navigation
Access Path:
From the main menu >> go to Weekly Plan >> then from the Actions section, select PD Settings.
D. Managing Time Slot Groups
The Time Slot Groups feature is designed to support schools with multiple academic levels by allowing more than one class session to be scheduled at the same time through the creation of grouped time slots. Within each group, specific time durations for each class session can be defined.
Schools can create multiple groups as needed and apply each group to specific grades or academic stages. This feature aims to provide a more flexible and accurate way to organize academic schedules, making it especially useful for schools that operate in two shifts (e.g., morning and evening), or that have customized time divisions (such as different schedules for specific days).


