Added all of your school’s users? Adjusted your system settings according to your preference? Now to the next step. It’s time to add your school stages. Classifying every stage into its own keeps everything organized and in place.
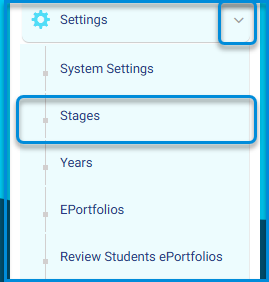
Main Menu >> Settings >> Stages
To Add a New Stage: #
- Click the Add Stage button on the Stages page to add stages individually.
- Select the stage you want from the drop-down list. (Kindergarten-Primary-Intermediate-High-University)
- Add a title to your stage.
- Add the title in the secondary language.
- Click Submit.
- Your stage shows in the Stages table and is ready for the next step !!
Note: If you are adding all of your stages for the first time, it’s better to use the Automate Stage Creation feature to create all stages and their levels once and for all.
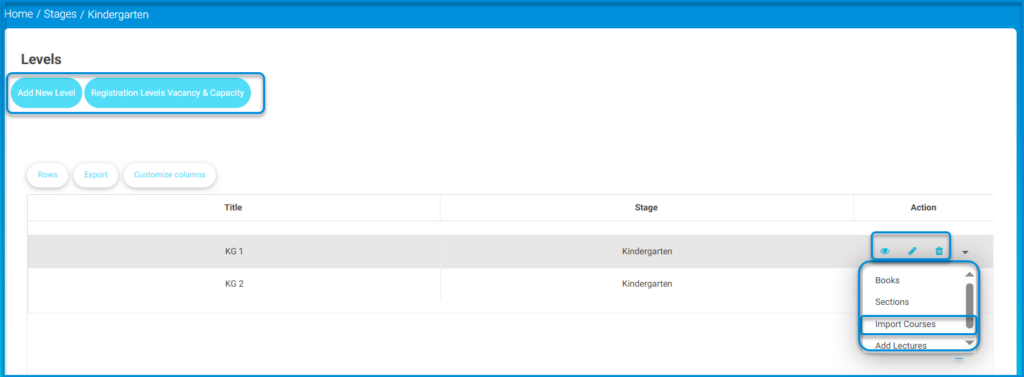
- Click the small arrow next to the stage from the Action column in the table to move to the next step and add the stage’s levels.

To Add a New Level : #
- Click the Add New Level button on the Levels page.
- Select the Master Level from the drop-down list.
- Type a title for your level.
- Type the title in the secondary language.
- Select the order of your level by clicking the radio button.
- Check the Hide from Registration Page checkbox if you want to hide your level from the registration page.
- Click Submit.
- Your level shows in the Levels table and is ready for the next step!!
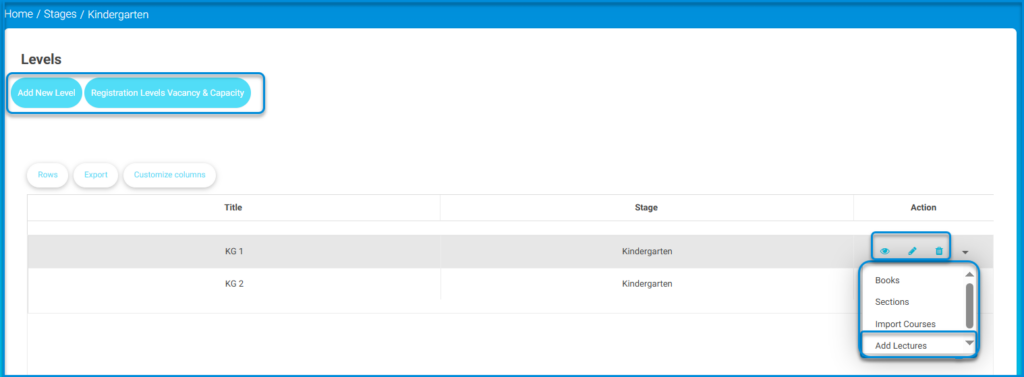
- Click the small arrow next to the level from the Action column in the table to move to the next steps:
- Adding the level’s sections
- Importing courses
- Adding Lectures
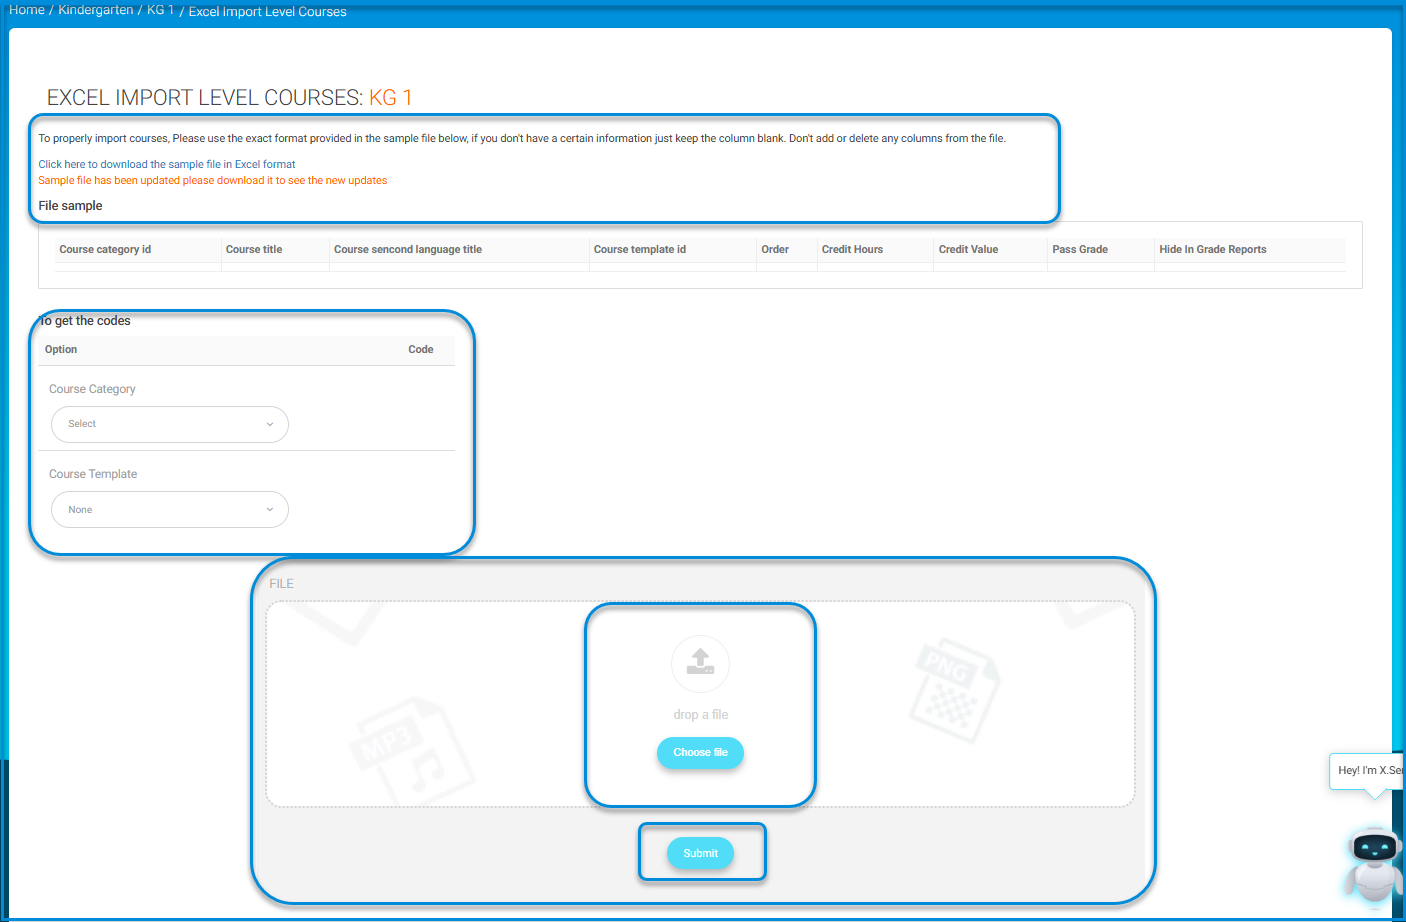
The Import Courses option allows you to upload many courses in bulk which saves time and effort.
- To import courses, download the sample file, fill it with the required data, then re-upload it. It is important to abide by the rules stated in this page to avoid any errors.
- You can upload courses individually one by one from Course Management >> Courses.
To Add a Lecture : #
- Click Add Lectures from the Action drop-down list.
- Select the course to which this lecture will be added.
- Select the teacher of this course.
- Select the section to which this lecture will be assigned.
- Click Add.
Now, you have added your stages, levels, sections, courses, and lectures. You better get started!!
To Add a New Section : #
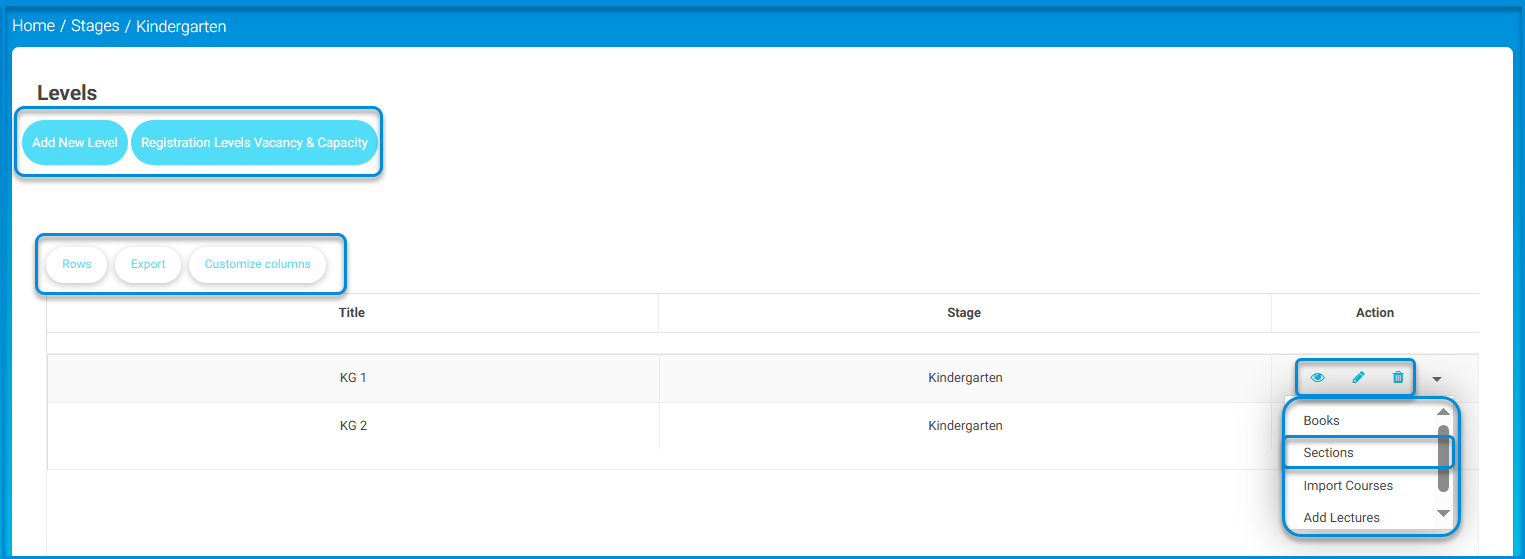

- Click the Add Section button on the Sections page.
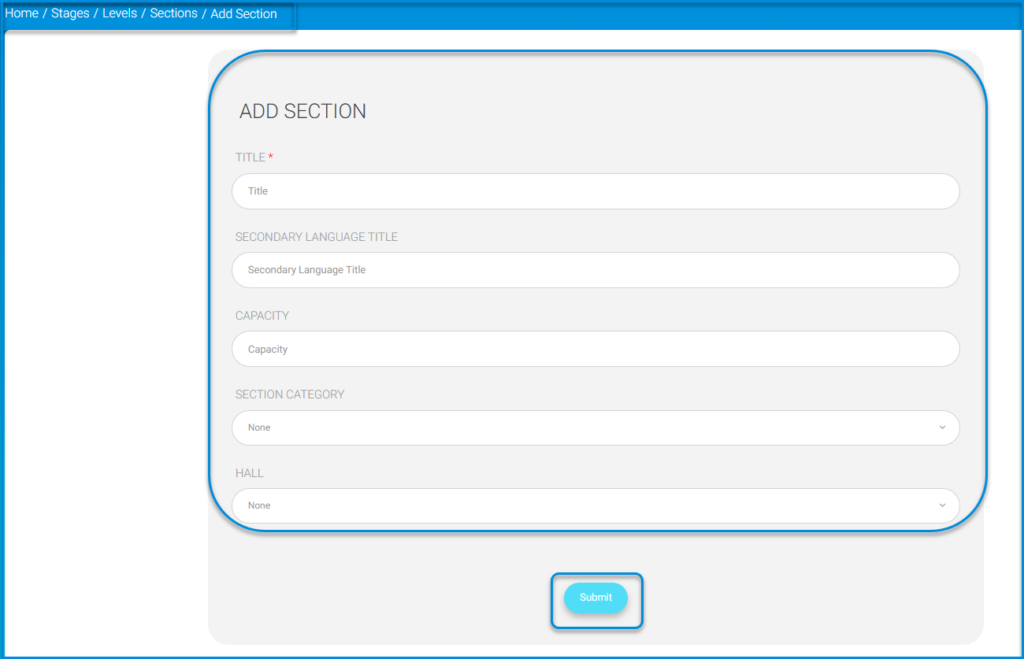
- Add a title for your section, for example, Section A.
- Add the title in the secondary language.
- Determine the section capacity of students, for example, 20 students.
- Select the Section Category.
- Select the Hall of the section. (where this section would take place)
- Click Submit.
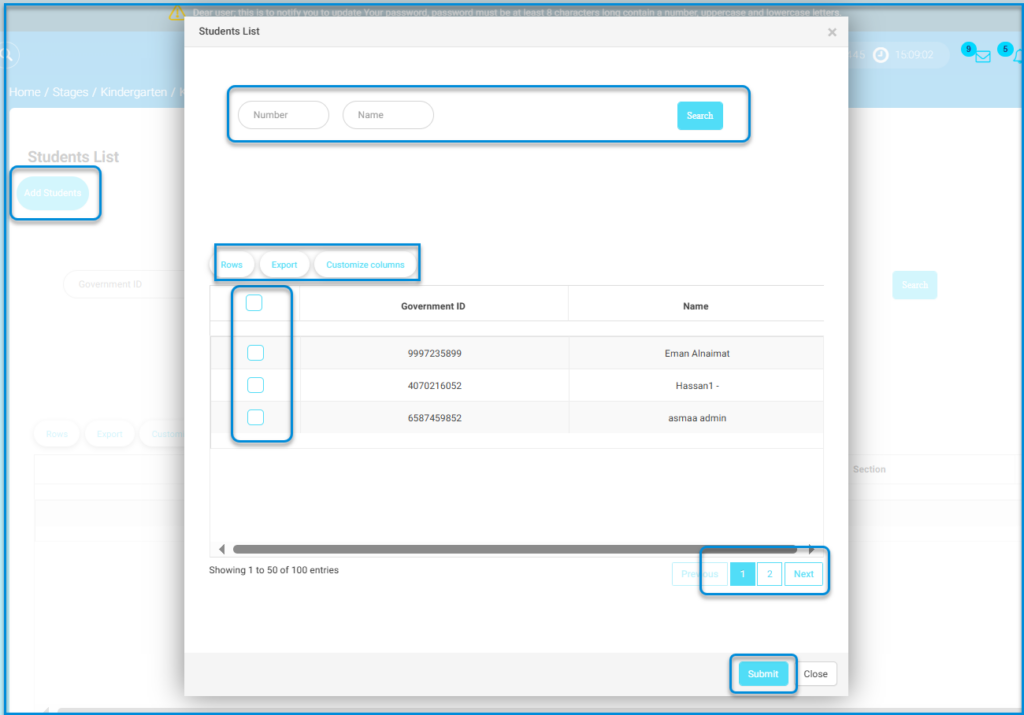
- Your section shows in the Sections table where you can view, edit and delete it. In addition, the small arrow in the Action column enables you to add students and the homeroom teacher to your section.
Note: You may assign students to sections while you add them on the Users >> Students >> Add Student page.
