Table of Contents
This page allows you to set the age limit for the schools levels you have control over. Meaning that no one under or over the age limit you set can register at the school’s level. Main Menu >> Settings >> System Settings >> Registration Settings

Registrations
The system allows the system administrator to control user registration procedures on the main platform and manage its settings by following these steps:
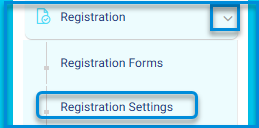
- Click on the “Registration” dropdown in the main sidebar menu.
- The system presents two options from the dropdown menu: “Registration Forms” and “Registration Settings.”
- Click on the “Registration Forms” button to view its main screen:
- The system navigates to the main registration form screen.
- The screen contains tabs for “Forms,” “Archives,” and “Add New Registration Form.”
- The screen includes a table listing all registrations for guardians and students along with their settings.
- Click on the “Registration Settings” button:
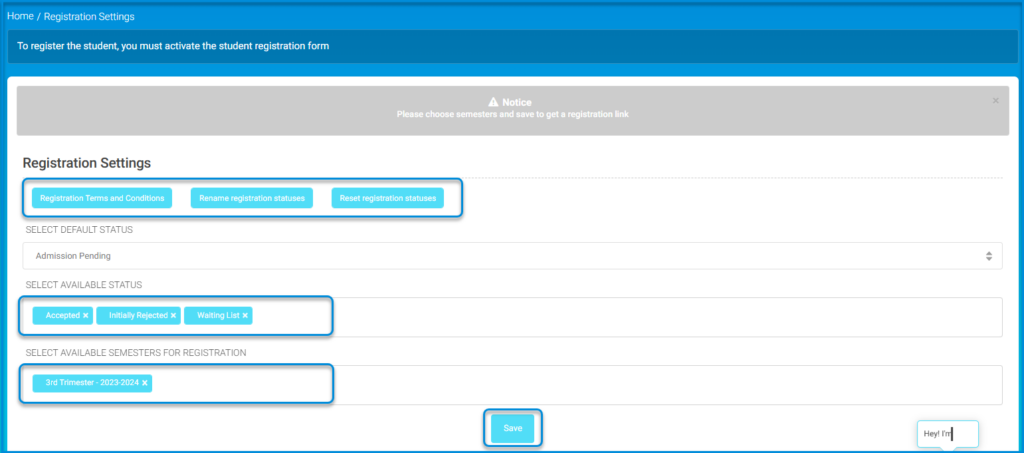
- The system navigates to the main registration settings screen for students and guardians.

Note: To register a guardian, you must activate the guardian registration form. Note: To register a student, you must activate the student registration form.
Registration Settings Include: #
- Terms and Conditions Set by the School for Registration:
- Click on the “Terms and Conditions” button.
- The system moves to the Terms and Conditions screen.
- Enter the specific terms and conditions set by the school in the dialogue box.
- Click the “Save” button when finished.
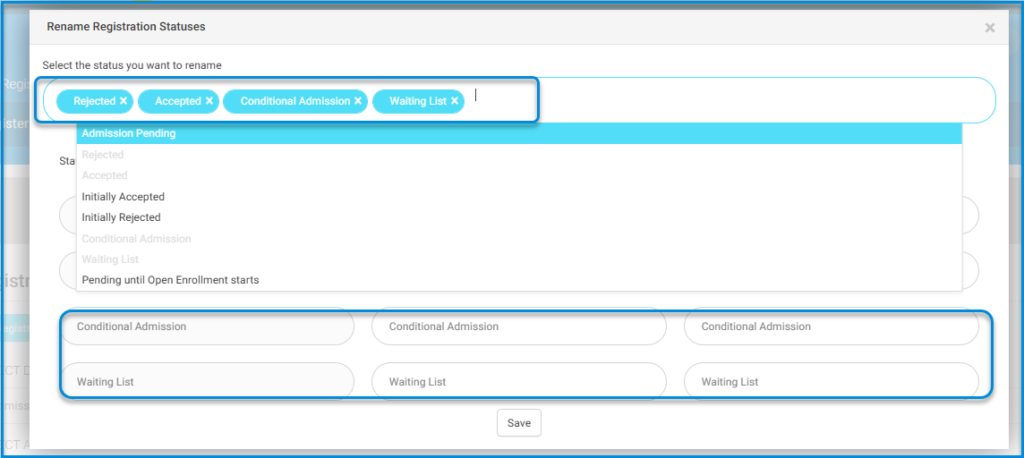
- Rename Registration Status:

- Choose the status to rename from the dropdown menu.
- Click the “Save” button.
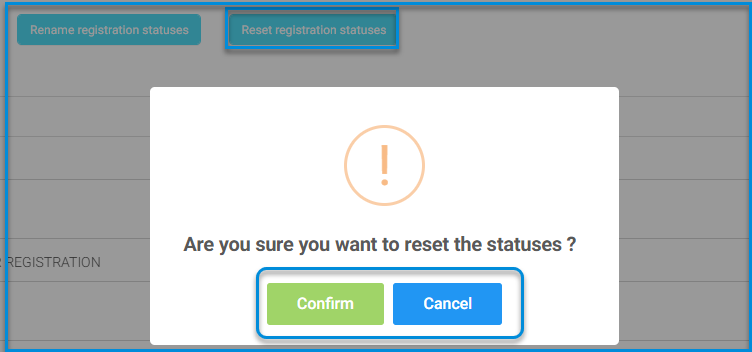
- Reset Registration Status:
- Click on the “Reset Registration Status” button according to administration instructions, with the option to confirm or cancel.

- Select Default Status:
- Click on the dropdown menu to select the default status for the student to determine their acceptance or rejection, etc.
- Select Available Status:
- Click on the dropdown menu to select the available status for the student to determine their acceptance or rejection, etc.
- Select the Academic Semester for Registration:
- Click on the dropdown menu for academic semesters.
- Select the specified semesters for registration.
- Save Settings:
- After finishing the settings, click on the “Save” button.


