Table of Contents
The system allows you to add courses to the main platform through the system administrator account, following these steps:
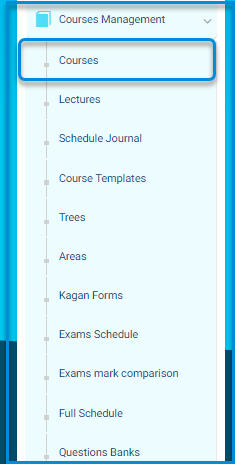
- Click on the Courses Management drop-down from the sidebar menu.
- Click the ‘Courses’ button to navigate to the screen for courses and their contents.
Main Menu >> Courses Management >> Courses >> Add Course
To Add a Course : #

- Select the course category.
- Type a title for the course.
- Type the secondary language title for the course.
- Type the course number.
- Select the level for the course.
- Choose a course template from the drop-down list.
- Type the order of the course in the report card.
- If you are going to apply for school GPA, you need to fill in the Credit Hours option, as it’s related to the GPA equation.
- Add a pass mark for the course. This option is related to the student’s course failure report.
- Check the Hide In Grade Reports checkbox to hide the subject from the report card.
- Choose an icon for your course.
- Click Add.
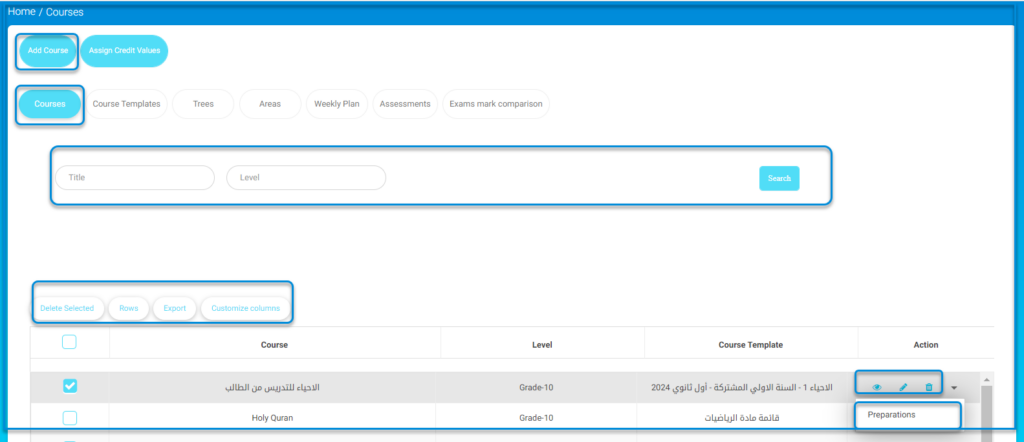
- Click the Add Course button to create a new course.
- Use the Assign Credit Values button to manage or assign credit values for courses.
- Use the Title and Level fields to filter the course list and click the Search button to display the relevant results.
- Click the Delete Selected button after selecting courses with the checkboxes to remove them.
- Adjust the number of rows displayed by clicking the Rows button.
- Export the list of courses by clicking the Export button.
- Customize the columns visible in the table by clicking the Customize Columns button.
- Use the Preparations button in the Action column to manage course preparations.
- Click the Edit icon in the Action column to update course details or the Eye icon to view course information.

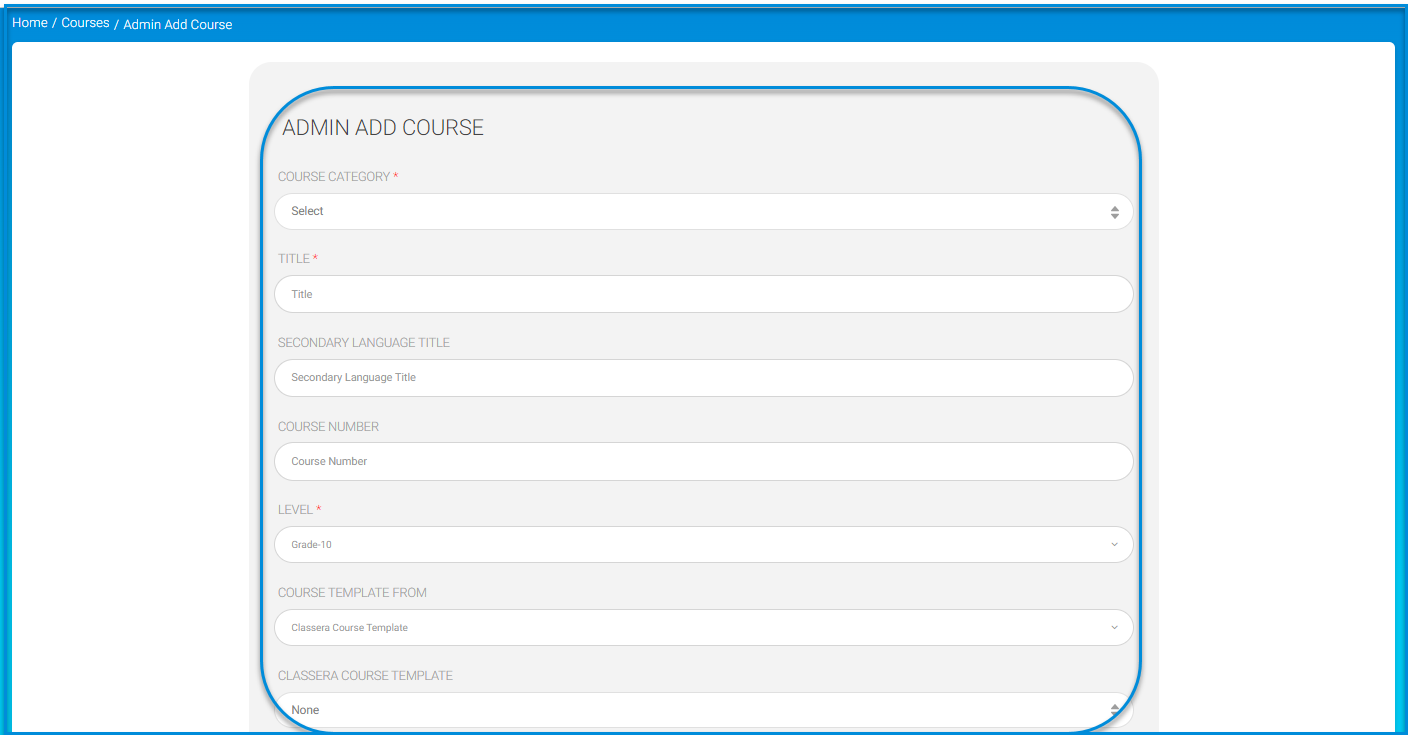
- Select the appropriate category for the course from the Course Category dropdown.
- Enter the course name in the Title field.
- If applicable, provide a secondary language title for the course in the Secondary Language Title field.
- Enter a unique identifier for the course in the Course Number field.
- Select the course level from the Level dropdown.
- Choose a template for the course from the Course Template From dropdown if applicable.
- Specify the Classera Course Template if required.
- Fill in any additional fields as necessary for the course details.
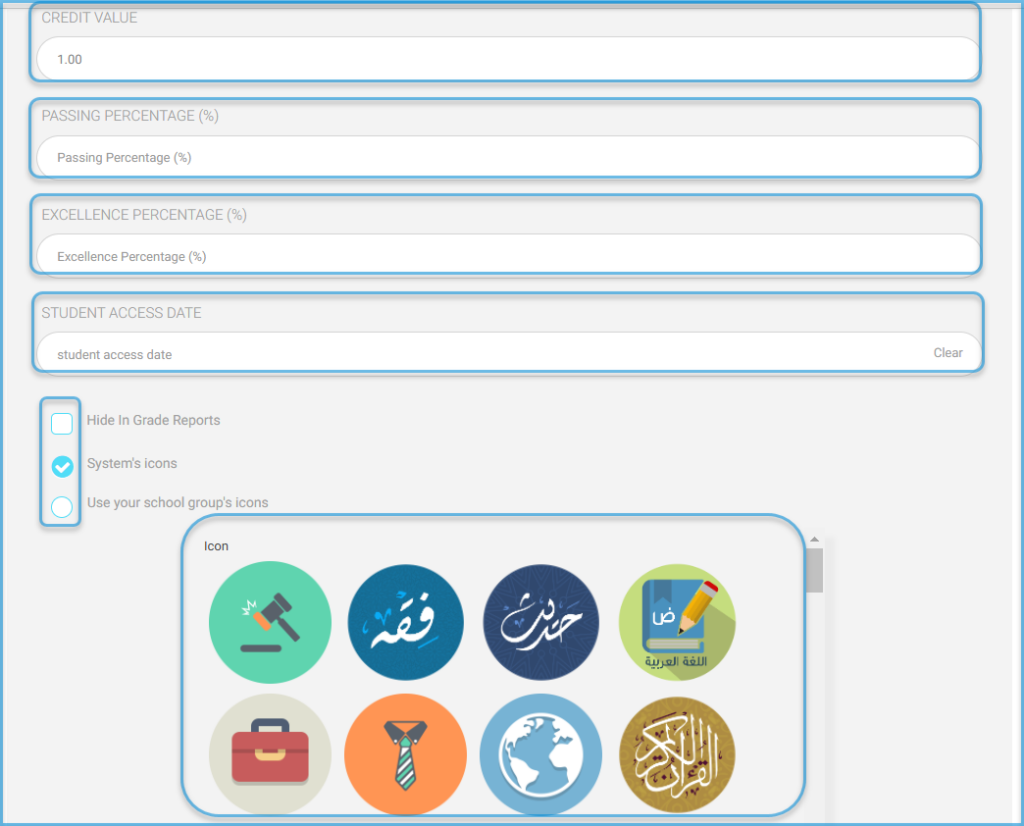
- Enter the value for the course credit in the Credit Value field.
- Specify the minimum passing percentage for the course in the Passing Percentage (%) field.
- Enter the percentage for excellence recognition in the Excellence Percentage (%) field.
- Set the date from which students can access the course using the Student Access Date field. Click Clear to reset the date if needed.
- Check or uncheck the Hide In Grade Reports option to control whether the course appears in grade reports.
- Choose the type of icons to use for the course. Select System’s Icons to use predefined icons or Use Your School Group’s Icons to apply custom icons.
- From the displayed icons, click to select the one you want to associate with the course.
- click the Add button.


Note #
The teacher will be able to add the courses, but they will only appear in the student’s account on the specified date.
The course will appear as inactive for the student until a specific time, allowing the student to be aware of the start date of the activities of this course.


