Table of Contents
The initial screen displayed upon opening the bus tracking application allows you to easily add and track schools’ buses and arrange trips. It helps parents monitor the bus trips and their details.
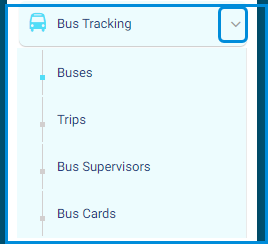
To Add a Bus: #
- Click the Bus Tracking tab from the main menu.
- Click Buses.
- Click the Add New Bus button.
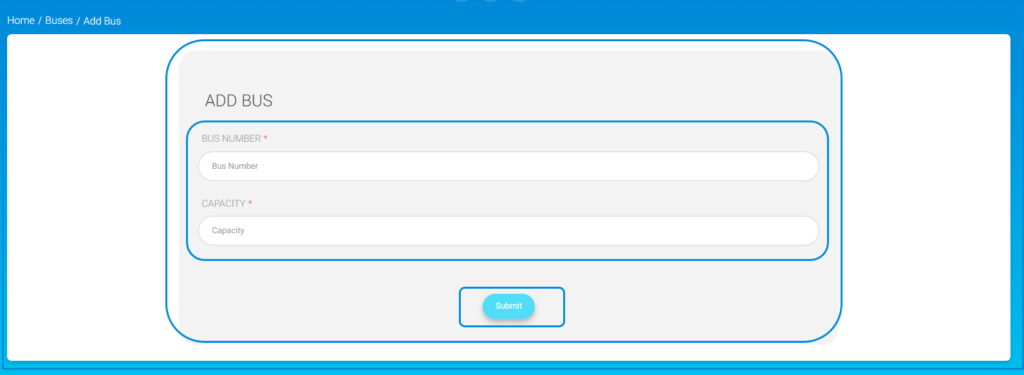
- Type the bus number.
- Type the bus capacity.
- Click Submit.
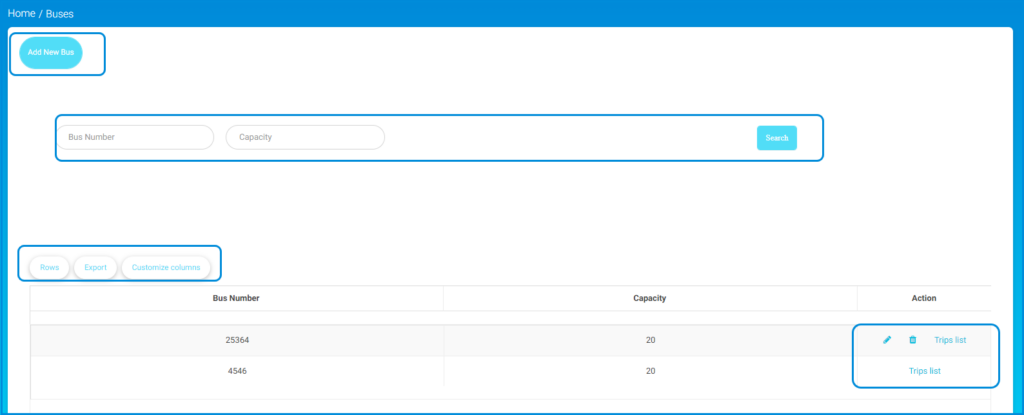
You can easily edit or delete the added buses in the Action column in the table.
To Add Trips: #
- Click the Bus Tracking tab from the main menu.
- Click Trips.
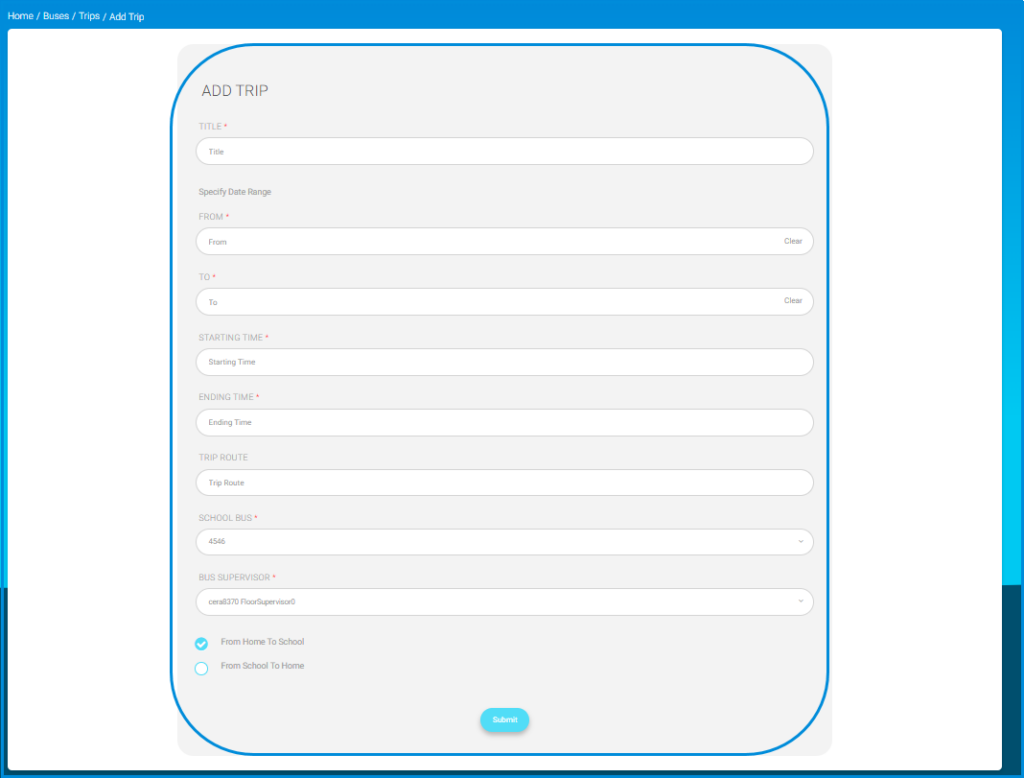
- Click the Add New Trip button.
- Type the title of the trip. (It’s recommended to type whether it is a morning trip or a night trip.)
- Set the date of the trip using From and To fields.
- Set the starting and ending times of the trip in the corresponding fields.
- Type in the Trip Route.
- Choose the bus from the drop-down list.
- Choose the bus’s supervisor from the drop-down list.
- Check the trip type checkbox.
- Click Submit.
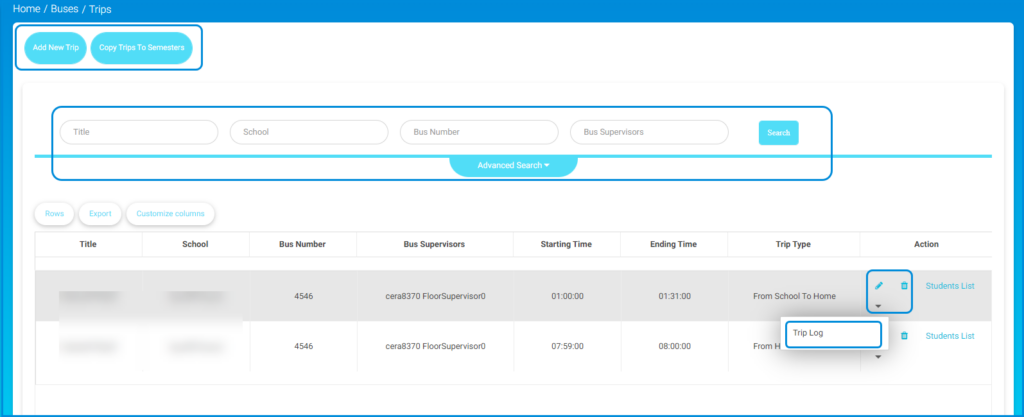
To Add Students to the Bus Trips: #
- Click the Bus Tracking tab from the main menu.
- Click Trips.
- Click the Students List from the Action Column in the table.
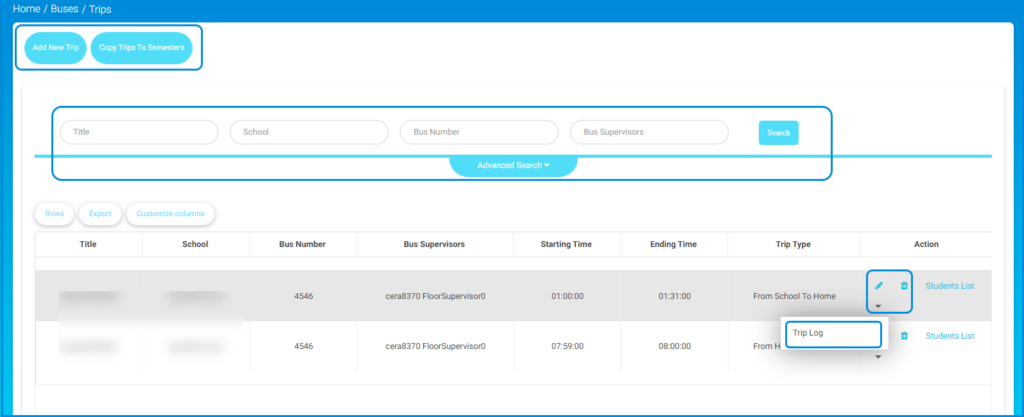
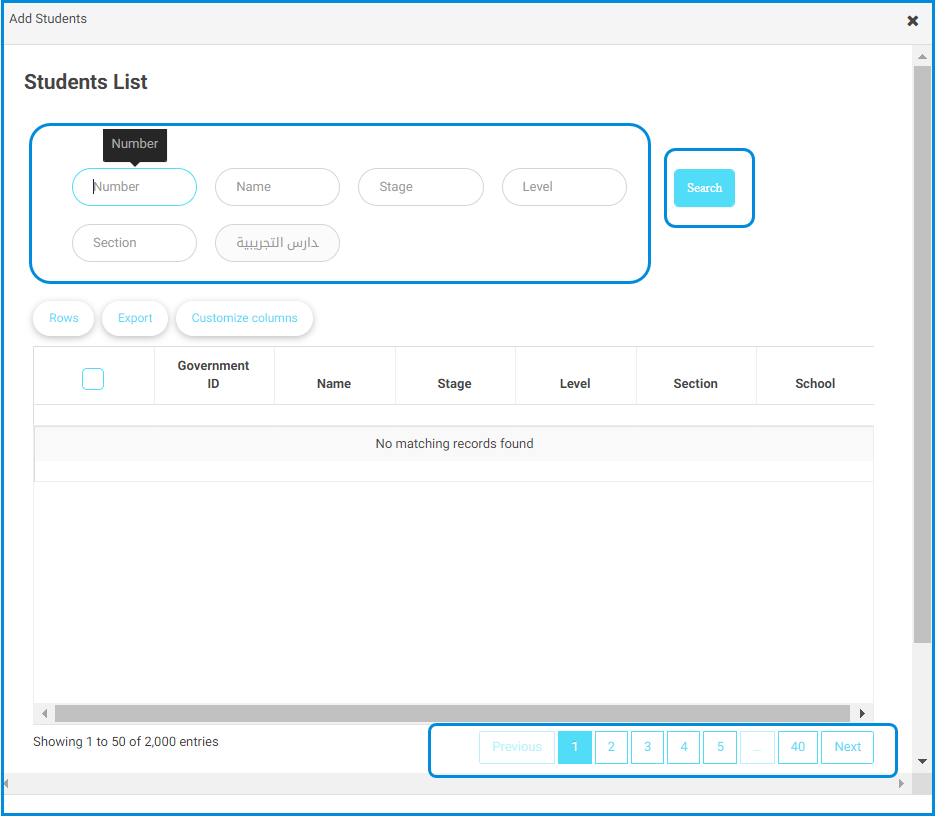
- Click the Add Students button.
- Select the students you want to add to this trip.
- Click the Add button.
To View Buses’ Supervisors: #
- Click the Bus Tracking tab from the main menu.
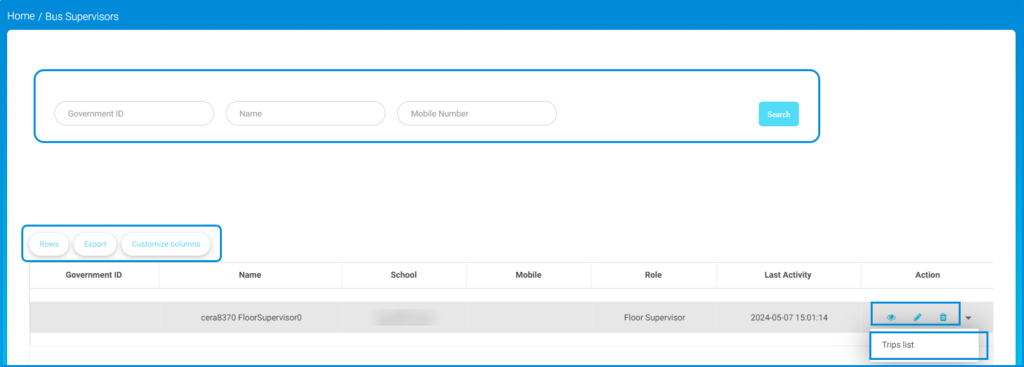
- Click Bus Supervisors.
- Click the arrow in the Action column next to the supervisor you want.
- Click the Trips List button.
- Now you can view all the trips assigned to the chosen supervisor.
To View Bus Cards: #
- Click the Bus Tracking tab from the main menu.
- Click Bus Cards.
- Cards of all students added to the bus trips show.
- You can search for the card you want by the student name, ID, or by level and section.


