AI Overview #
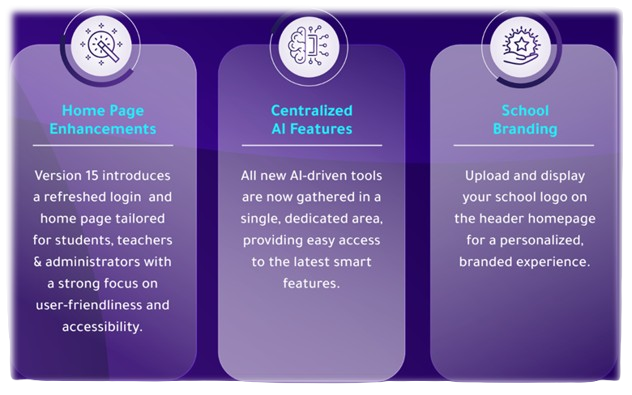
1. General updates #
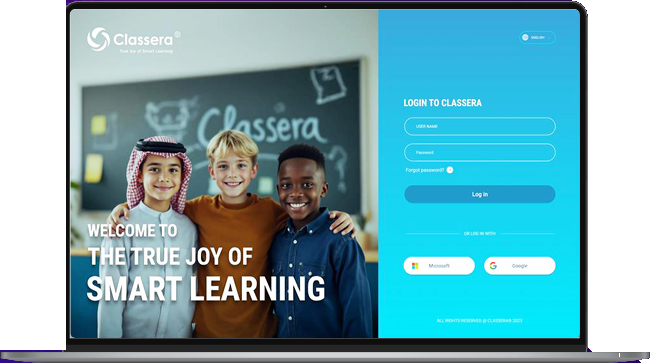
A. Redesigned Login Screen #
- Enhanced User Experience:
- The login screen is redesigned for a better, more inclusive experience.
B. Innovated Redesigned Homepage #
- Diverse User Needs:
- Tailored to suit all types of Classera users.
- Accessibility Standards:
- Compliant with universal accessibility standards for ease of use.
- Smooth Navigation:
- Simplified interface for seamless access and usability.
Dynamic Dashboard #
Chart Type Customization: Switch between different chart types for each widget.
Resizable Charts: Adjust the size of charts to prioritize the most important data.
Flexible Layout: Move and arrange charts within the dashboard for better organization.
2. System Administrator Updates #
A. AI Settings #
This screen allows administrators to manage AI service settings for books, announcements, and course content, enable or customize sharing options, and activate additional content services.
1. Activating the AI Service #
To open AI Settings:
- From the following path: main left-side menu >> Settings >> System Settings, scroll down till you find AI Settings
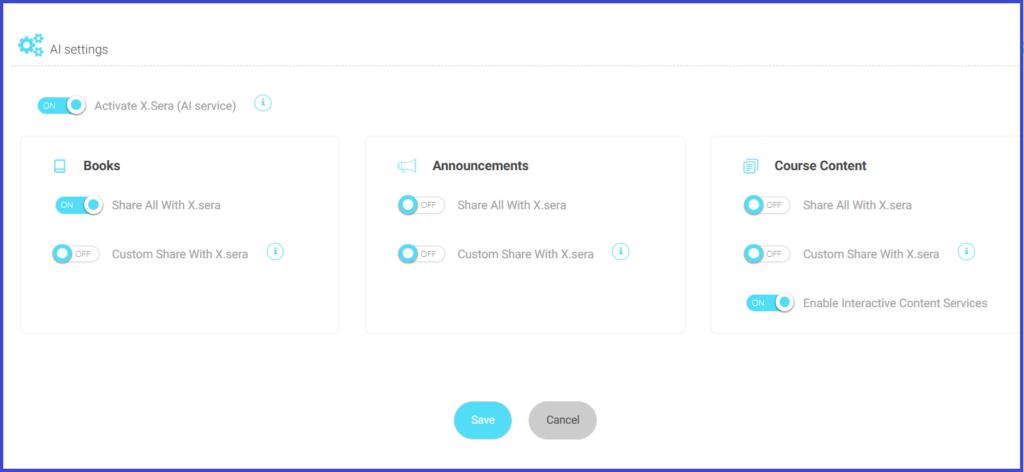
To use the AI Settings screen effectively, follow these steps:
- Use the Activate X.Sera (AI service) toggle to enable or disable the AI service across the platform.
- In the Books section, toggle Share All With X.Sera to share all books with the AI service. If needed, enable Custom Share With X.Sera to configure specific sharing settings for books.
- In the Announcements section, toggle Share All With X.Sera to allow the AI service to access all announcements. Enable Custom Share With X.Sera for more tailored sharing configurations.
- In the Course Content section, toggle Share All With X.Sera to grant the AI service access to all course content. Use Custom Share With X.Sera for selective sharing. Enable Interactive Content Services to activate additional content-related AI features.
- Once the desired settings are configured, click the Save button to apply the changes. To discard any modifications, click the Cancel button.
2. Disabling the feature for some users or groups: #
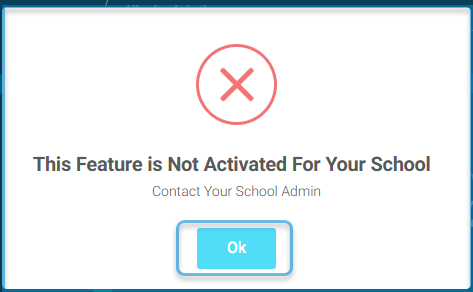
If a user attempts to access a feature that the system administrator has not activated, the following error message will appear:
"This feature is currently unavailable. Please contact your system administrator to activate it."
3. The AI Trial Version Usage Limit #
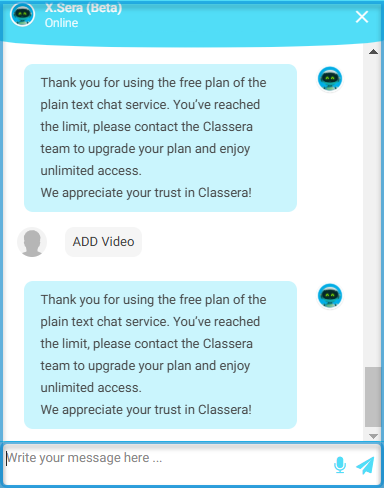
Within the trial version, you have a limited balance usage of the AI features. If your balance reaches the limit, a warning message will appear.
“Thank you for using the free plan of the plain text chat service. You’ve reached the limit, please contact the Classera team to upgrade your plan and enjoy unlimited access.
We appreciate your trust in Classera!”
3. Using the AI Service #
The AI service streamlines educational tasks for teachers, supervisors, students, etc., offering instant assistance, resource management, and automated tools. With features like X.Sera ChatBot, teachers can get real-time guidance, create interactive lessons, and generate exams automatically using uploaded resources such as books, videos, and question banks. The AI ensures a dynamic, user-friendly experience tailored to educational needs, improving efficiency and content quality.
AI: Your Personal Assistant Xsera for Instant Support #
Train Your Assistant to Become Your Companion in Your Educational Journey
“YOUR PERSONALIZED AI ASSISTANT FOR REAL-TIME SUPPORT”
Share video lectures, course materials, and presentations with X.Sera for
targeted assistance.
Upload books, announcements, and resources to keep students informed
and well-resourced.
Features Available to All Users (Teacher, Student, etc.):
Users can interact with the personal assistant Xsera by asking questions related to:
- Content: Queries about uploaded educational materials.
- Announcements: School or platform-wide notices.
- Books: Books uploaded in the library section.
To open the new AI service:
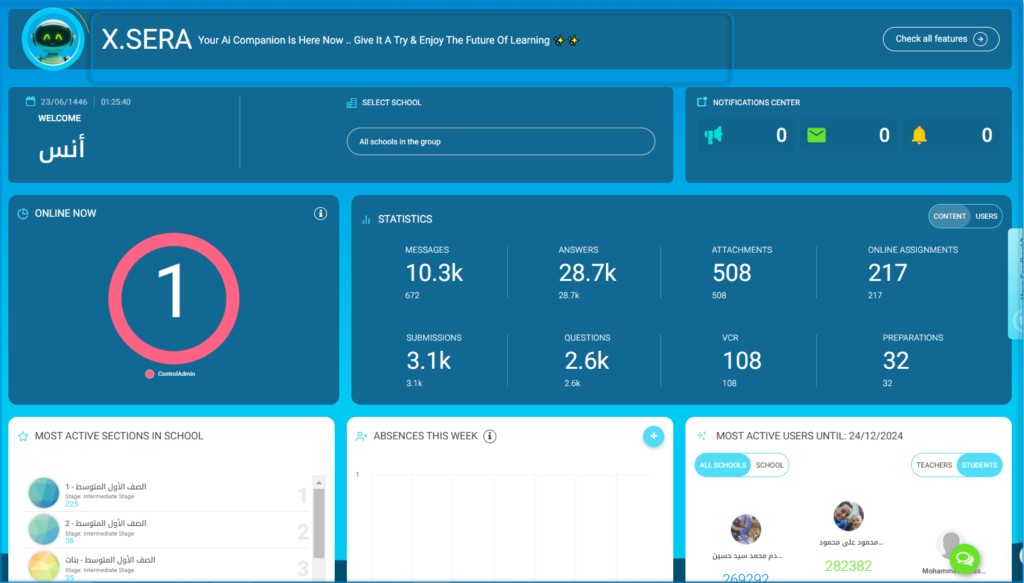
- View the banner to learn about X.SERA, the AI companion, and its features designed to enhance the learning experience.
- Hover over or click anywhere on the X.SERA banner (highlighted with the red rectangle in the above screen), including the icon, text, or surrounding area, to access and explore X.SERA’s features and tools.
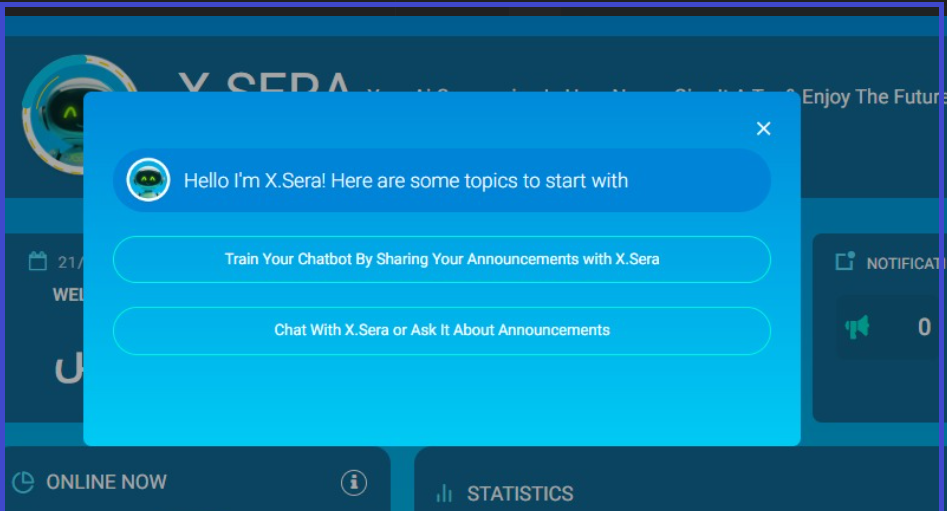
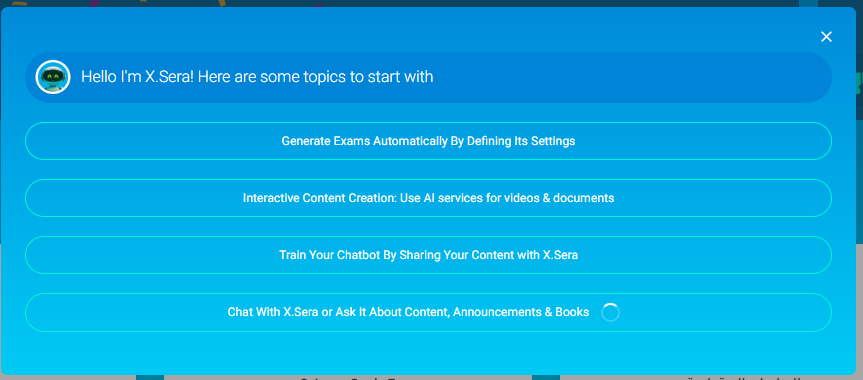
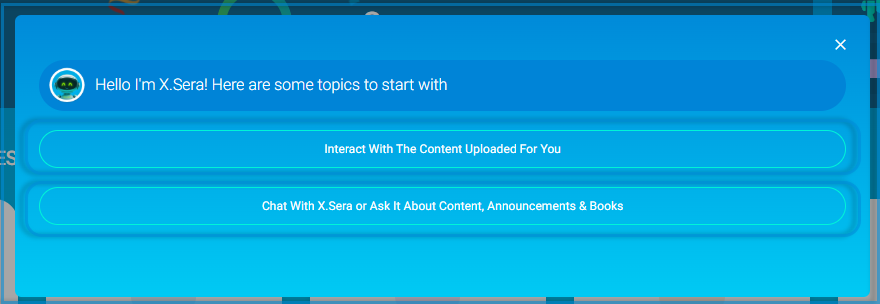
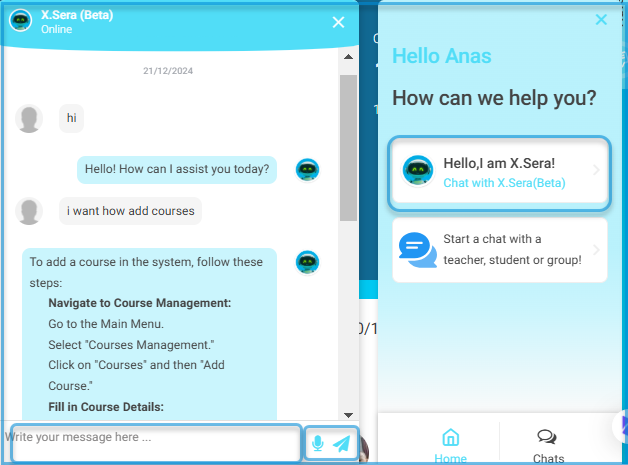
Alternatively, from the side menu, select the Chat bar >> “Hello, I am Xsera.” - Click the Check All Features button to explore the available tools and functionalities provided by X.SERA. According to your role and access rights, the AI features will change.
- Click any of the suggested options, and you will be automatically directed to the the screen related to the suggested feature to work on for amore more user-friendly experience.
Xsera’s Tool Diversity #
The personal assistant supports all types of content in various formats, ensuring a dynamic and personalized learning experience.
The content upload tool will open, allowing you to upload digital content to the ChatBot. Afterward, you can proceed to ask any related questions.
An example for each account demonstrates how AI simplifies their regular daily tasks.
4. Learning & Course Management Enhancements #
- Customizable & Static Weekly Plans
– You can adjust the weekly plan table borders according to your preference for a personalized look.
– Seamlessly add, view, and manage static weekly plans. - Enhanced Registration Statuses
Change registration statuses’ names based on your school’s preferences. - Course Icon Uploads
Easily upload course icons for custom visuals, making course navigation more intuitive. - Lesson Preparation Sharing
Share lesson preparations across multiple sections, even in numerous schools, simplifying lesson planning. - Shared Study Plans
Teachers can share their study plans with their colleagues. - Dynamic Student Cards
Access essential student information at a glance with a customizable design, allowing you to select the details to easily display and print. - Transform Data Into Actionable Insights
- Claims Reports
- Track and manage claim statuses comprehensively.
- Progress Report Summary
- Display average passing and excellence rates across course levels, providing a quick performance overview.
Teacher’ s Account Powered by AI #
The teacher’s account, enhanced by AI, empowers educators to streamline their daily tasks. From creating interactive lessons to auto-generating exams and accessing real-time assistance through X.Sera, the AI tools provide a personalized, efficient, and engaging teaching experience.
Exams Creation Powered by AI #
Teachers start by consulting X.Sera for guidance (Screen 1), prepare supporting resources like books (Screen 2), manage and access their exams (Screen 3), and finally use AI tools to generate exams with specified options automatically (Screen 4). This streamlined workflow enhances efficiency and ensures high-quality exam content.
To create exams powered by AI:
- From the following path: main left-side menu >> Settings >> System Settings, scroll down till you find AI Settings
- Hover over or click anywhere on the X.SERA banner (highlighted with the red rectangle in the above screen), including the icon, text, or surrounding area, to access and explore X.SERA’s features and tools.
Alternatively, from the side menu, select the Chat bar >> “Hello, I am Xsera.” - Click the Check All Features button to explore the available tools and functionalities provided by X.SERA. According to your role and access rights, the AI features will change.
- Select the Generate Exams Automatically by defining its settings option.
- Navigate to the “Exams” section and click on Create a New Exam Automatically.
- Configure exam settings, including subject, topic, area, and difficulty level, using resources such as question banks, books, and videos.
- Click Generate to create the exam automatically, preview the questions, and finalize publishing options.
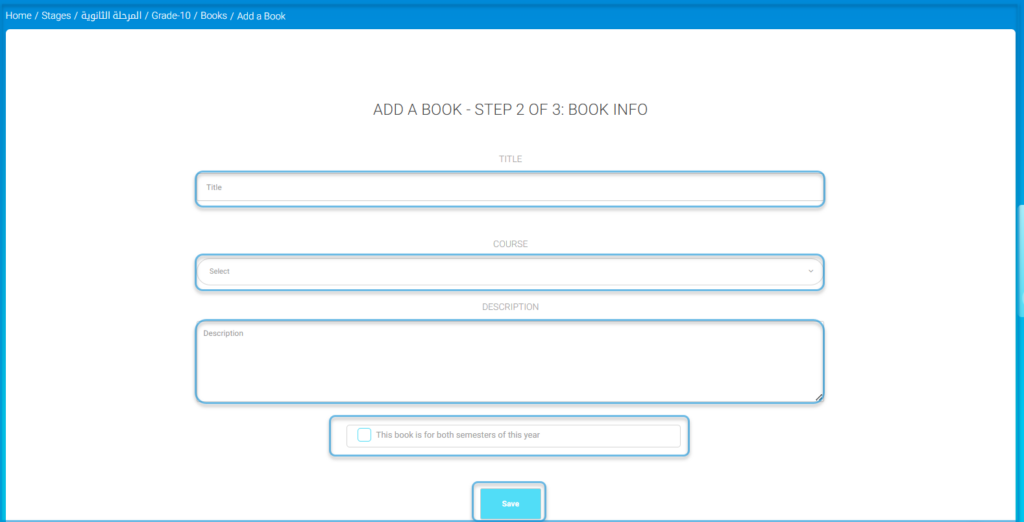
This screen allows teachers to upload relevant resources, such as books, into the system. These uploaded books can later be used to generate exam questions. Teachers provide the title, associate the book with a course, and write a description to ensure accurate categorization and usability.
Step 1:
AI: Auto-Generated Exams #
“CUSTOMIZED AND ADAPTIVE EXAMS FOR SMARTER ASSESSMENTS Personalized Exam Creation: Teachers customize exams by selecting
specific topics, learning objectives, and lessons.
Resource Selection: Choose from books, videos, or public question banks for a rich question base.
Flexible Parameters: Set the number of questions, difficulty levels, and more.
- Prepare exams based on specific educational resources and question banks within moments.
- Specify the test options in terms of the number of questions (minimum of 10), their types, the type of test, and the difficulty level.
- Specify the videos for which you want to share questions, provided the ‘Share with Xera’ option has been selected.
- Based on the books uploaded to the system, specify the book or multiple books.
- You can also select specific pages from the book.
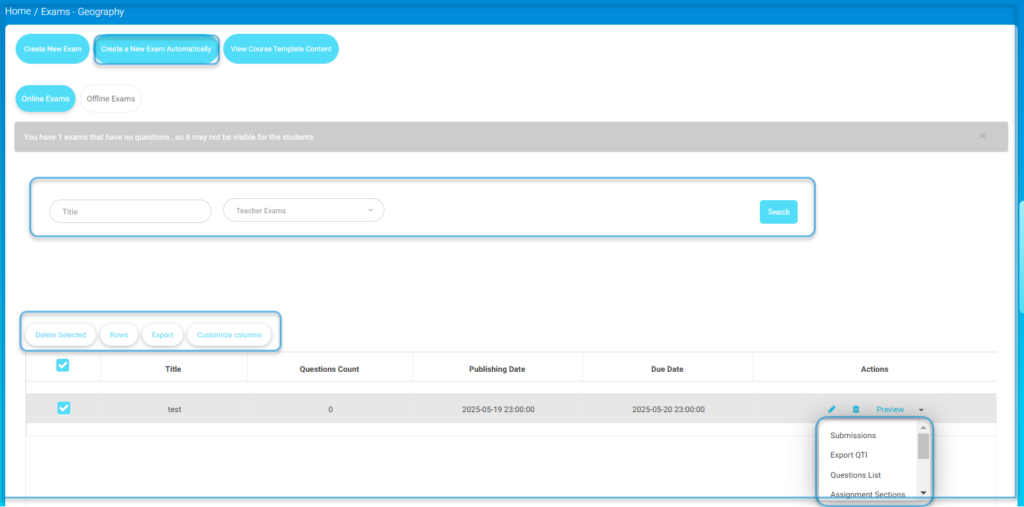
Teachers access the exams management section, where they can manage, search, and create exams.
A detailed list appears displaying the available options for creating exams, including:
- Options include Create New Exam (manual), Create a New Exam Automatically (AI-powered), and viewing previously created exams.
- The New Exam Screen opens.
Step 2
New Exam Settings #
This screen allows teachers to upload relevant resources, such as books, into the system. These uploaded books can later be used as a basis for generating exam questions. Teachers provide the Title, associate the book with a Course, and write a Description to ensure accurate categorization and usability.
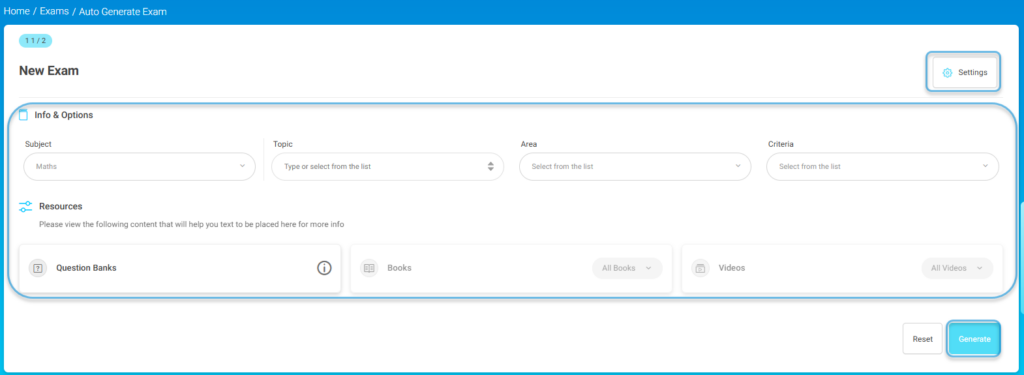
- Select the Subject for the exam from the dropdown menu.
- Choose the Topic, Area, and Criteria to define the scope and focus of the exam.
- Under Resources, select the relevant materials for question generation:
- Click on Question Banks to choose from available question sets.
- Use the Books dropdown to include content from specific books.
- Select Videos if applicable, to generate questions based on multimedia content.
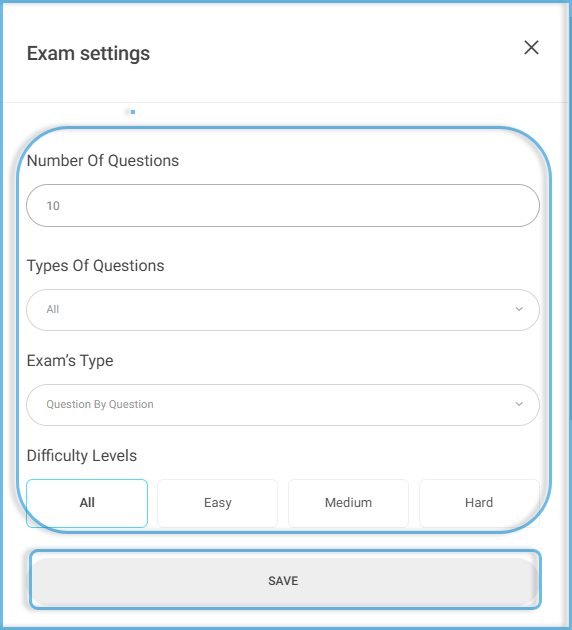
- Adjust additional exam settings by clicking the Settings button in the top-right corner.
- Specify the test options in terms of the number of questions (minimum of 10), their types, the type of test, and the difficulty level.
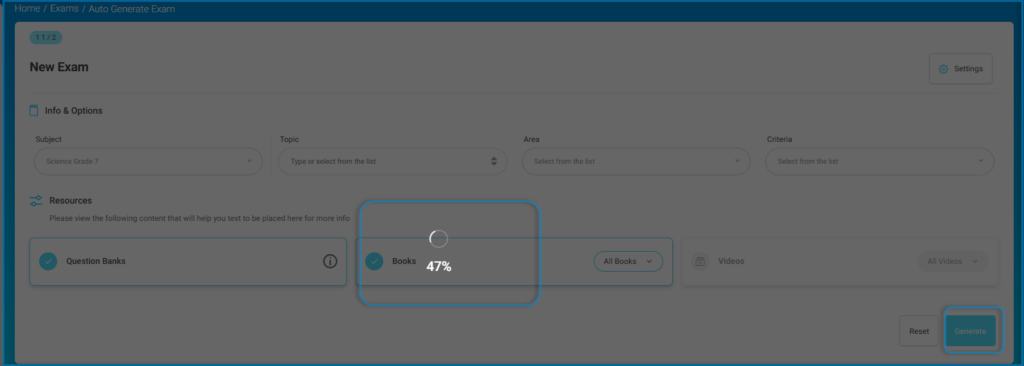
- Click the Generate button to create the exam based on the selected criteria and resources.
- Question generation begins, and the question preview screen is displayed.
- Use the Reset button if you need to clear all inputs and start over.
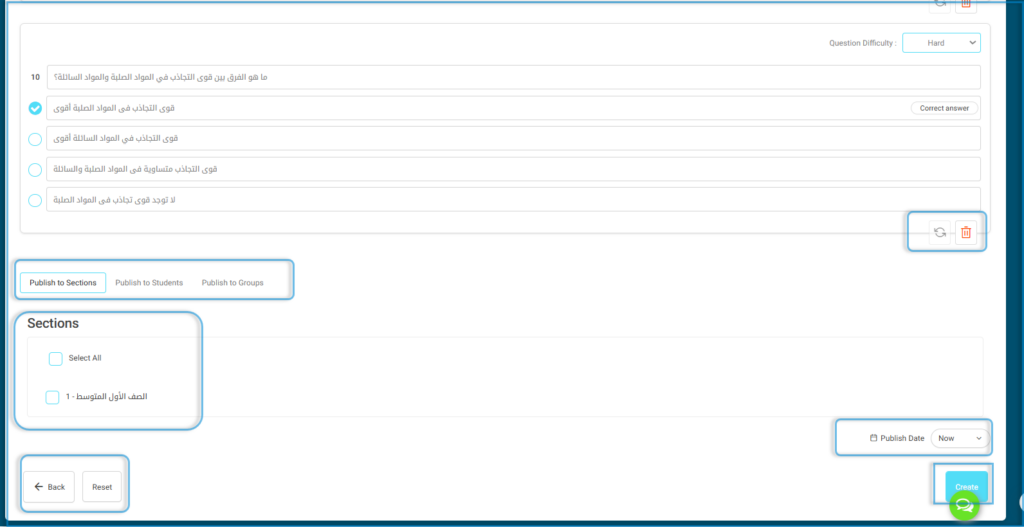
Note: At the end of the questions, publishing options and the publication date can be specified.
Then, click the “Add” button to add the exam.
AI: Interactive Lesson Creation #
“ENGAGE STUDENTS WITH AI-POWERED, MULTI-FORMAT LESSONS”
AI Content Enhancement: Generate interactive lessons in text, PDF, and video formats.
Interactive Lesson Creation
Automatic Lesson Assets: Instantly generate descriptions, topics,
questions, and learning outcomes.
Enhance your teaching experience with AI-powered content creation! Teachers can now transform video lectures hosted on Vimeo into interactive, engaging educational materials. Select any video on Vimeo, and our AI tools will help you generate detailed, dynamic content that goes beyond traditional learning.
Teachers can now create AI-powered content for various types of materials across multiple libraries, including:
- Course Attachments
- Audio Library
- Presentation Library
- Documents Library
The results will appear in the teacher’s account, allowing them to modify AI-related settings as needed.
Additionally, students can browse the content interactively. They can watch, learn, and interact effortlessly, bringing a new level of engagement to their educational journey!
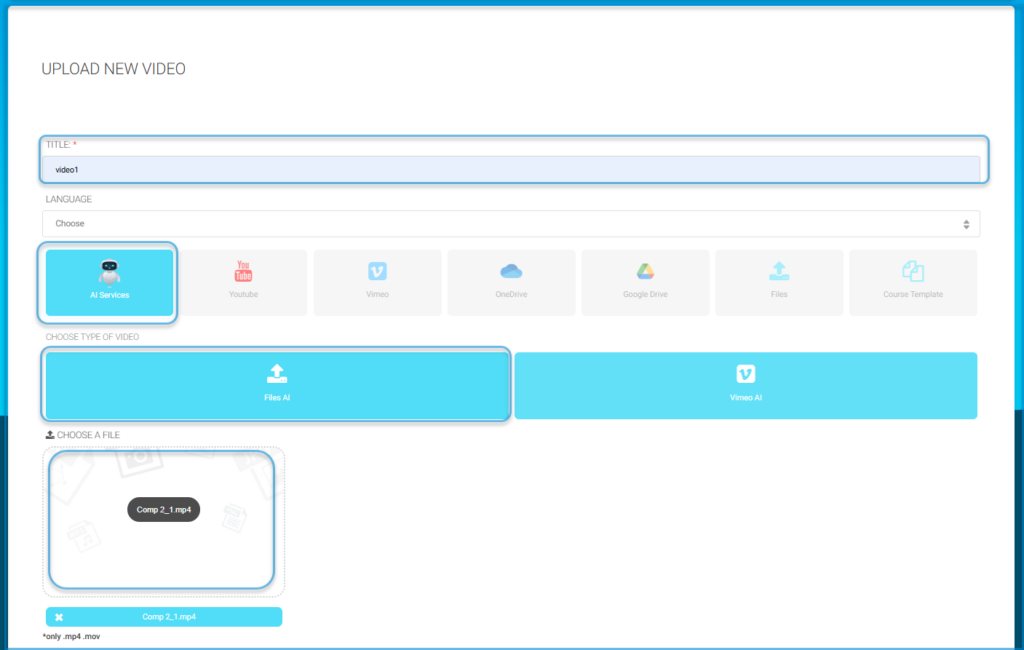


The following steps will guide you in successfully uploading a new video and associating it with AI services or other content sources.
- Enter the Title of the video in the provided field. This is a mandatory field.
- Select the Language for the video content from the dropdown menu.
- Choose the source of the video:
- Click on AI Services to upload the video for AI-powered processing.
- Select other options like YouTube, Vimeo, OneDrive, Google Drive, Files, or Course Template based on your preferred source.
- Under Choose Type of Video, select the appropriate option:
- Files AI if you are uploading a file for AI processing.
- Vimeo AI for AI-based content from Vimeo.
- In the Choose a File section, upload your video file by dragging it into the designated area or clicking to browse and select the file from your computer. Ensure the file is in an accepted format like
.mp4or.mov. - Confirm that the file appears in the upload section and proceed as required by the platform.


