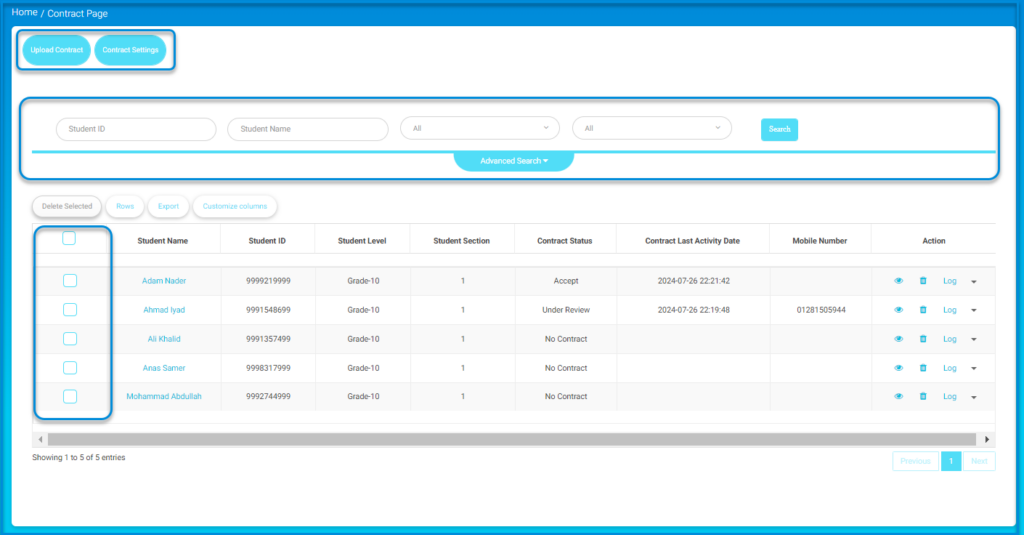
This screen allows users to manage student contracts by filtering records, uploading contracts, adjusting settings, exporting data, and viewing activity logs or detailed information for each student. The following steps will help you navigate, filter, and manage student contract data efficiently.

To use this screen effectively, follow these steps:
- Use the Student ID and Student Name fields to filter records by entering relevant information, then click the Search button.
- To apply more specific filters, click the Advanced Search dropdown and select criteria such as grade level or section.
- To upload new contract documents, click the Upload Contract button.
- Manage contract settings by clicking the Contract Settings button.
- To perform bulk actions, select the checkboxes next to the students and click Delete Selected to remove selected entries.
- Adjust the number of visible rows using the Rows button or customize the table columns by clicking the Customize Columns button.
- To export the displayed data, click the Export button.
- Review details of each student, such as their Contract Status and Contract Last Activity Date, in the table.
- Use the Log button in the Action column to view the activity log or click the Eye icon to view specific details of a record.


