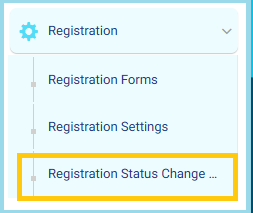
From the main menu:
- Open the Registration dropdown list.
- Select Registration Status Change Logs.
Filtering Registration Status Change Logs
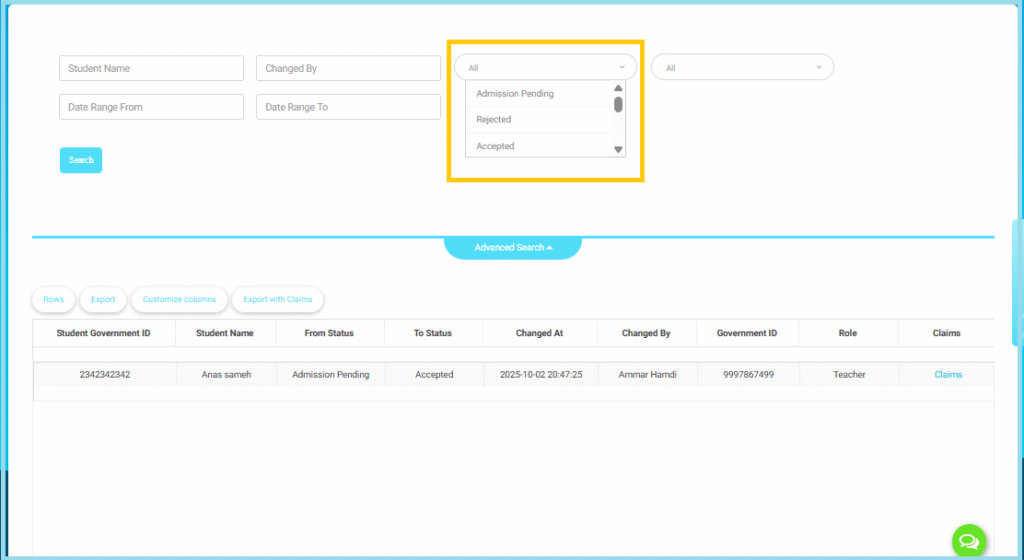
Once you open the Registration Status Change Logs page, you can use the advanced search panel to filter and view specific status-change records.
Open the Filters:
At the top of the page, you will find several search fields used to filter the logs.
Select the Registration Status:
Use the Status dropdown menu (highlighted in the screenshot) to filter by one or more status values, such as:
- Admission Pending
- Rejected
- Accepted
- Any additional statuses configured by the school
You may select:
- A single status
- Multiple statuses at the same time
2. Additional Search Filters
You can also filter logs using any of the following fields:
- Student Name
- Changed By
- Date Range (Date Range From, Date Range To)
Additional Dropdowns:
Depending on system configuration, you may see other dropdowns such as grade, stage, or type.
3. Viewing the Results
After selecting the filter criteria:
- Click Search
- The filtered results will appear in the table below, showing:
- Student Government ID
- Student Name
- From Status (previous status)
- To Status (new status)
- Changed At (date & time of the update)
- Changed By (staff member who made the change)
- Government ID
- Role
- Claims (if there are any linked claims or notes)
4. Additional Actions
- Export
- Customize Columns
- Export with Claims
5. Best Practices
Combine Status and Date Range filters to track changes during critical stages of the admission cycle.
Use Date Range to avoid loading large amounts of data during peak admission periods.
Use the Changed By filter when reviewing internal errors or disputes.