1) Student Registration: Automatically Unarchive Students Once Edited #
This feature streamlines student admission workflows by providing an automated option to unarchive students whose registration details are updated. By eliminating manual unarchiving, it ensures that administrators and admission officers can track registration modifications for new semesters and stay informed of profile updates through immediate notifications.
This feature is available to System Administrators and Admission Officers.
Configuring and Using the Unarchive Feature #
To activate the automatic unarchive option and manage registration changes, follow these steps:
1. Activating the Setting
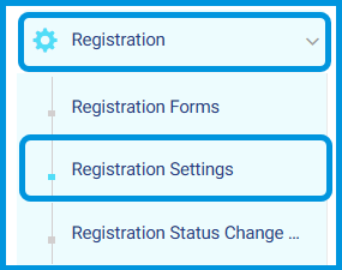
1- Go to the side menu and select Registration.
2- Click on Registration Settings.
3- Locate the checkbox option: Automatically unarchive students once edited.
4- Select the checkbox and click Save.

2. Modifying Archived Registrations
- Navigate to the archived students section using your access path:
a. Admins: Side Menu > Students > More Actions > Registration Approval > Archive.
b. Admission Officers: Side Menu > Registration Approval > Archive.
- Locate the archived student profile and apply your edits.
- Review the system behavior based on your configuration:
a. If the setting is enabled: The student’s record will automatically unarchive immediately upon saving the edits.
b. If the setting is disabled: The student’s record remains archived.

Note: Any update made to an archived student’s registration profile triggers a system notification to all assigned administrators and admission officers. The notification title appears as: “The archived student [[student’s first and last name]] has been edited”.
2) Exams Creator: Assigning Multiple Exam Creators by Level and Course #
This feature enhances administrative flexibility within student registration by allowing the assignment of multiple exam creators for admission tests. Instead of restricting test creation to a single user, admissions teams can assign several teachers based on specific level and course combinations, optimizing the assessment workflow for new applicants. This feature is available to Admission Officers.
Assigning Multiple Exam Creators #
To assign teachers as exam creators for specific courses and levels, follow these steps:
- Navigate to your dashboard and select Registration Approval.
- Click on the Exams Creator button at the top of the page.

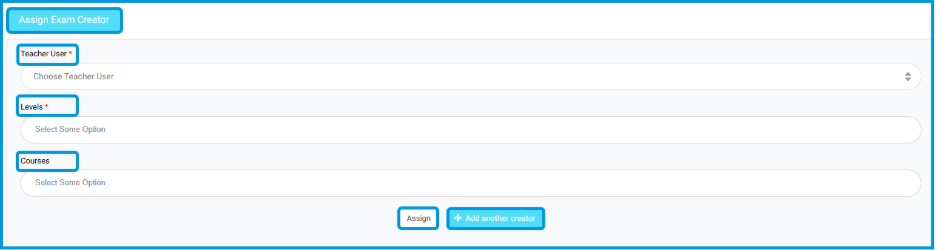
- In the configuration window under Assign Exam Creator, complete the following fields:
a. Teacher User: Type or select the name of the teacher you wish to assign.
b. Levels: Choose one or multiple levels (e.g., Primary 1, Primary 2).
c. Courses: Select the corresponding courses (e.g., Math, Science, English Gr1).
- Click the Assign button to save the configuration for this teacher.
- If you need to designate additional test makers, click the + Add another creator button to enter another set of assignments.
3) Admission Exams Schedule: Advanced Conflict Validation #
This feature enhances scheduling integrity during the student enrollment phase by establishing automated conflict validation. When drafting timetables, the system cross-checks all entries to ensure no student, teacher, or examination hall is double-booked across overlapping timeslots, preventing administrative errors and maintaining accurate scheduling for new applicants.
This feature is available to Admission Officers.
1.Creating and Managing Exam Schedules #
To create an admission exam schedule and view validation steps, follow these steps:
1. Setting up the Schedule Framework
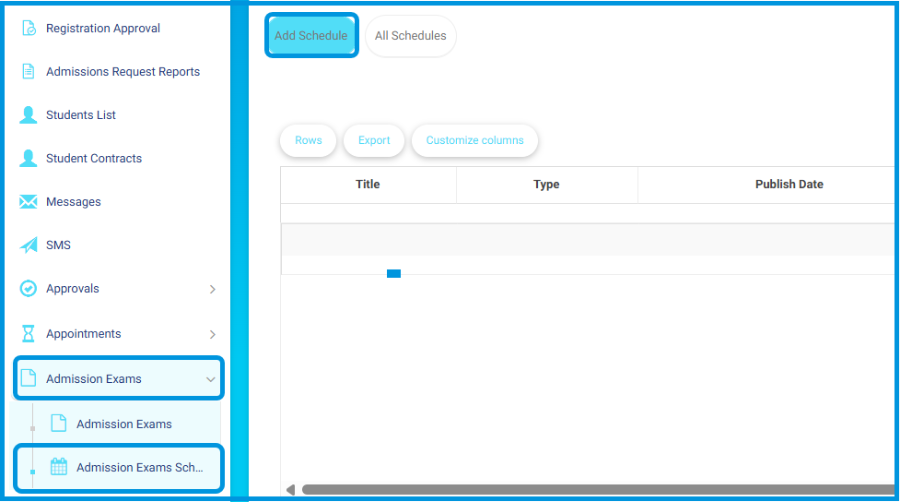
- Go to the side menu and select Admission Exams.
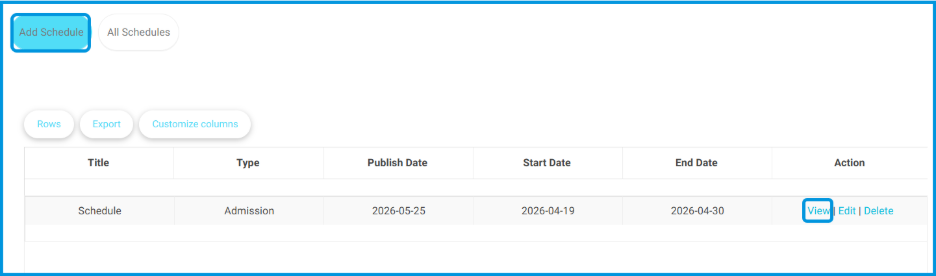
- Click on Admission Exams Schedules.
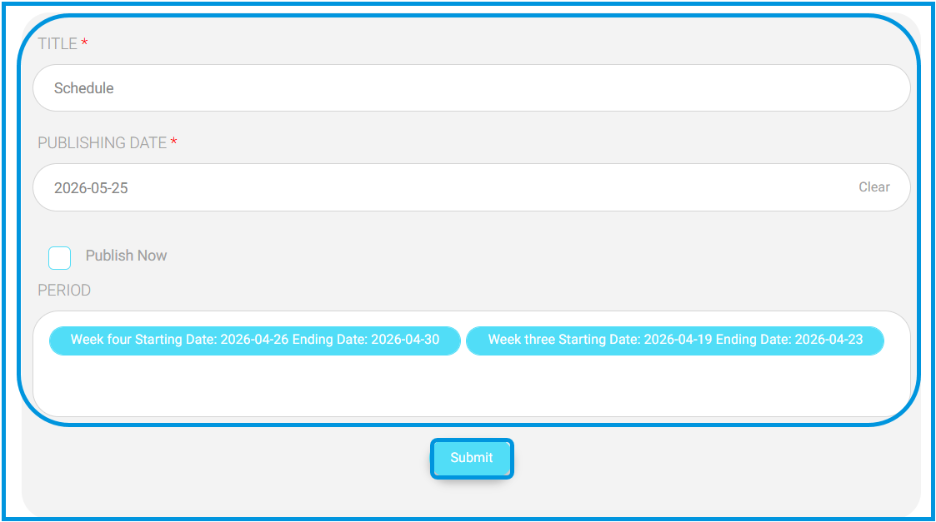
- To build a new schedule framework, click Add Schedule. Fill in the Title, Publish Date, Start Date, and End Date, then click Submit.
2. Adding and Validating Specific Exams #
- Locate your created schedule framework in the table and click the View button under the actions column.
- Click the Add Exam button at the top of the page.

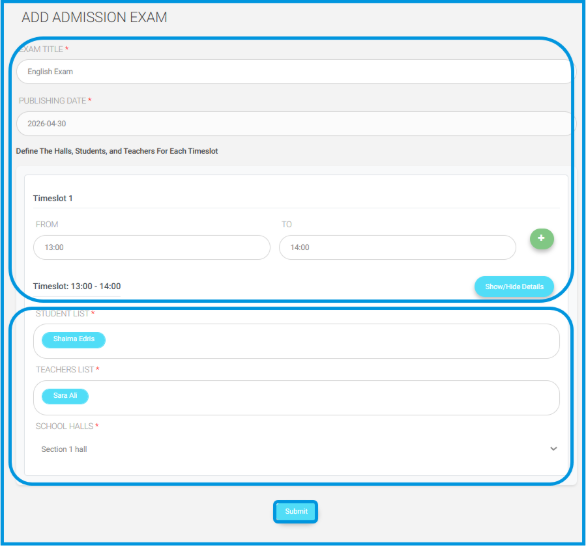
- Fill in the Exam Title and Publishing Date.
- Under the Timeslot section, define the start (From) and end (To) times.
- Add the following parameters for the timeslot:
a. Student List: Select the incoming applicants.
b. Teachers List: Assign the proctoring or assessing teachers.
c. School Halls: Designate the examination room.
- Click Save to finalize the timeslot.
Automated System Restrictions
To prevent human error, the system will actively scan your entries for overlaps and immediately block submissions if any of the following conflicts occur:
- Student Conflicts: Assigning a student to multiple examinations running during the exact same timeslot, or overloading a student’s daily capacity.
- Teacher Conflicts: Booking a proctoring teacher for more than one exam at the same time.
- Venue Conflicts: Assigning the same school hall to overlapping examinations.
Note: If a scheduling conflict is identified, the system will display a clear validation error on the screen and prevent the invalid configuration from being saved.


