1) Lesson Preparations: Approving All Preparations at Once #
This feature streamlines the lesson planning workflow by allowing teacher supervisors to approve multiple (or all) lesson preparations simultaneously. Instead of reviewing and approving each submission individually, supervisors can perform bulk approvals, saving significant time and administrative effort.
This feature is available to Teacher Supervisors.
Note: This feature applies only if the administrative setting “Teacher supervisor approve preparations before publishing it” is enabled by the system administrator.
Approving Multiple Preparations Simultaneously #

To approve preparations in bulk, follow these steps:
- Navigate to your Teacher supervisor dashboard.
- Select the target teacher from your list.
- Click on the More Actions dropdown menu and select Preparations.
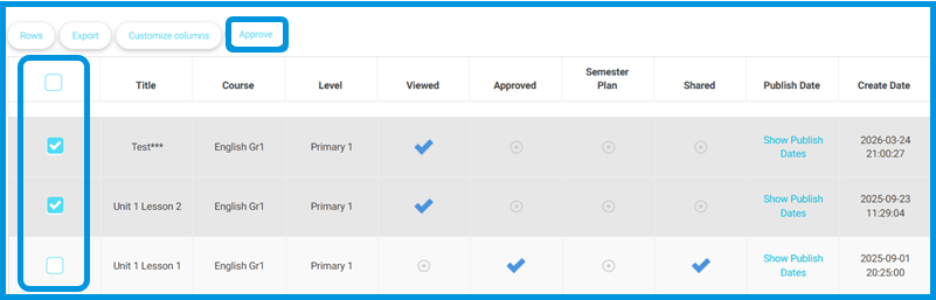
- Review the lesson preparations listed in the data table.
- Notice the new selection checkbox column added at the beginning of the table.
- Check the boxes next to the specific preparations you wish to approve, or click the top checkbox to Select All.
- Click the Approve button located directly next to the Customize Columns button.
- The system will immediately update and approve all selected preparations at once.
2) Mailbox Module: Teacher Mailbox Approval Flow #
This feature establishes an essential administrative workflow that ensures all email communications sent by teachers to students or guardians are reviewed, approved, or rejected by a Teacher Supervisor before being dispatched. This guarantees consistent oversight and ensures that institutional standards are maintained across all outgoing messages.
This feature is available to System Administrators and Teacher Supervisors.
How to Set Up and Use the Mailbox Approval Flow #
To create and manage the mailbox approval process, follow these steps:
1. Setting up the Approval Flow (Admin) #

- Go to the side menu and select Settings.
- Click on Approval Flows.
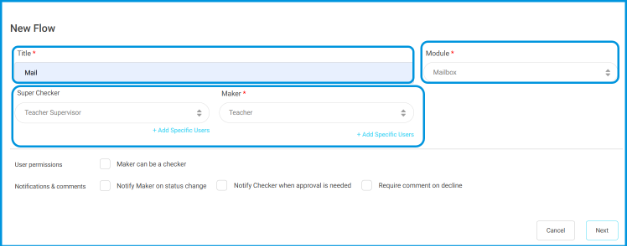
- Click + Add New Flow.

- Select Mailbox from the Module dropdown menu.
- Set the Teacher as the Maker, and assign the Teacher Supervisor as the Checker.
- Define the targeted action:
a. Sending mails to students, OR
b. Sending mails to guardians.
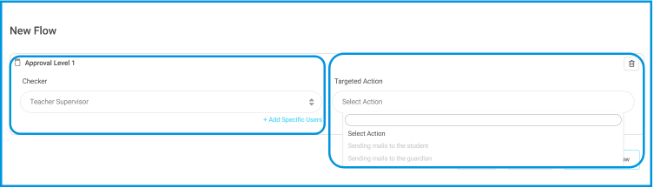
Note: You cannot combine both targeted actions in a single approval flow.
2. Reviewing and Taking Action (Teacher Supervisor) #
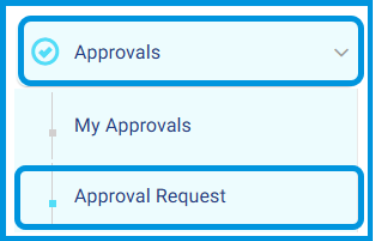
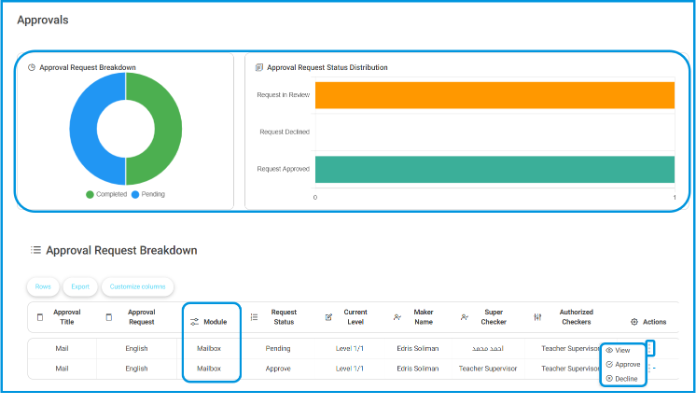
- Go to the side menu and select Approvals.
- Click Approval Request .
- Review the visual analytics shown in the top charts for a quick overview:
a. Approval Request Breakdown: Displays the total ratio of Completed vs. Pending requests.
b. Approval Request Status Distribution: Shows the count of requests categorized by status (In Review, Declined, or Approved).
- Scroll to the Approval Request Breakdown table below the charts.
- Locate the message request, click the Actions menu (the three dots), and select from the available options:
a. View: Opens a side popup detailing the email content.
b. Approve: Authorizes the email for immediate delivery.
c. Decline: Rejects the email and prevents it from being sent.
Approval Results & System Behavior
- In case of Approval: The message is officially sent. The exact date and time of the email dispatch are recorded as the moment the supervisor approved it.
- In case of Decline: The message is blocked. The email will not be sent to the recipients and will not appear in the teacher’s sent mailbox.


