
 English
  Arabic
  French
 The Course Template module reflects all curriculums generated through the Xsera AI Curriculum Engine. It provides administrators with two viewing options, a classic folder-tree directory (360 View) and an interactive dual-panel visual workspace (360 View New).
Accessing 360 View Modes #
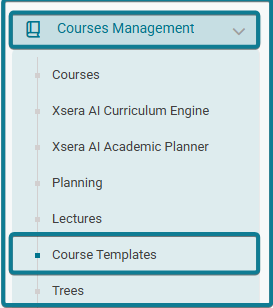
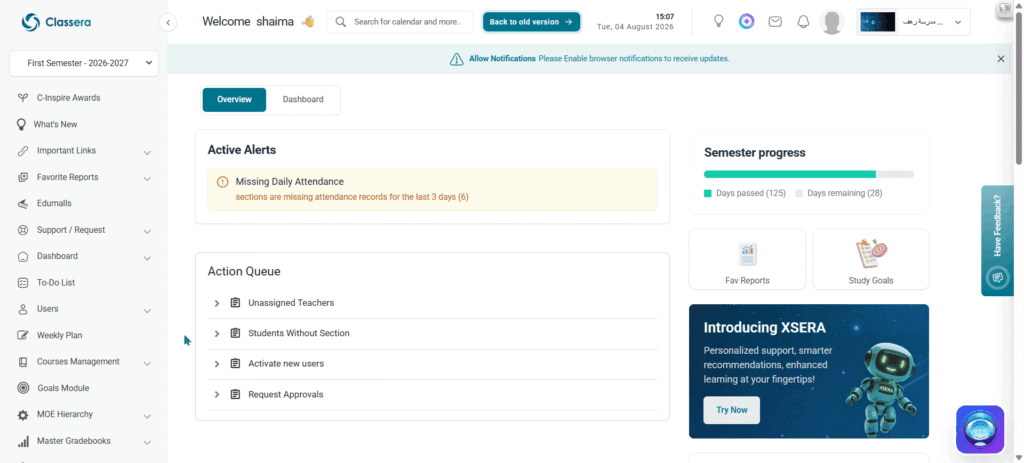
- Navigate to Courses Management > Course Templates from the left navigation sidebar.
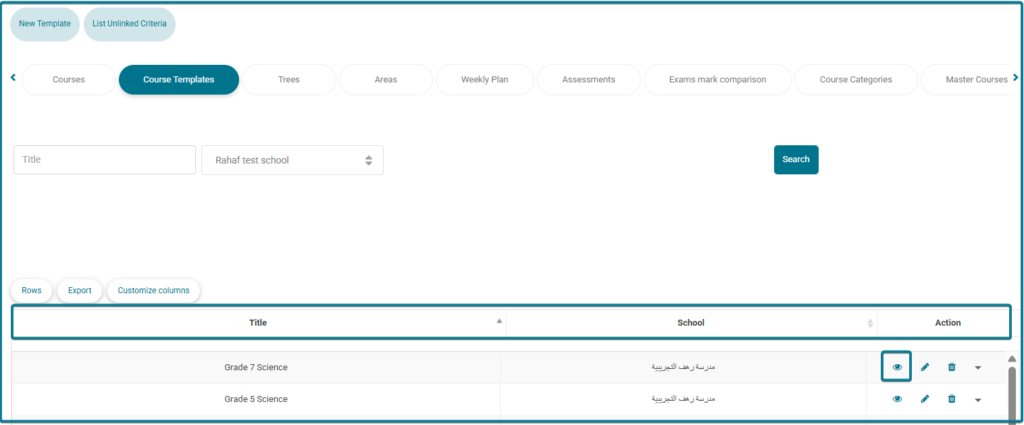
- Locate the desired course template entry in the repository table.
- Under the Action column, click the Eye icon (View).
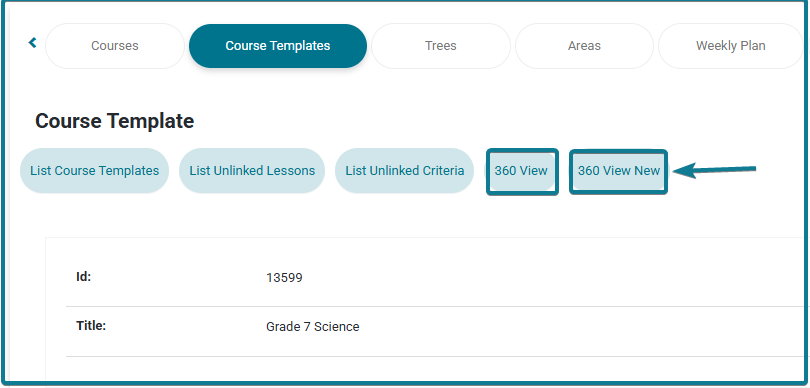
- The template overview page opens, displaying two action buttons at the top: 360 View and 360 View New.
Understanding the 360 View Options #
1. 360 View (Classic Node View) #
Clicking 360 View opens the traditional node management workspace (Home / Courses / Manage Trees).
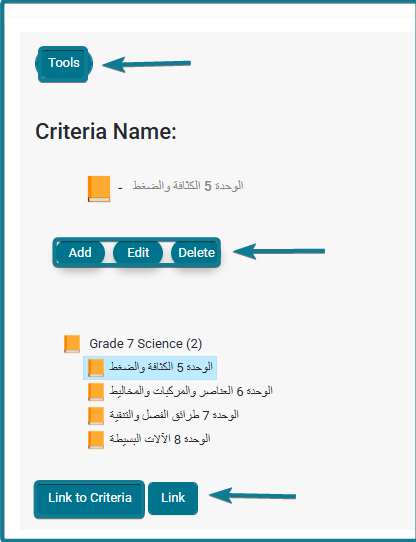
- Visible Layout & Details:
- Directory Tree: Displays the curriculum hierarchy as folder nodes (Course Title /Units /Chapters/Lessons).
- Selected Criteria Header: Shows the active node name and ID at the top.
- Criteria Linked Panel: Displays a dedicated list on the right showing all ministry benchmark standards currently mapped to the selected lesson/chapter.
- Available Actions:
- Tools: Accesses utility options for bulk managing tree nodes uder it:
- Add: Inserts a new child node (unit, chapter, or lesson) directly under the highlighted tree folder.
- Edit: Opens a text prompt to rename the selected node folder.
- Delete: Removes the highlighted folder node and its contents from the tree.
- Link / Link to Criteria: Opens the Select Criteria to Link pop-up modal to search, select, and associate ministry learning standards with the active node.
- Unlink Criteria: Click the red trash icon next to any criterion listed in the right panel to remove its link from the selected lesson.
2. 360 View New (Interactive Tree View) #
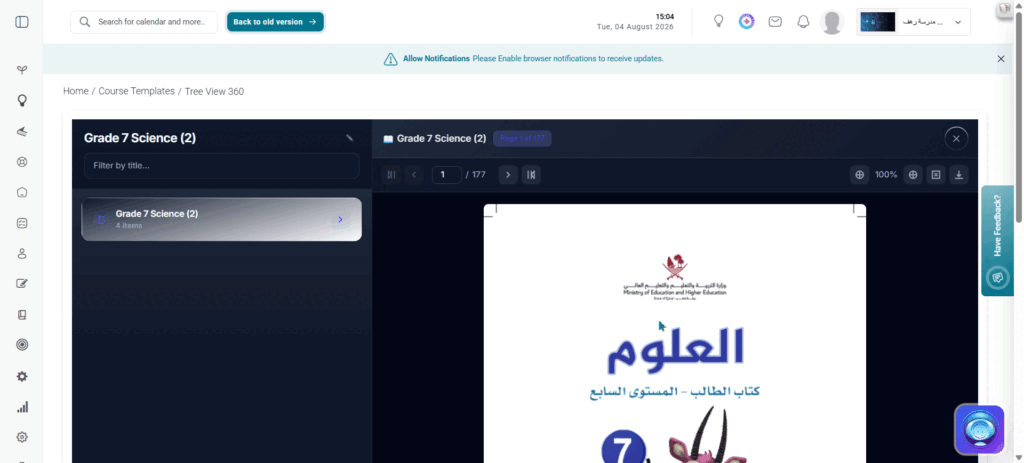
Clicking 360 View New launches the modern, dual-panel interactive workspace (Home / Course Templates / Tree View 360).
Page Layout & Overview #
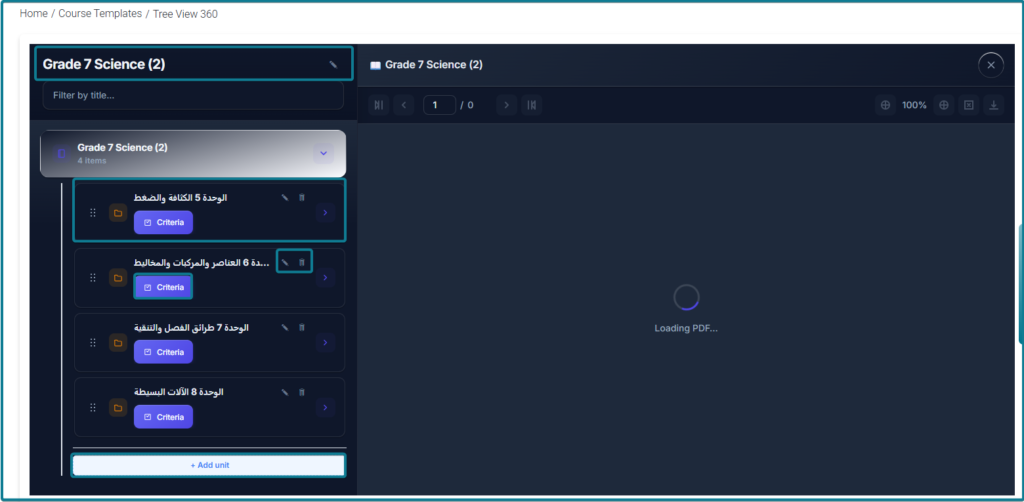
When the Tree View 360 page opens, the screen is divided into two main panels:
- Left Panel (Curriculum Tree Sidebar): Houses the structured hierarchy containing the main course title, units, individual lesson cards, page tags, and interactive criteria/outcome buttons.
- Right Panel (Interactive Online Book Viewer): Displays the digital textbook viewer equipped with zoom controls, page jumping options, and full-screen document viewing tools.
Direct Actions & Editing Features #
1. Managing Structure & Titles:
- Main Tree Title: Click the Pencil icon next to the header at the top of the left panel (e.g., Grade 7 Science (49)), enter the updated name in the inline text box, and click Save changes (or Cancel).
- Unit & Lesson Titles: Click the Pencil icon on any individual unit card or lesson block to rename it directly.
- Deleting Elements: Click the Trash icon on any unit or lesson card to permanently remove it from the curriculum tree.
2. Interactive Online Book Navigation:
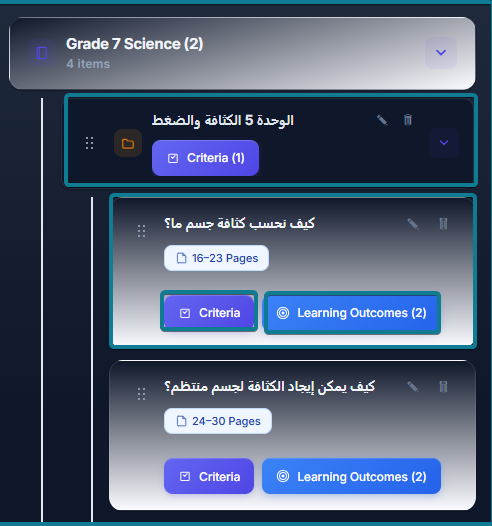
- Each lesson card displays an assigned page range tag (e.g., 16–23 Pages, 24–30 Pages).
- Clicking directly on a lesson card or its page range button automatically syncs the Right Panel, loading the exact pages of the digital textbook corresponding to that lesson.
3. Linking Ministry Criteria: Click the Criteria button on any unit or lesson card to configure educational benchmarks:
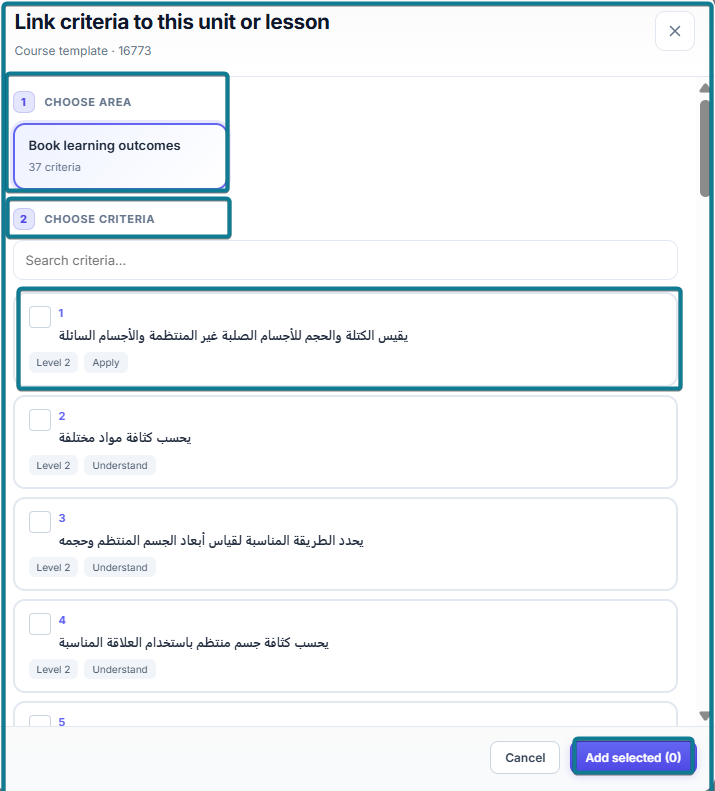
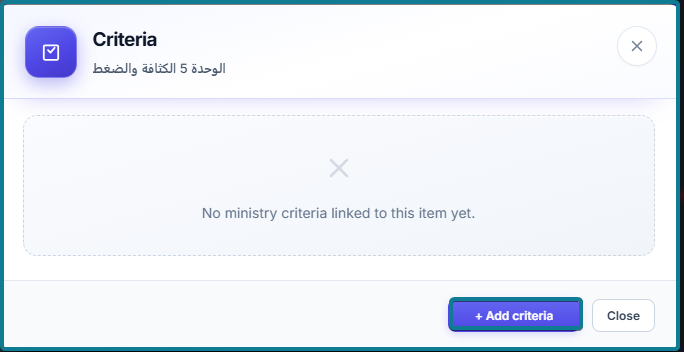
- The Criteria pop-up modal opens showing all linked standards (if empty, click + Add criteria).
- Under CHOOSE AREA, select the target unit card (e.g., Unit 5 Density & Pressure).
- Under CHOOSE CRITERIA, use the search bar or scroll down to check the desired benchmarks (each displays cognitive parameters like Level 2 / Understand).
- Click Add selected to commit the benchmark mapping.
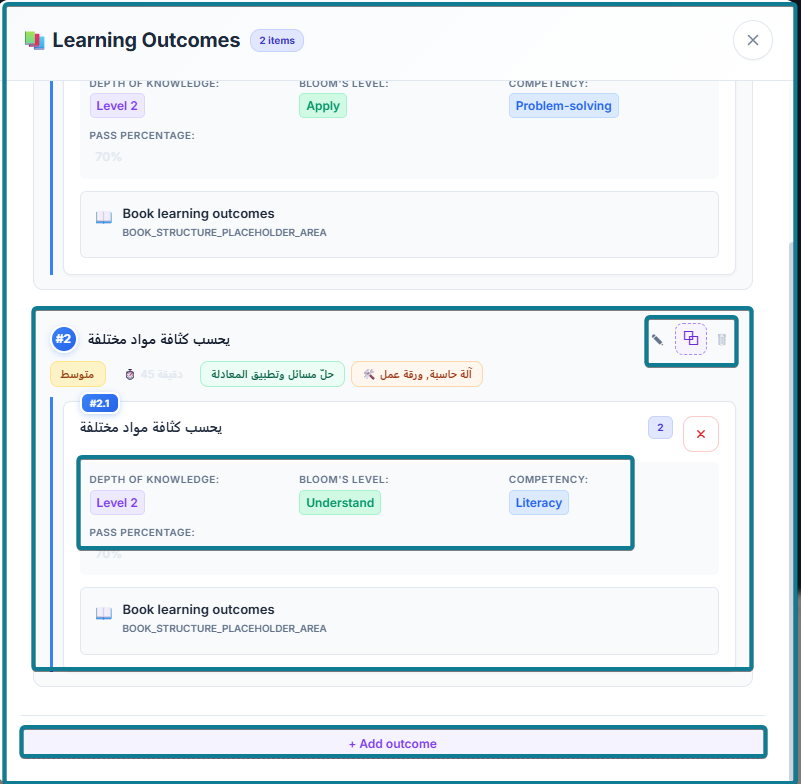
4. Configuring Learning Outcomes: Click Learning Outcomes on any lesson card to open the dedicated outcomes manager:
- Outcome Cards Display: Shows active target numbers alongside badges for Depth of Knowledge, Bloom’s Level, Competency, Pass Percentage, and linked textbook areas.
- Editing Outcomes: Click the Pencil icon on any outcome card to expand its field form (Title, Complexity, Duration, Strategy, Tools). Update the necessary parameters and click Save changes.
- Removing Outcomes: Click the Trash icon or the Red X button to unlink an outcome.
- Adding Custom Outcomes: Scroll to the bottom of the modal and click + Add outcome to create a new learning target from scratch.
5. Adding New Units:
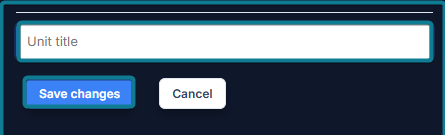
- Scroll to the bottom of the left panel’s curriculum tree list.
- Click + Add unit.
- Type the new unit name in the Unit title inline text field.
- Click Save changes to insert the unit into your curriculum structure.


