
 English
  Arabic
  French
 The Study Plan is an adaptive learning workspace in Classera powered by XSERA AI. It enables students to generate AI-driven study pathways based on diagnostic assessments, manually build custom learning plans, track specific study goals, and verify concept mastery through post-assessments.
Accessing the Study Plan #
Students can access the Study Plan (Student Compass) workspace through two convenient pathways:
Pathway 1: Via the Student Dashboard (Direct Access) #
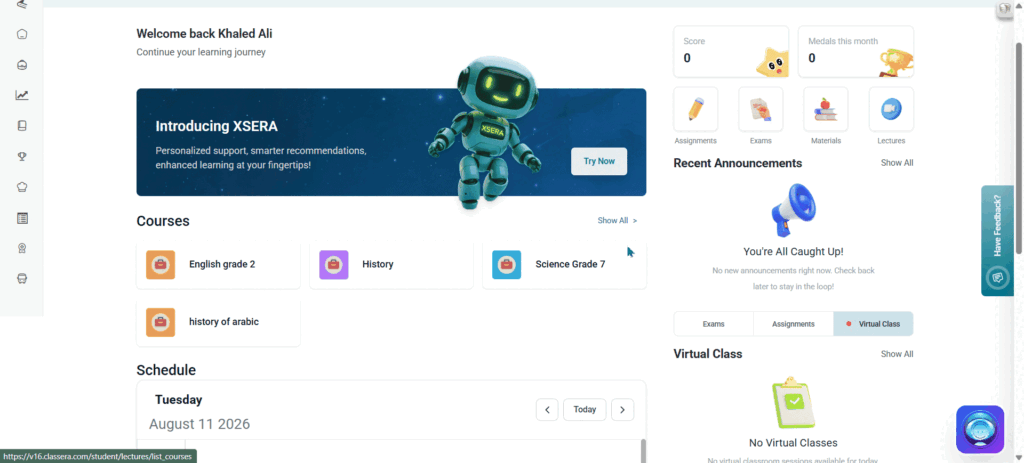
- On the Student Homepage Dashboard, locate the Student Compass section.
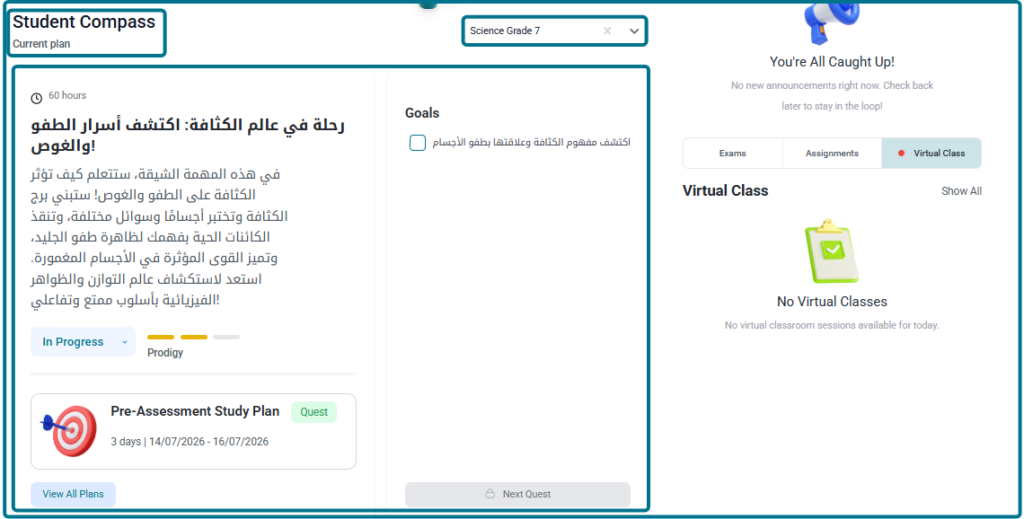
- Select your target subject from the course dropdown menu on the right (e.g., Science Grade 7).
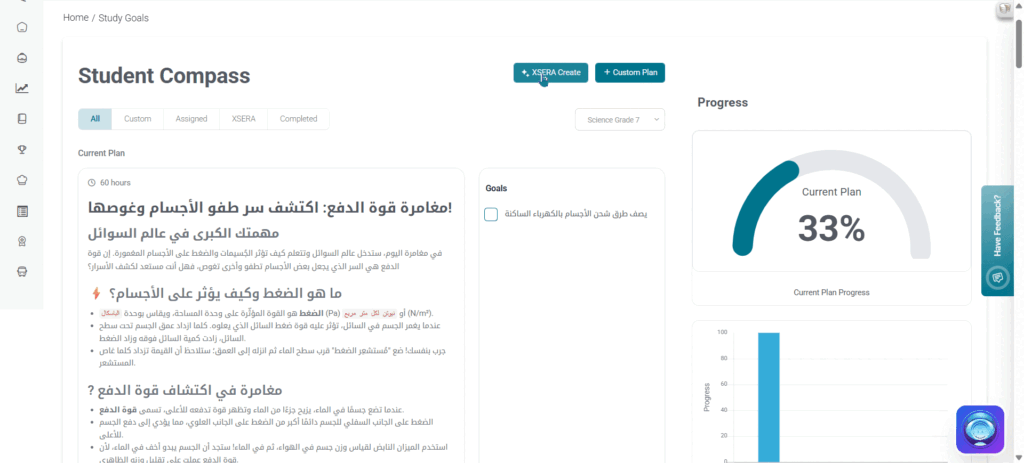
- View your active Current Plan, task duration, progress status, and assigned goals directly on the dashboard.
- Click View All Plans at the bottom of the card to open the full Student Compass study goals workspace.
Note: The Student Compass section on the Student Homepage Dashboard will only appear if the student has been assigned a study plan by a teacher or has created a custom plan.
Pathway 2: Via My Learning Hub (Course Navigation) #
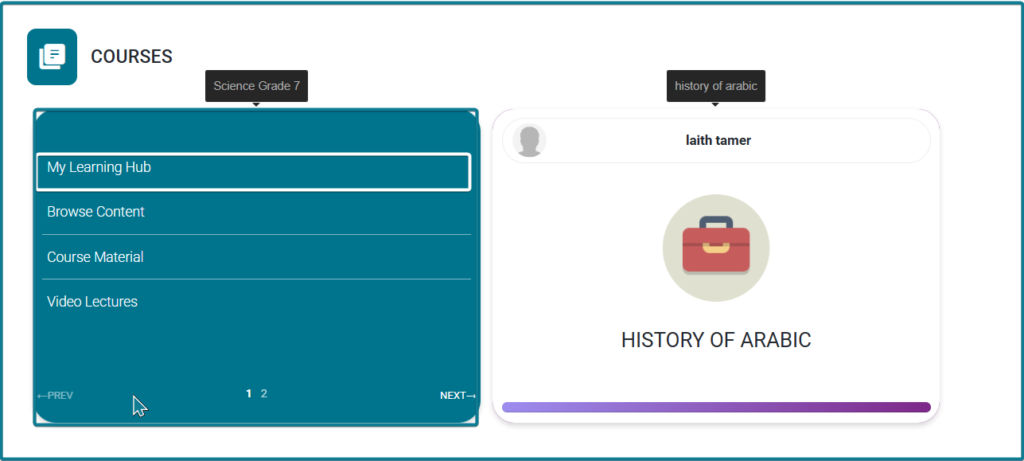
- From the Student Homepage, navigate to the Courses section.
- Click Show All in the top right corner of the Courses panel.
- Hover over your target course card (e.g., Science Grade 7).
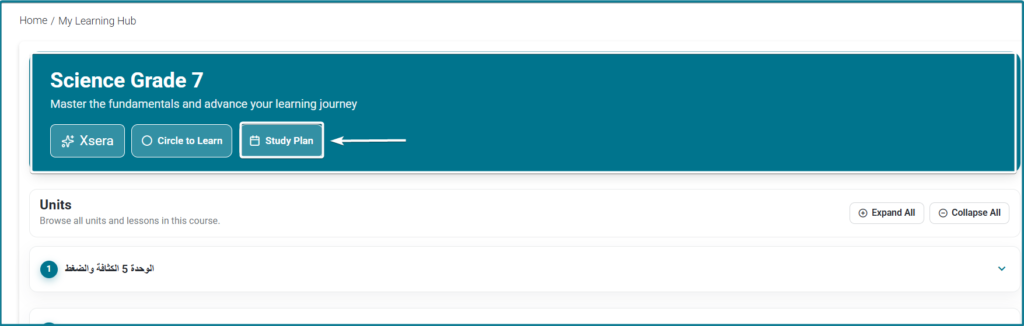
- Select My Learning Hub from the pop-up menu.
- Click Study Plan in the top header banner to open the study goals workspace.

Option 1: Creating an AI-Powered Study Plan with XSERA #
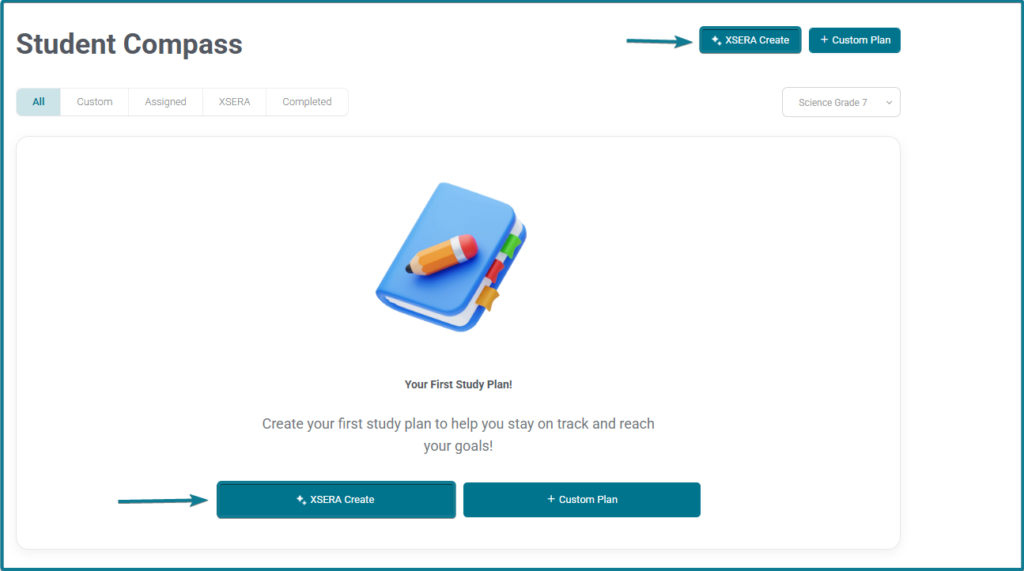
Step 1: Launch XSERA Creation #
- First-Time Users: If you do not have any existing study plans, click the XSERA Create button located in the center card of your empty workspace.
- Returning Users: If you already have existing study plans, click the XSERA Create button located in the top-right section of the Student study plan workspace to start a new diagnostic plan.
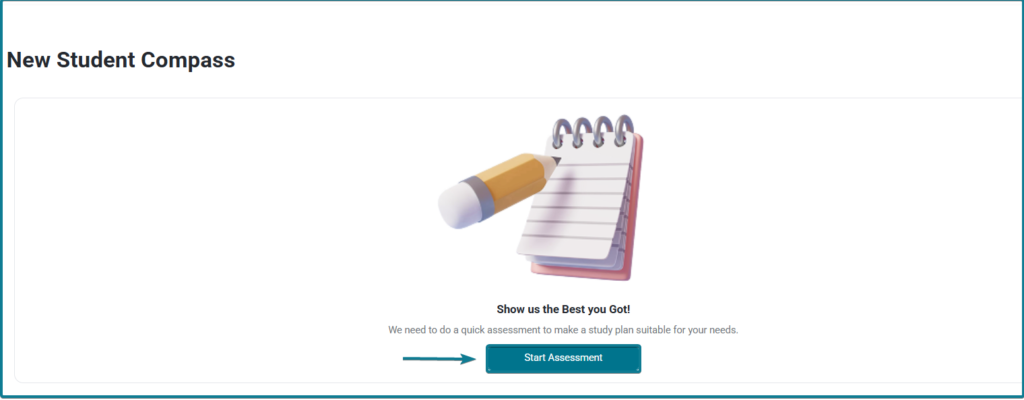
Step 2: Select Units and Lessons #
- Click on Start Assessment0.
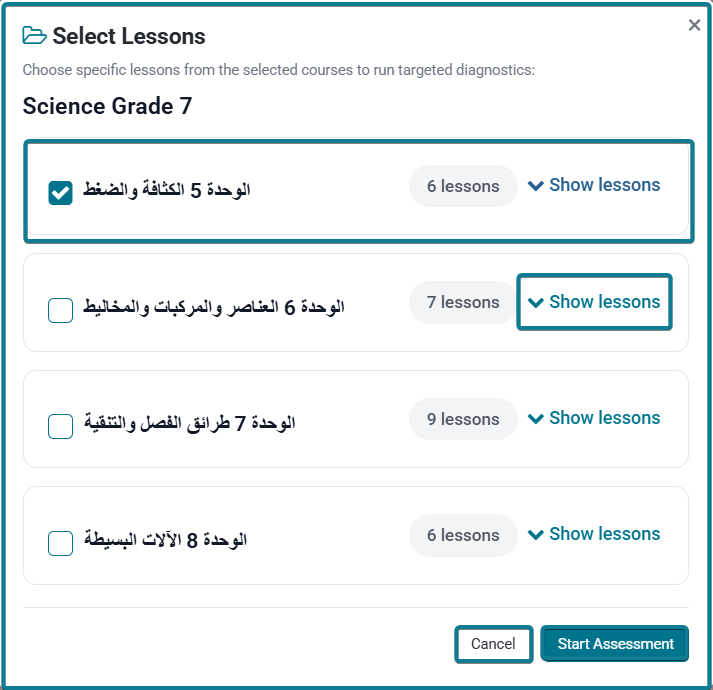
- A modal window titled Select Lessons opens displaying the course units (e.g., الوحدة 5 الكثافة والضغط).
- Check the boxes next to the units or expand lessons (Show lessons) to choose specific topics for targeted diagnostics.
- Click Start Assessment.
Step 3: Complete Diagnostic Assessment #
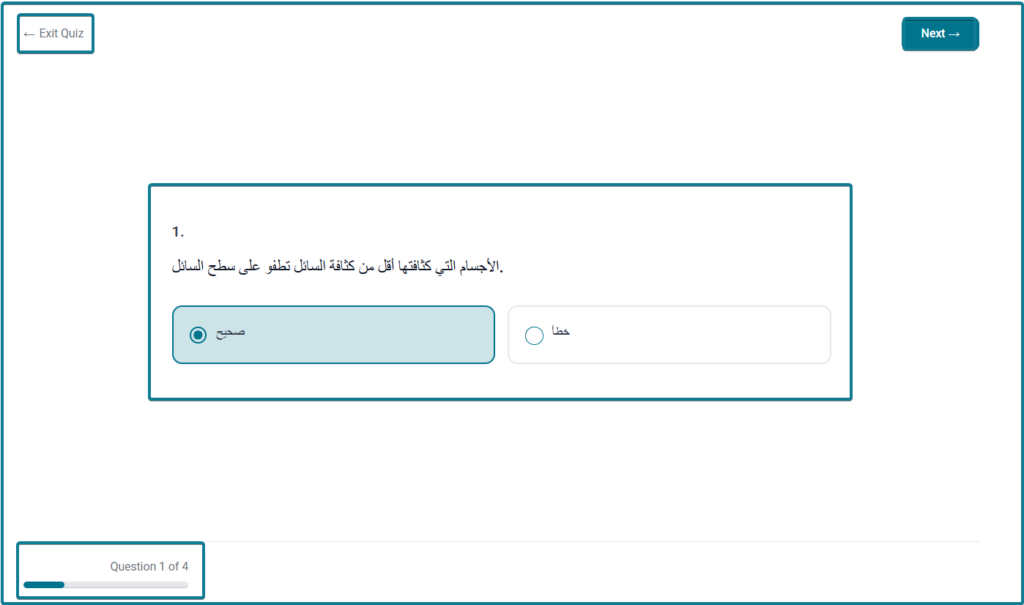
- Answer the generated diagnostic questions.
- Upon submitting the diagnostic test, a summary modal titled Closer to your Goals! displays:
- Total Score & Time Spent: Shows accuracy percentage and completion time.
- Learning Outcomes: Highlights masteries and correct response ratios.
- Areas Of Improvement: Identifies specific concepts requiring targeted study.
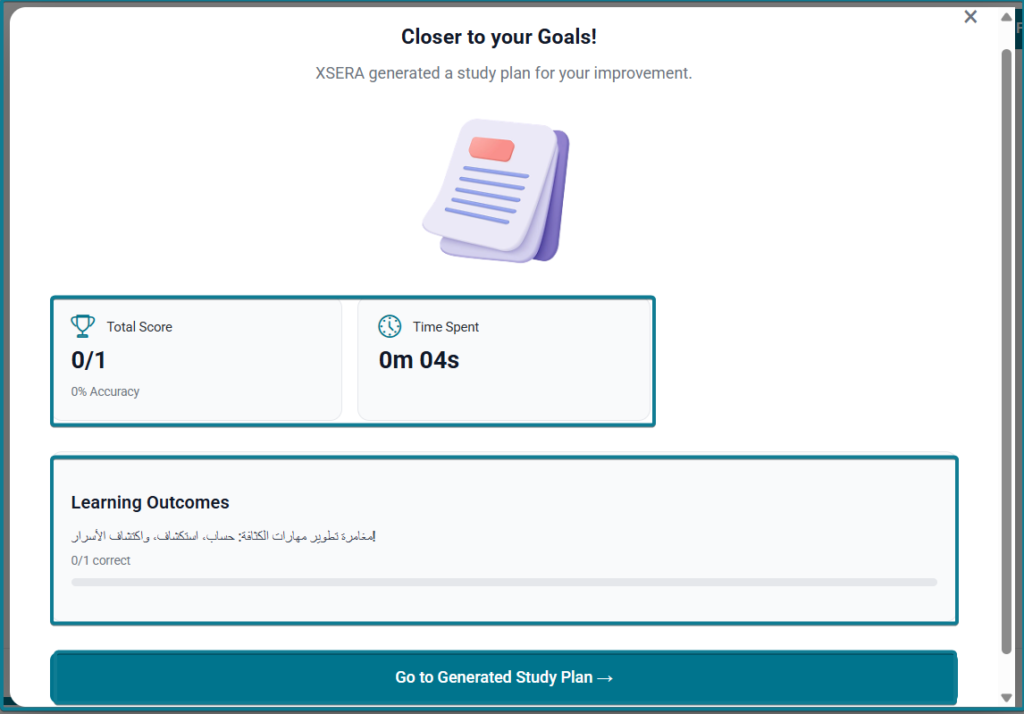
- Click Go to Generated Study Plan.
Option 2: Creating a Custom Study Plan Manually #
In addition to AI-generated plans, students can manually design tailored learning pathways through the Custom Plan feature.
Step 1: Launch Custom Plan #
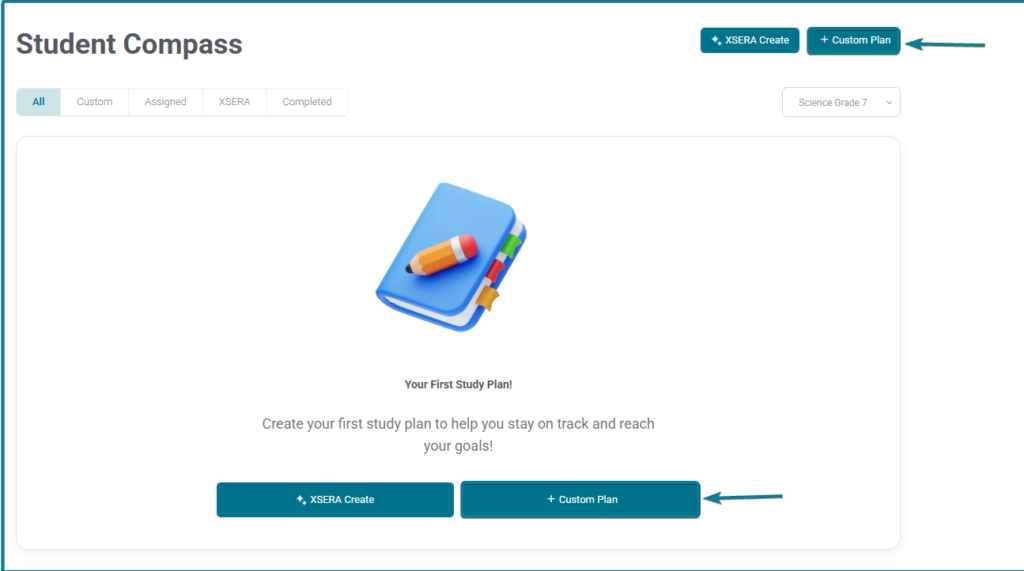
- First-Time Users: If you do not have any existing study plans, click the Custom Plan button located in the center card of your empty workspace.
- Returning Users: If you already have existing study plans, click the + Custom Plan button located in the top-right section of the Student Compass workspace.
Step 2: Select Quests & Review Total Hours #
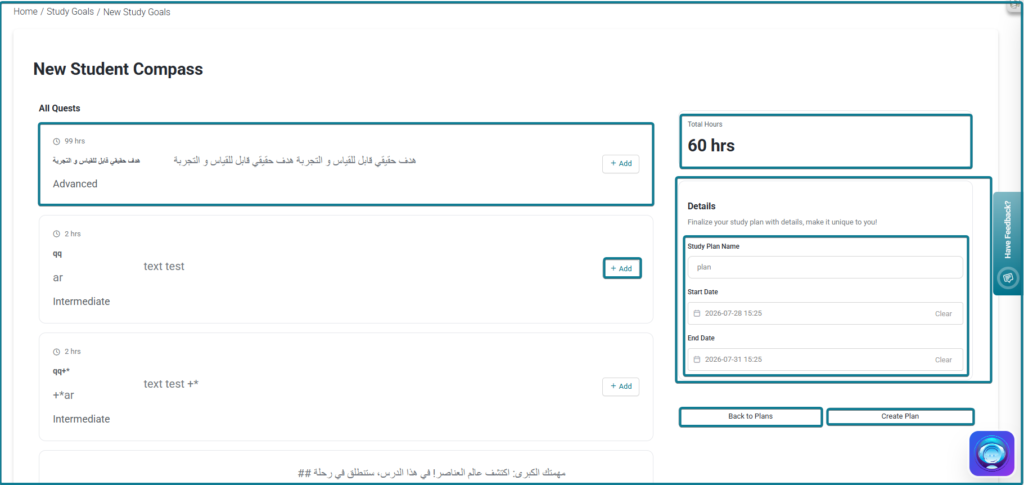
- Browse through the All Quests list displaying available learning modules, difficulty levels (Advanced, Intermediate), and estimated completion times.
- Click + Add next to any quest you want to include in your plan.
- The system automatically calculates and updates the cumulative duration under Total Hours (e.g., 60 hrs, 216 hours).
Step 3: Configure Plan Details #
In the Details pane on the right side:
- Study Plan Name: Enter a unique title for your plan in the text box.
- Start Date: Select your desired start date using the calendar picker.
- End Date: Select your target completion date using the calendar picker.
Step 4: Finalize & Manage Custom Plans #
- Click Create Plan to save (or click Back to Plans to discard changes).
- Saved custom plans appear under the Custom tab in Student Compass with a yellow Custom tag.
- Each custom plan card provides quick action buttons to Edit plan details, Select Plan to make it your active view, or Delete the plan.
Working Through the Study Plan & Tracking Goals #
1. Plan Overview & Content Reading #
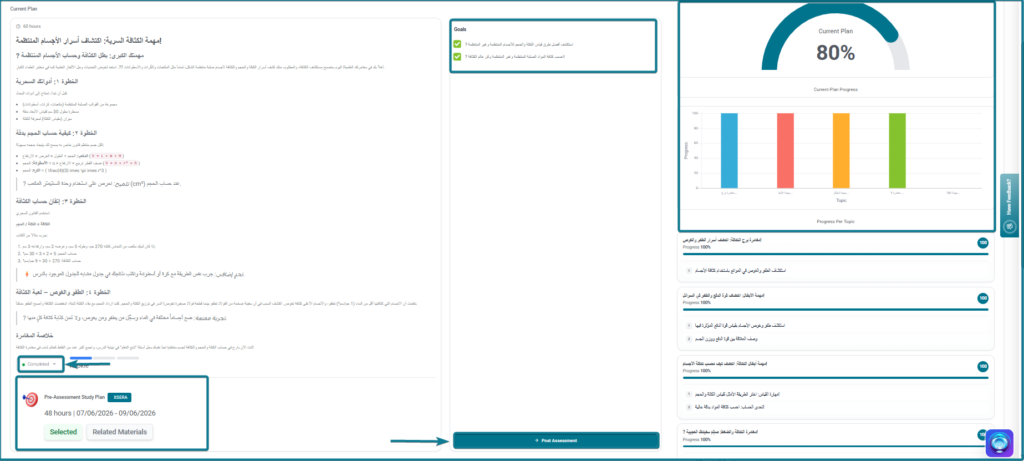
- The active plan displays reading materials, key concepts, formulas, and real-world application notes tailored to your improvement areas or selected custom quests.
- Track the estimated duration (e.g., 60 hours, 48 hours) and assigned date windows.
2. Managing Goal Statuses #
To unlock and proceed to the final verification test, students must manually update their task status:
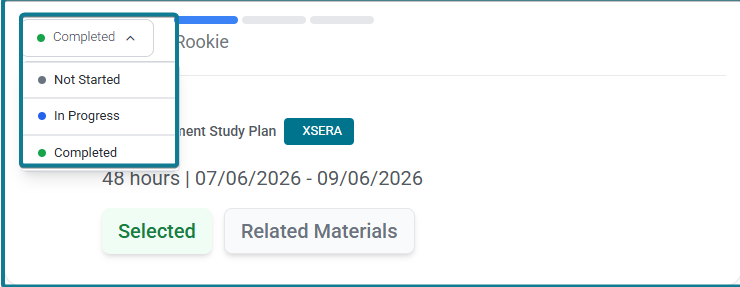
- Click the status dropdown menu on the study plan card (options: Not Started, In Progress, Completed).
- Select Completed once you have studied the material and achieved the listed goals.
- Check off the corresponding checkboxes under the Goals panel on the right side of the screen.
- Unlocking Post-Assessment: Once all study plan goals are checked and the plan status is updated to Completed, the Post Assessment button becomes active at the bottom of the workspace.
- Taking Post-Assessment: Click Post Assessment to take a follow-up test designed to verify whether you have successfully mastered the target learning goals.
- Looping & Completion Rules (Teacher-Side Settings):
- Adaptive Loop Setting: Teachers can configure system rules to keep the student in a learning loop—generating follow-up study iterations if the post-assessment score falls below the required threshold.
- Mastery & Reporting: Once the student successfully passes the post-assessment, the study plan marks completion, and an automated diagnostic report is generated and sent to the teacher dashboard.


