
 English
  Arabic
  French
 The Xsera AI Curriculum Engine uses artificial intelligence to automate curriculum creation, map institutional hierarchies, assign learning outcomes, and provide an interactive 360-degree curriculum management workspace.
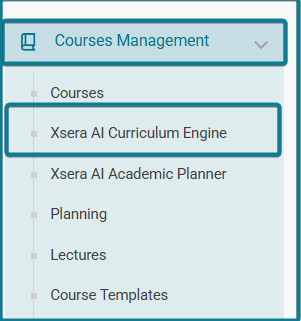
Accessing Xsera AI Curriculum Engine #
To access the Xsera AI Curriculum Engine, follow these steps:
- Expand Courses Management from the left navigation sidebar.
- Select Xsera AI Curriculum Engine.
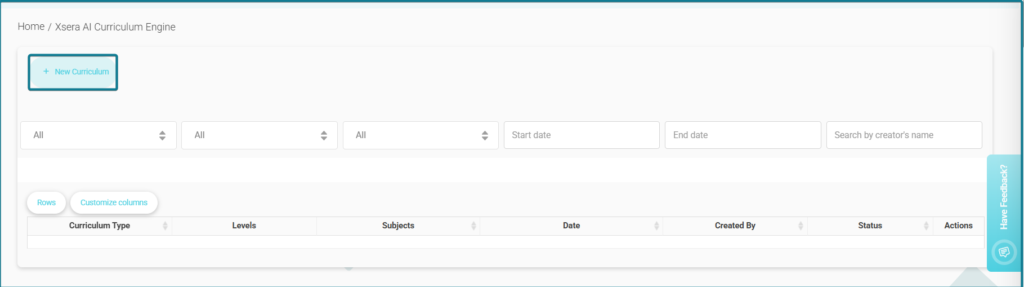
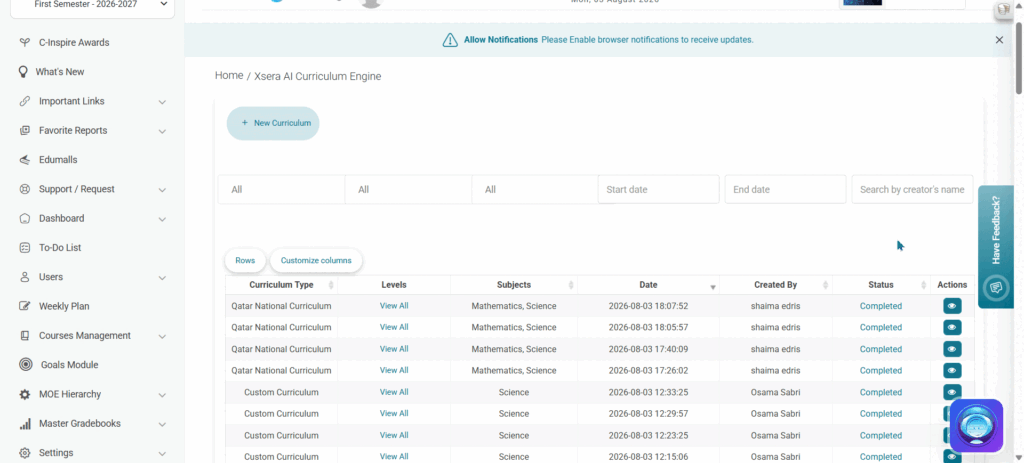
- The main repository page opens, displaying top filter controls and the primary Curriculums Table.
Filter & Search Controls #
At the top of the table, you can filter and refine listed records using:
- Dropdown Filters: Filter by specific Curriculum Type, Levels, or Subjects.
- Date Pickers: Specify a custom timeframe using Start date and End date.
- Search Field: Search entries directly using Search by creator’s name.
- Table Customization: Toggle between Rows view density or click Customize columns to show or hide specific table parameters.
Curriculums Table Columns #
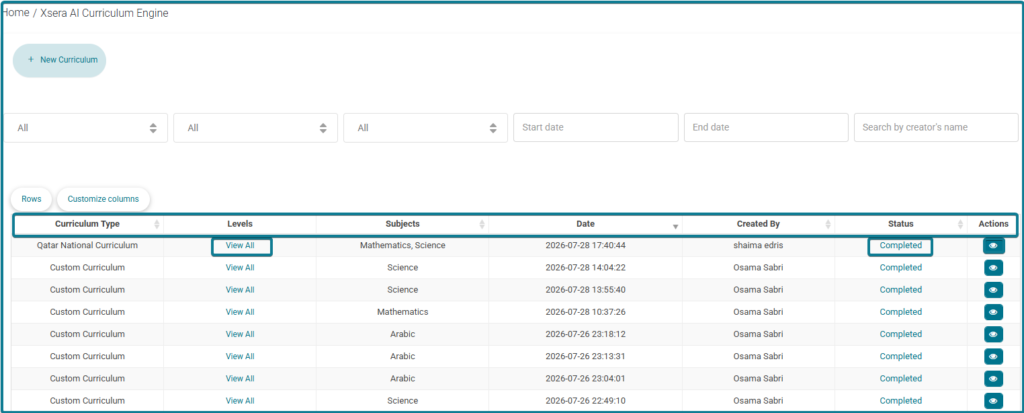
The main table displays the following data fields for every generated or in-progress curriculum:
- Curriculum Type: Displays the classification or type of curriculum (e.g., Custom Curriculum).
- Levels: Shows the target grade levels associated with the curriculum (includes a View All link to expand all assigned grades).
- Subjects: Lists the specific academic subject assigned to the curriculum (e.g., Science).
- Date: Displays the exact creation date and timestamp (YYYY-MM-DD HH:MM:SS).
- Created By: Identifies the author or system administrator who initiated the curriculum creation.
- Status: Indicates the current processing state:
- Completed: Successfully processed; ready for management and Tree View 360.
- Pending: AI generation is currently in progress.
- Failed: The creation process encountered an error.
- Actions: Contains the Eye icon (View) to open the Course Template Details pop-up and launch the Tree View 360 workspace.
Creating a New Curriculum (4-Step Wizard) #
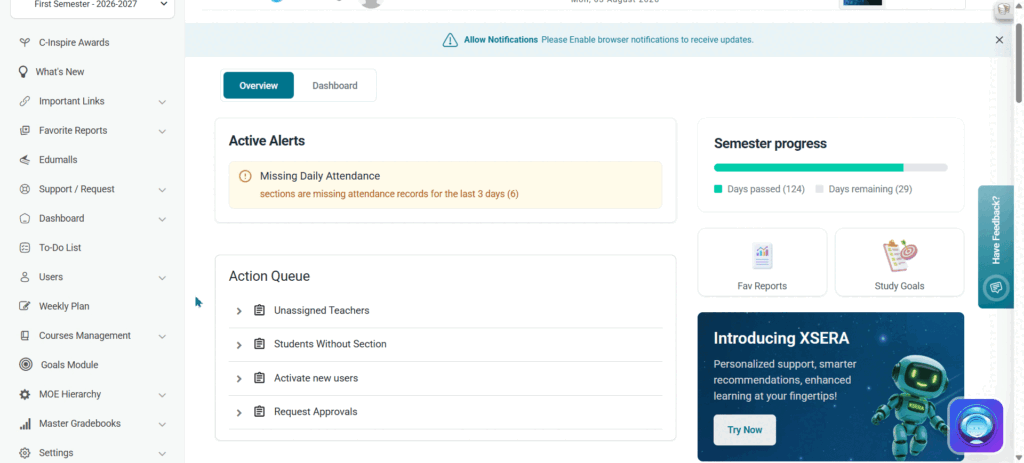
Click + New Curriculum at the top left of the repository page to launch the creation wizard:
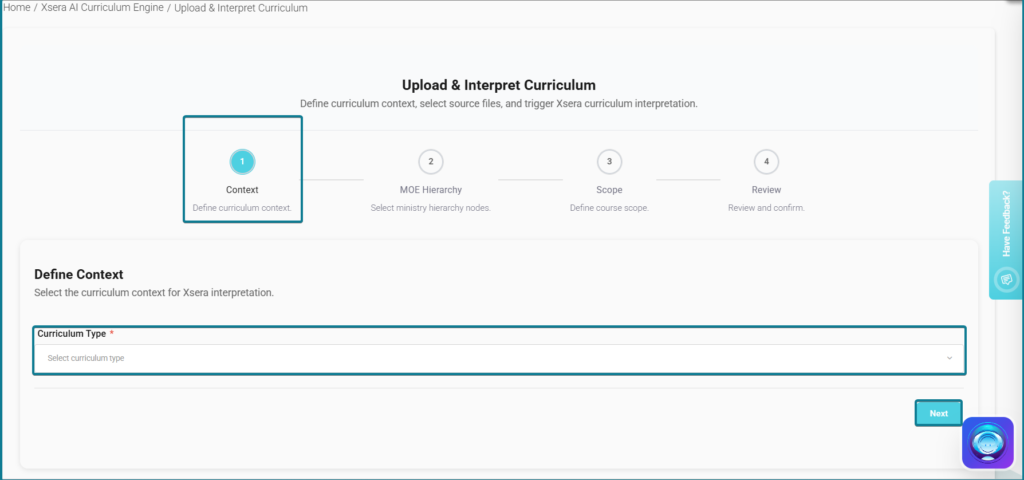
Step 1: Context (Define Context) #
- Select your target Curriculum Type from the dropdown menu.
- Click Next.
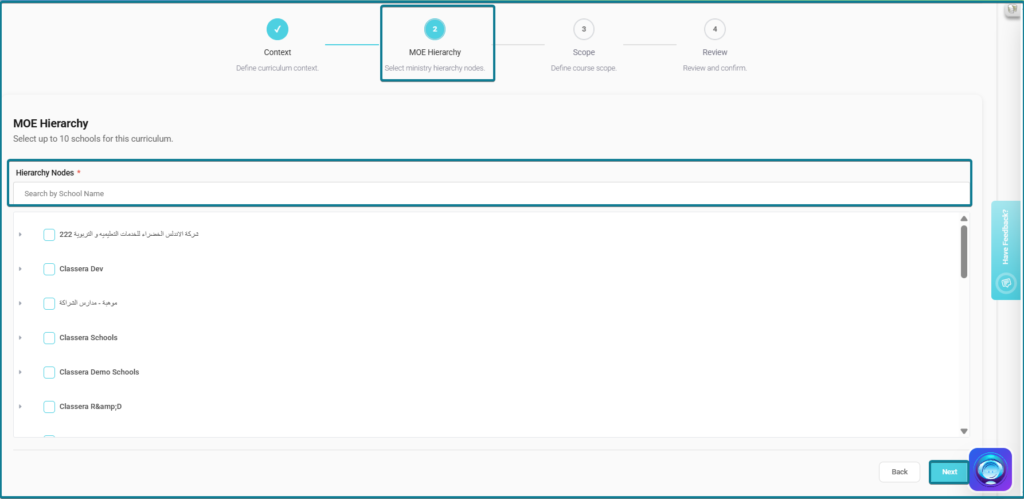
Step 2: MOE Hierarchy (Ministry Nodes) #
- Select up to 10 designated school campuses or institutional nodes using the search bar or checkboxes.
- Click Next.
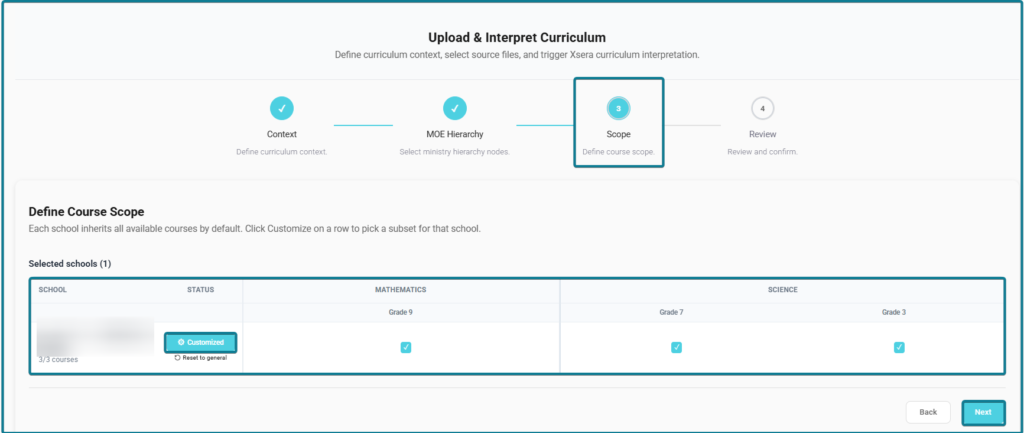
Step 3: Scope (Define Course Scope) #
- Review inherited courses across selected campuses.
- Customize grade parameters (e.g., Grade 7, Grade 9) or specific subjects (Mathematics, Science).
- Click Next.
#
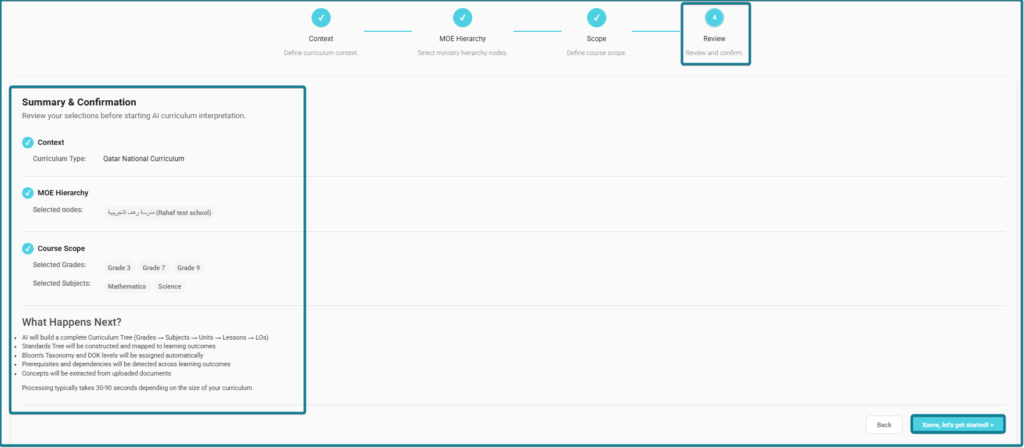
Step 4: Review & AI Build #
- Review your configured summary (Context, Selected MOE Nodes, Grades, and Subjects).
- Click Xsera, let’s get started!.
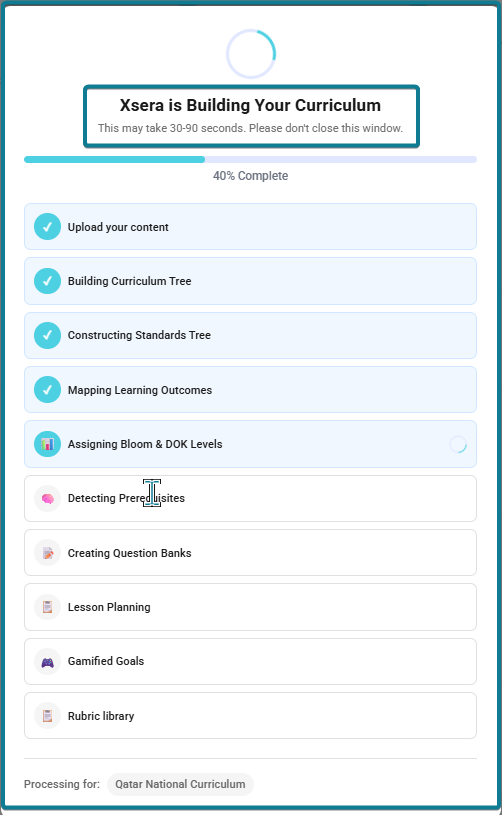
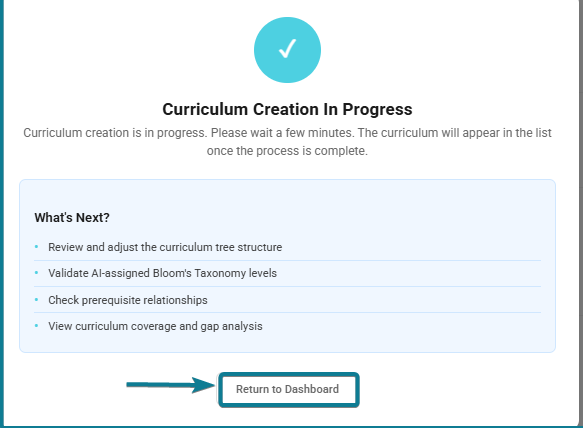
- A progress modal will track real-time AI milestones (Building Curriculum Tree, Mapping Outcomes, Assigning Bloom & DOK Levels).
- Once processing is complete, click Return to Dashboard.
Custom Curriculum
Selecting Custom Curriculum expands the creation process into 5 steps (instead of 4). In this workflow, you will need to select your subject and grade, then upload your primary course book and standard documents under the Scope step. An extra step called Enrichment will also open, allowing you to upload up to 12 optional files (like teacher guides) so the AI can analyze and build your curriculum tree accurately.
Accessing the Tree View 360 Workspace #
To open the Tree View 360 workspace for any created curriculum, follow these steps:
- Locate your curriculum row in the main repository table.
- Under the Actions column, click the Eye icon (View).
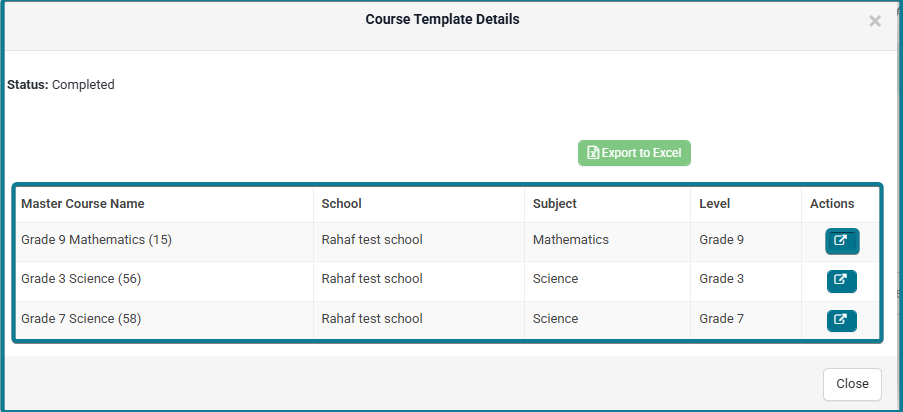
- The Course Template Details pop-up window opens displaying the master course name, assigned school, subject, level, and status.
- Click the Action icon (External Link button) inside the pop-up table.
- The system launches the Tree View 360 workspace (Home / Course Templates / Tree View 360).
Working inside the Tree View 360 Workspace #
Page Layout & Overview #
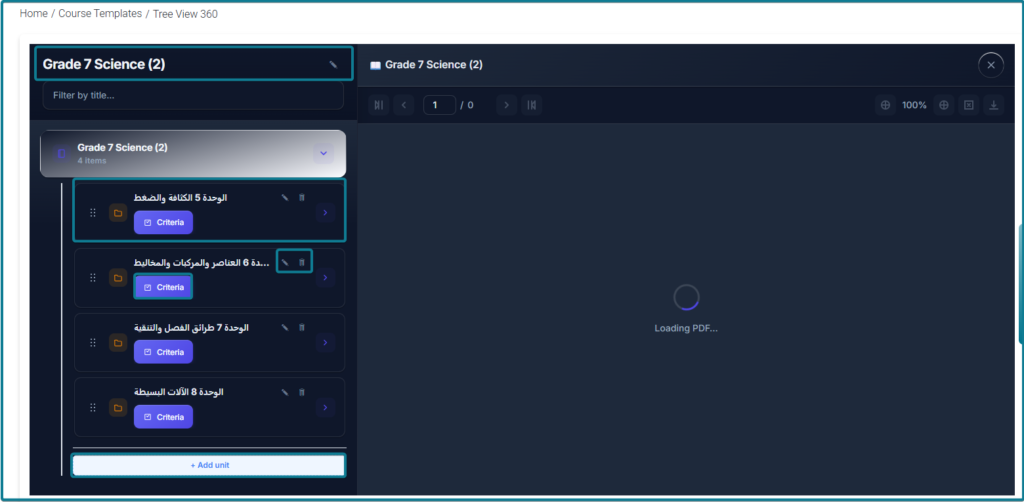
When the Tree View 360 page opens, the screen is divided into two main panels:
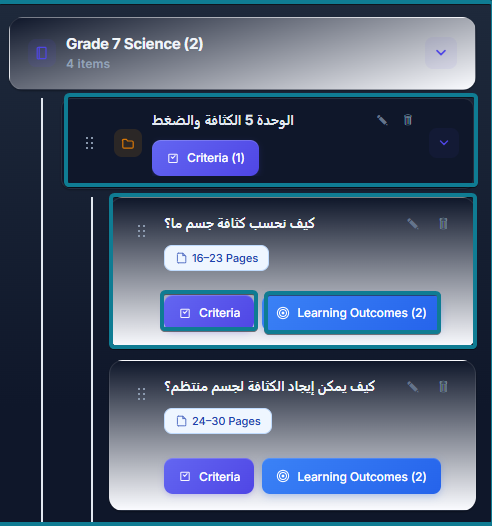
- Left Panel (Curriculum Tree Sidebar): Houses the structured hierarchy containing the main course title, units, individual lesson cards, page tags, and interactive criteria/outcome buttons.
- Right Panel (Interactive Online Book Viewer): Displays the digital textbook viewer equipped with zoom controls, page jumping options, and full-screen document viewing tools.
Direct Actions & Editing Features #
1. Managing Structure & Titles:
- Main Tree Title: Click the Pencil icon next to the header at the top of the left panel (e.g., Grade 7 Science (49)), enter the updated name in the inline text box, and click Save changes (or Cancel).
- Unit & Lesson Titles: Click the Pencil icon on any individual unit card or lesson block to rename it directly.
- Deleting Elements: Click the Trash icon on any unit or lesson card to permanently remove it from the curriculum tree.
2. Interactive Online Book Navigation:
- Each lesson card displays an assigned page range tag (e.g., 16–23 Pages, 24–30 Pages).
- Clicking directly on a lesson card or its page range button automatically syncs the Right Panel, loading the exact pages of the digital textbook corresponding to that lesson.
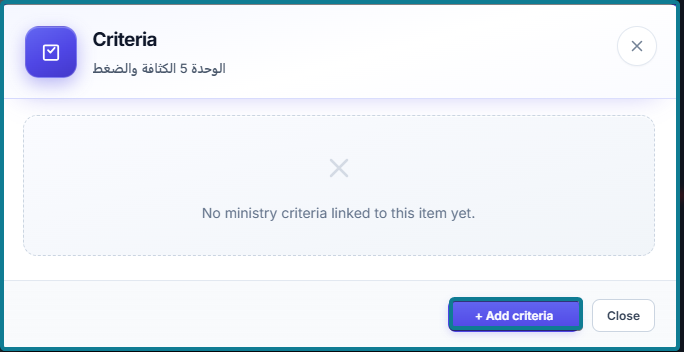
3. Linking Ministry Criteria: Click the Criteria button on any unit or lesson card to configure educational benchmarks:
- The Criteria pop-up modal opens showing all linked standards (if empty, click + Add criteria).
- Under CHOOSE AREA, select the target unit card (e.g., Unit 5 Density & Pressure).
- Under CHOOSE CRITERIA, use the search bar or scroll down to check the desired benchmarks (each displays cognitive parameters like Level 2 / Understand).
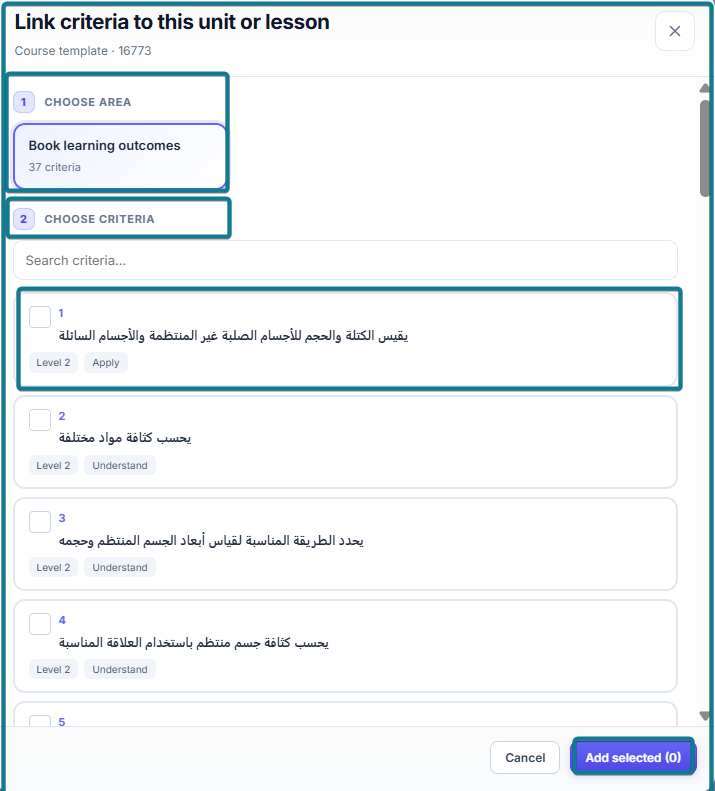
- Click Add selected to commit the benchmark mapping.
4. Configuring Learning Outcomes: Click Learning Outcomes on any lesson card to open the dedicated outcomes manager:
- Outcome Cards Display: Shows active target numbers alongside badges for Depth of Knowledge, Bloom’s Level, Competency, Pass Percentage, and linked textbook areas.
- Editing Outcomes: Click the Pencil icon on any outcome card to expand its field form (Title, Complexity, Duration, Strategy, Tools). Update the necessary parameters and click Save changes.
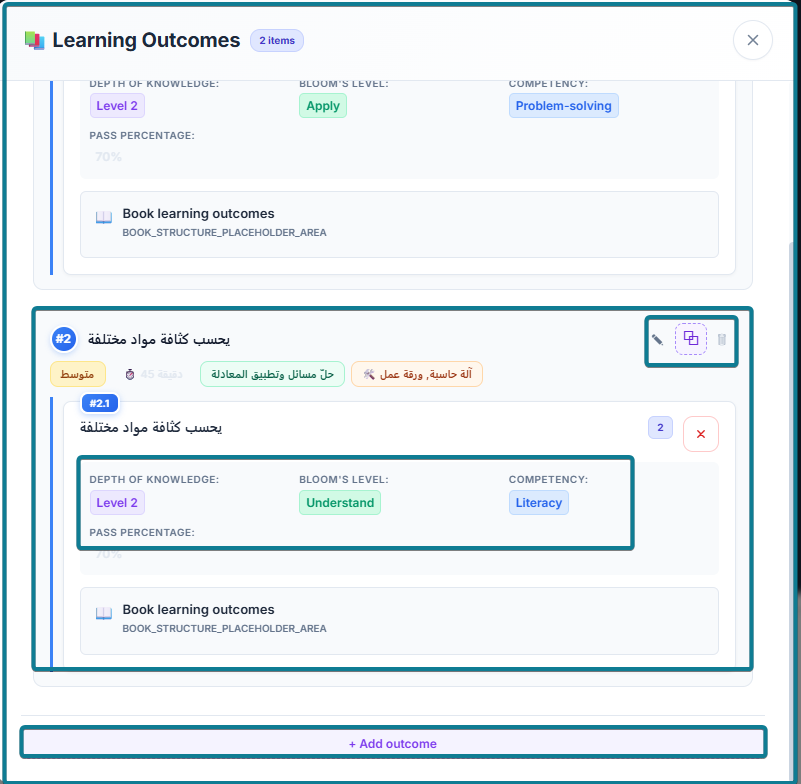
- Removing Outcomes: Click the Trash icon or the Red X button to unlink an outcome.
- Adding Custom Outcomes: Scroll to the bottom of the modal and click + Add outcome to create a new learning target from scratch.
5. Adding New Units:
- Scroll to the bottom of the left panel’s curriculum tree list.
- Click + Add unit.
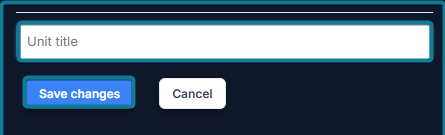
- Type the new unit name in the Unit title inline text field.
- Click Save changes to insert the unit into your curriculum structure.
Reflection in School Course Templates #
Once a curriculum is created and processed by Xsera AI, it automatically reflects in the target school’s Course Templates repository (Home / Courses / Course Templates).
To manage created templates directly:
- Navigate to Courses Management > Course Templates from the sidebar.
- Use the search bar or select the school campus filter.
- The table lists all active templates with their Title and School.
- Use the Action column controls to execute management tasks:
- Eye Icon (View): Review template contents and structure.
- Pencil Icon (Edit): Modify course template parameters and settings.
- Trash Icon (Delete): Permanently remove the template from the school’s repository.
- Dropdown Arrow: Access additional course management operations.


